Toro TITAN MX4880 Operator'S Manual Download Page 1

Form No. 3372-976 Rev A

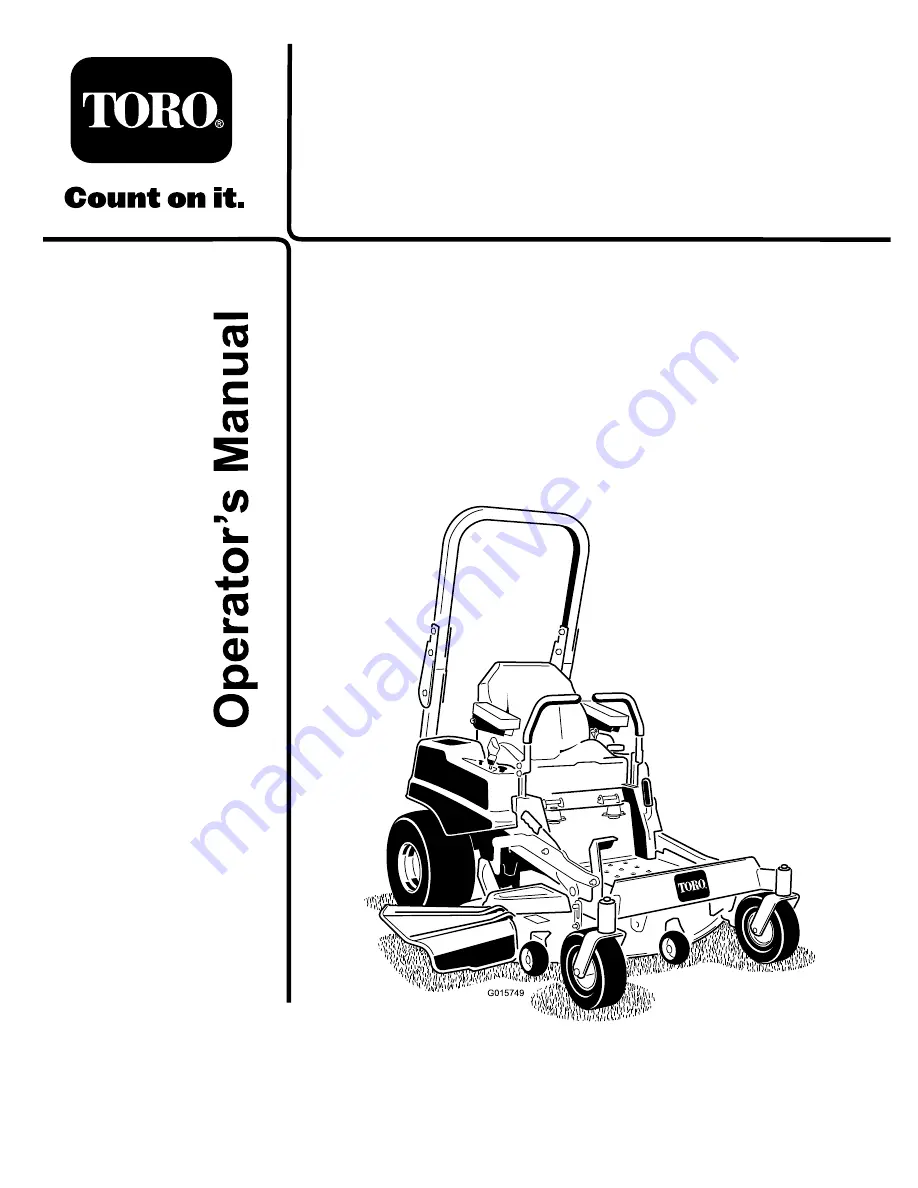
TITAN MX4880 Zero-Turn-Radius
Riding Mower

Model No. 74871—Serial No. 312000001 and Up

G015749

To register your product or download an

Operator's Manual

or

Parts Catalog

at no charge, go to www.Toro.com.

Original Instructions (EN)

Summary of Contents for TITAN MX4880

Page 1: ...ITAN MX4880 Zero Turn Radius Riding Mower Model No 74871 Serial No 312000001 and Up G015749 To register your product or download an Operator s Manual or Parts Catalog at no charge go to www Toro com O...

Page 2: ...blades and fuel system components with original Toro parts The enclosed Engine Owner s Manual is supplied for information regarding the US Environmental Protection Agency EPA and the California Emiss...

Page 3: ...he Safety Interlock System 23 Driving Forward or Backward 24 Stopping the Machine 25 Adjusting the Height of Cut 25 Adjusting the Anti Scalp Rollers 26 Positioning the Seat 27 Adjusting the Motion Con...

Page 4: ...alert slow down and use caution when making turns Look behind and to the side before changing directions Never leave a running machine unattended Always turn off blades set parking brake stop engine a...

Page 5: ...children Children are often attracted to the machine and the mowing activity Never assume that children will remain where you last saw them Keep children out of the mowing area and under the watchful...

Page 6: ...ar damage and deterioration which could expose moving parts or allow objects to be thrown Frequently check components and replace with manufacturers recommended parts when necessary Mower blades are s...

Page 7: ...degrees Use the slope chart to determine the degree of slope of hills before operating Do not operate this machine on a slope greater than 15 degrees Fold along the appropriate line to match the recom...

Page 8: ...2 Fast 5 Reverse 3 Slow 115 9625 1 Parking brake disengaged 2 Parking brake engaged 117 1158 1 Bypass lever position for operating the machine 2 Bypass lever position for pushing the machine 115 9632...

Page 9: ...cturer 110 6691 1 Thrown object hazard keep bystanders a safe distance from the machine 2 Thrown object hazard mower do not operate without the deflector discharge cover or grass collection system in...

Page 10: ...locked position and wear the seat belt Lower the roll bar only when absolutely necessary do not wear the the seat belt when the roll bar is down 3 Read the Operator s Manual drive slowly and carefull...

Page 11: ...acid can cause blindness or severe burns 4 Wear eye protection 9 Flush eyes immediately with water and get medical help fast 5 Read the Operator s Manual 10 Contains lead do not discard 115 9630 1 Re...

Page 12: ...ng do not carry passengers look behind and down when reversing 3 Cutting dismemberment hazard mower blade entanglement hazard belt stay away from moving parts keep all guards and shields in place 7 Th...

Page 13: ...teners from the negative battery cable and use them to secure the negative battery cable to the negative battery post Figure 4 G010257 1 2 3 5 4 Figure 4 1 Bolt 4 Negative battery post 2 Washer 5 Nut...

Page 14: ...ion pressure Checking the Side Discharge Chute Remove the packing restraint holding the side discharge chute up and lower the chute into place Checking the Engine Oil Level Before you start the engine...

Page 15: ...vers 7 Front caster wheel 10 Deflector 2 Operator seat 5 Parking brake 8 Anti scalp roller 3 Roll over protection system ROPS 6 Footrest 9 Foot pedal deck lift and height of cut G014766 1 2 3 4 Figure...

Page 16: ...the blades have operated It operates when the blade control switch PTO is engaged Use these times for scheduling regular maintenance Figure 7 Fuel Gauge The fuel window located below the operator posi...

Page 17: ...n the safety section Knowing this information could help you your family pets or bystanders avoid injury DANGER Mowing on wet grass or steep slopes can cause sliding and loss of control Wheels droppin...

Page 18: ...ck carefully for overhead clearances i e branches doorways electrical wires before driving under any objects and do not contact them Important Lower the roll bar only when absolutely necessary 1 To ra...

Page 19: ...conditions during fueling static electricity can be released causing a spark which can ignite the gasoline vapors A fire or explosion from gasoline can burn you and others and can damage property Alw...

Page 20: ...result in fuel leakage or damage to the engine or emission system 1 Clean around the fuel tank cap and remove the cap Note You can use the fuel window below the operating position verify the presence...

Page 21: ...the choke to disengage the choke after the engine has started Figure 17 G008959 1 2 Figure 17 1 On 2 Off Operating the Ignition Switch 1 Turn the ignition key to the Start position Figure 18 When the...

Page 22: ...the engine fails to start allow a 15 second cool down period between attempts Failure to follow these instructions can burn out the starter motor 7 After the engine starts push down on the Choke cont...

Page 23: ...operating the machine Understanding the Safety Interlock System The safety interlock system is designed to prevent the engine from starting unless The parking brake is engaged The blades are disengage...

Page 24: ...le control regulates the engine speed as measured in rpm revolutions per minute Place the throttle control in the fast position for best performance Always operate in the full throttle position when m...

Page 25: ...s unattended Always remove the ignition key and set the parking brake when leaving the machine unattended even if just for a few minutes Adjusting the Height of Cut The machine is equipped with a foot...

Page 26: ...f cut position To lock the deck in the transport position 1 Push on the deck lift pedal with your foot and raise the mower deck to the transport position also the 4 5 inch 114 mm cutting height positi...

Page 27: ...perator comfort 1 Loosen the upper bolt holding the control lever to the control arm shaft 2 Loosen the lower bolt just enough to pivot the control lever fore or aft Tighten both bolts to secure the c...

Page 28: ...e of the mower free from uncut grass which allows air to be drawn into the mower Cutting a Lawn for the First Time Cut grass slightly longer than normal to ensure the cutting height of the mower does...

Page 29: ...f the Mower Clean Clean clippings and dirt from the underside of the mower after each use If grass and dirt build up inside the mower cutting quality will eventually become unsatisfactory Blade Mainte...

Page 30: ...oil more often in dusty dirty conditions Check the spark plug s Replace the fuel filters more often under dusty dirty conditions Every 200 hours Replace the paper element more often in dusty dirty con...

Page 31: ...ual before performing any maintenance 4 Check the hydraulic oil every 25 hours 2 Check the engine oil every 8 hours 5 Check the caster wheel tire pressure every 25 hours 3 Check the drive wheel tire p...

Page 32: ...o 2 General Purpose Lithium Base Grease 1 Park the machine on a level surface and disengage the blade control switch 2 Move the motion control levers outward to the neutral position set the parking br...

Page 33: ...vice Interval Every 100 hours Service the paper element more often in dusty dirty conditions Every 200 hours Yearly whichever comes first Replace the paper element more often in dusty dirty conditions...

Page 34: ...To keep dirt grass clippings etc out of the engine clean the area around the oil fill cap dipstick before removing it Figure 37 G008792 1 2 5 6 7 3 9 10 4 8 Figure 37 Changing the Engine Oil Service...

Page 35: ...l 2 Change the engine oil filter Figure 40 G008748 3 4 1 2 3 4 5 6 Figure 40 Note Ensure the oil filter gasket touches the engine and then an extra 3 4 turn is completed 3 Fill the crankcase with the...

Page 36: ...or cracks If you see light brown or gray on the insulator the engine is operating properly A black coating on the insulator usually means the air cleaner is dirty Set the gap to 0 030 inches 0 76 mm...

Page 37: ...ve the motion control levers to the neutral lock position and set the parking brake 2 Stop the engine remove the key and wait for all moving parts to stop before leaving the operating position 3 Allow...

Page 38: ...als and metal parts of the machine WARNING Incorrect battery cable routing could damage the machine and cables causing sparks Sparks can cause the battery gasses to explode resulting in personal injur...

Page 39: ...below 32 F 0 C 1 Charge battery for 10 to 15 minutes at 25 to 30 amps or 30 minutes at 10 amps 2 When the battery is fully charged unplug the charger from the electrical outlet then disconnect the ch...

Page 40: ...e air pressure in the front and rear tires as specified Uneven tire pressure can cause uneven cut Check the pressure at the valve stem Figure 49 Check the tires when they are cold to get the most accu...

Page 41: ...irreparable damage to the transaxle drive system Removing Hydraulic System Filters 1 Stop engine wait for all moving parts to stop and allow engine to cool Remove the key and engage the parking brake...

Page 42: ...ansaxle drive system Bleeding the Hydraulic System 1 Raise the rear of machine up and support with jack stands or equivalent support just high enough to allow drive wheels to turn freely G010333 1 Fig...

Page 43: ...Blades Park the machine on a level surface disengage the blade control switch PTO and set the parking brake Turn the ignition key to Off Remove the key Inspecting the Blades Service Interval Before ea...

Page 44: ...maged blade with a new blade Never file or create sharp notches in the edges or surfaces of blade A If the difference between A and B is greater than 1 8 inch 3mm replace the blade with a new blade Re...

Page 45: ...sk cone must be installed toward the bolt head Figure 59 Torque the blade bolt to 100 110 ft lb 135 150 N m Mower Deck Leveling Check to ensure the mower deck is level any time you install the mower o...

Page 46: ...rear blade to the flat surface Figure 63 If the front blade tip is not 1 16 5 16 inch 1 6 7 9 mm lower than the rear blade tip continue to the Leveling the Mower Deck procedure Figure 63 1 Blades fron...

Page 47: ...g when cutting grass frayed belt edges burn marks and cracks are signs of a worn mower belt Replace the mower belt if any of these conditions are evident 1 Disengage the blade control switch PTO move...

Page 48: ...outward to the neutral position engage parking brake stop the engine remove the key and wait for all moving parts to stop before leaving the operating position Lower the mower to the 3 inch 76 mm hei...

Page 49: ...efore each use or daily Inspect the grass deflector for damage WARNING An uncovered discharge opening could allow the lawn mower to throw objects in the operator s or bystander s direction and result...

Page 50: ...of the mower after each use to prevent grass buildup for improved mulch action and clipping dispersal 1 Park the machine on a level surface and disengage the blade control switch 2 Move the motion co...

Page 51: ...water Do not pressure wash the machine Avoid excessive use of water especially near the control panel engine hydraulic pumps and motors 3 Check the brake refer to Servicing the Brake in the Maintenanc...

Page 52: ...t store stabilizer conditioned fuel over 90 days 13 Check and tighten all bolts nuts and screws Repair or replace any part that is damaged 14 Paint all scratched or bare metal surfaces Paint is availa...

Page 53: ...eplace seat if needed 9 Electrical connections are corroded loose or faulty 9 Check the electrical connections for good contact Clean connector terminals thoroughly with electrical contact cleaner app...

Page 54: ...vice Dealer 6 Blade spindle is bent 6 Contact an Authorized Service Dealer Abnormal vibration 7 Motor mount is loose or worn 7 Contact an Authorized Service Dealer 1 Blade s not sharp 1 Sharpen the bl...

Page 55: ...Schematics G014723 Wire Diagram Rev B 55...

Page 56: ...or system 2 Bring the product and your proof of purchase sales receipt to the Service Dealer The dealer will diagnose the problem and determine if it is covered under warranty 3 If for any reason you...

Reviews: