g009658
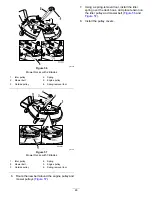
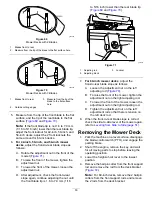
Figure 69
Mower Decks with 2 Blades
1.
Blades front to rear
2.
Measure from the tip of the blade to the flat surface here.
g009659
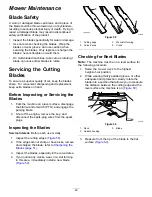
Figure 70
Mower Decks with 3 Blades
1.
Blades front to rear
3.
Measure from the tip of the
blade to the flat surface
here.
2.
Outside cutting edges
5.
Measure from the tip of the front blade to the flat
surface, and the tip of the rear blade to the flat
surface (
and
).
Note:
If the front blade tip is not 1.6 to 7.9 mm
(1/16 to 5/16 inch) lower than the rear blade tip,
adjust the front locknut for 42-inch, 50-inch, and
54-inch decks; adjust the 2 front locknuts the
same amount for 60-inch decks.
6.
For 42-inch, 50-inch, and 54-inch mower
decks
, adjust the front-to-rear blade slope as
follows:
A.
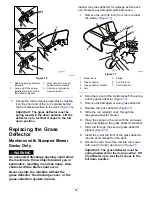
Rotate the adjustment nut in the front of the
mower (
).
B.
To raise the front of the mower, tighten the
adjustment nut.
C.
To lower the front of the mower, loosen the
adjustment nut.
D.
After adjustment, check the front-to-rear
slope again, continue adjusting the nut until
the front blade tip is 1.6 to 7.9 mm (1/16
to 5/16 inch) lower than the rear blade tip
(
and
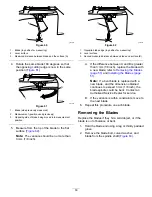
g014634
Figure 71
1.
Adjusting rod
3.
Locknut
2.
Adjusting block
7.
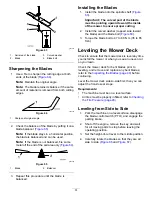
For 60-inch mower decks
, adjust the
front-to-rear blade slope as follows:
A.
Loosen the adjustment nut on the left
adjusting rod (
).
B.
To raise the front of the mower, tighten the
adjustment nut on the right adjusting rod.
C.
To lower the front of the mower, loosen the
adjustment nut on the right adjusting rod.
D.
Tighten the adjustment nut on the left
adjustment rod so that there is tension on
the left deck rod.
8.
When the front-to-rear blade slope is correct
check the side-to-side level of the mower again,
refer to
Leveling from Side to Side (page 51)
.
Removing the Mower Deck
1.
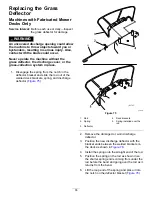
Park the machine on a level surface, disengage
the blade-control switch (PTO), and engage the
parking brake.
2.
Shut off the engine, remove the key, and wait
for all moving parts to stop before leaving the
operating position.
3.
Lower the height-of-cut lever to the lowest
position.
4.
Remove the hairpin cotter from the front support
rod and remove the rod from the deck bracket
(
).
Note:
For 60-inch decks, remove the 2 hairpin
cotters from the front support rods and remove
the 2 rods from the deck bracket.
53
Summary of Contents for TimeCutter 74726
Page 62: ...Schematics g028022 Electrical Diagram Rev A 62 ...
Page 63: ...Notes ...
Page 64: ......

