Leveling the Rear Roller (continued)
5. Adjust the position of the side plate to parallel the rear roller and cutting reel.
Tighten the shoulder bolts to
37 to 44 N∙m (27 to 33 ft-lb)
.
6. After tightening the side plate, check the rear roller. If necessary, loosen and
adjust the second side plate.
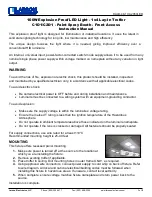
g214395
Figure 326
1.
Rear roller bracket
5.
Rear roller assembly
2.
0.010 inch shim (if necessary)
6.
Roller shim (2 each)
3.
Flange nut (2 each)
7.
Carriage screw (2 each)
4.
Flat washer (2 each)
7. If the rear roller is still not level after adjusting both side plates, check to see
if the cutting reel is tapered; refer to
(page )
. If the cutting reel is not tapered
and rear roller is not level, a 0.010 inch shim (Toro Part No.107-4001) is
available to allow additional rear roller adjustment. The shim would be used
on one side of the rear roller and should be installed between the rear roller
bracket and the roller shim (
8. After leveling the rear roller, complete the cutting unit set-up and adjustment
sequence.
Cutting Unit: Adjustments
Page 9–16
Reelmaster
®
5410/5510/5610 Series
15216SL Rev C
Summary of Contents for Reelmaster 5510 Series
Page 4: ...NOTES NOTES Page 4 Reelmaster 5410 5510 5610 Series 15216SL Rev C...
Page 10: ...Preface Page 10 Reelmaster 5410 5510 5610 Series 15216SL Rev C...
Page 18: ...Safety Safety and Instructional Decals Page 1 8 Reelmaster 5410 5510 5610 Series 15216SL Rev C...
Page 356: ...Hydraulic System Service and Repairs Page 6 238 Reelmaster 5410 5510 5610 Series 15216SL Rev C...
Page 594: ...Cutting Unit Service and Repairs Page 9 64 Reelmaster 5410 5510 5610 Series 15216SL Rev C...
Page 662: ......