


Maintenance
Note:
Determine the left and right sides of the machine from the normal operating position.
Recommended Maintenance Schedule(s)
Maintenance Service
Interval
Maintenance Procedure
After the first hour
• Check the control cable and adjust it if necessary.
• Check for loose fasteners and tighten them if necessary.
After the first 2 hours
• Change the engine oil.
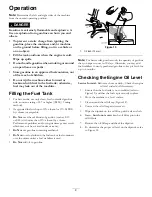
Before each use or daily
• Check the engine oil level and add oil if necessary.
Yearly
• Check the control cable and adjust it if necessary.
• Inspect the rotor blades and have an Authorized Service Dealer replace the rotor
blades and scraper if necessary.
• Change the engine oil.
• Service the spark plug and replace it if necessary.
• Check for loose fasteners and tighten them if necessary.
• Have an Authorized Service Dealer inspect the drive belt and replace it if necessary.
Yearly or before storage
• Prepare the machine for storage.
Adjusting the Control Cable
Refer to Adjusting the Control Cable in Setup.
Inspecting the Rotor Blades
Service Interval:
Yearly—Inspect the rotor blades and have
an Authorized Service Dealer replace the
rotor blades and scraper if necessary.
Before each session, inspect the rotor blades for wear. When
a rotor blade edge has worn down to the wear indicator hole,
have an Authorized Service Dealer replace the rotor blades
and the scraper (Figure 27).
Figure 27
1.
The wear indicator hole is
intact; you do not need to
replace the rotor blades.
3.
Scraper
2.
The wear indicator hole is
exposed; replace the rotor
blades and scraper.
Changing the Engine Oil
Service Interval:
After the first 2 hours
Yearly
Run the engine a few minutes before changing the oil to warm
it. Warm oil flows better and carries more contaminants.
1.
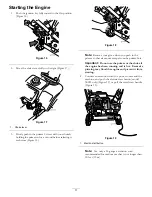
Ensure that the fuel tank is not overfilled (refer to
Figure 13) and that the fuel cap is securely in place.
2.
Move the machine to a level surface.
3.
Place an oil drain pan under the oil drain plug
(Figure 12), remove the oil drain plug, and tip the
machine backward (handle down) halfway to the
ground to drain the used oil into the oil drain pan.
Important:
Do not tip the machine all the way
back to the ground, or fuel may leak out of the
machine.
4.
After draining the used oil, return the machine to the
operating position.
5.
Install the oil drain plug and tighten it securely.
6.
Clean around the oil fill cap (Figure 12).
7.
Unscrew the oil fill cap and remove it.
8.
Slowly
pour oil into the oil fill hole. Wait 3 minutes,
then check the oil level on the dipstick by wiping the
dipstick clean and then inserting,
but not screwing in,
the oil fill cap into the hole.
Note:
To determine the proper oil level on the
dipstick, refer to Figure 28.
15
Summary of Contents for Powerlite 38273
Page 18: ...Notes 18...