Setup
Loose Parts
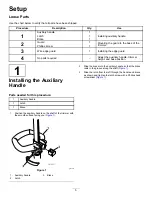
Use the chart below to verify that all parts have been shipped.
Procedure
Description
Qty.
Use
Auxiliary handle
1
Latch
1
1
Brace
1
Installing auxiliary handle.
Guard
1
2
Phillips screw
1
Mounting the guard to the base of the
trimmer.
3
Wire edge guard
1
Installing the edge guard
4
No parts required
–
Adjust the auxiliary handle, trimmer
height, and base position.
1
Installing the Auxiliary
Handle
Parts needed for this procedure:
1
Auxiliary handle
1
Latch
1
Brace
1.
Position the auxiliary handle on the shaft of the trimmer with
the smooth surface facing you (
g017277
Figure 1
1.
Auxiliary handle
3.
Brace
2.
Latch
2.
Slide the brace into the auxiliary handle so that the brace
rests in the groove along the shaft (
3.
Slide the latch from the left through the handle and brace
as shown and tighten the latch screw with a Phillips head
screwdriver (
).
5
Summary of Contents for 51484
Page 2: ......
Page 3: ......
Page 4: ......
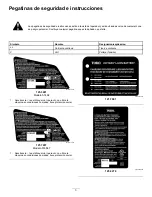
Page 8: ...decal125 3295 125 3295 decal138 6681 138 6681 4 ...
Page 20: ...decal125 3295 125 3295 decal138 6681 138 6681 4 ...
Page 32: ...decal125 3295 125 3295 decal138 6681 138 6681 4 ...


