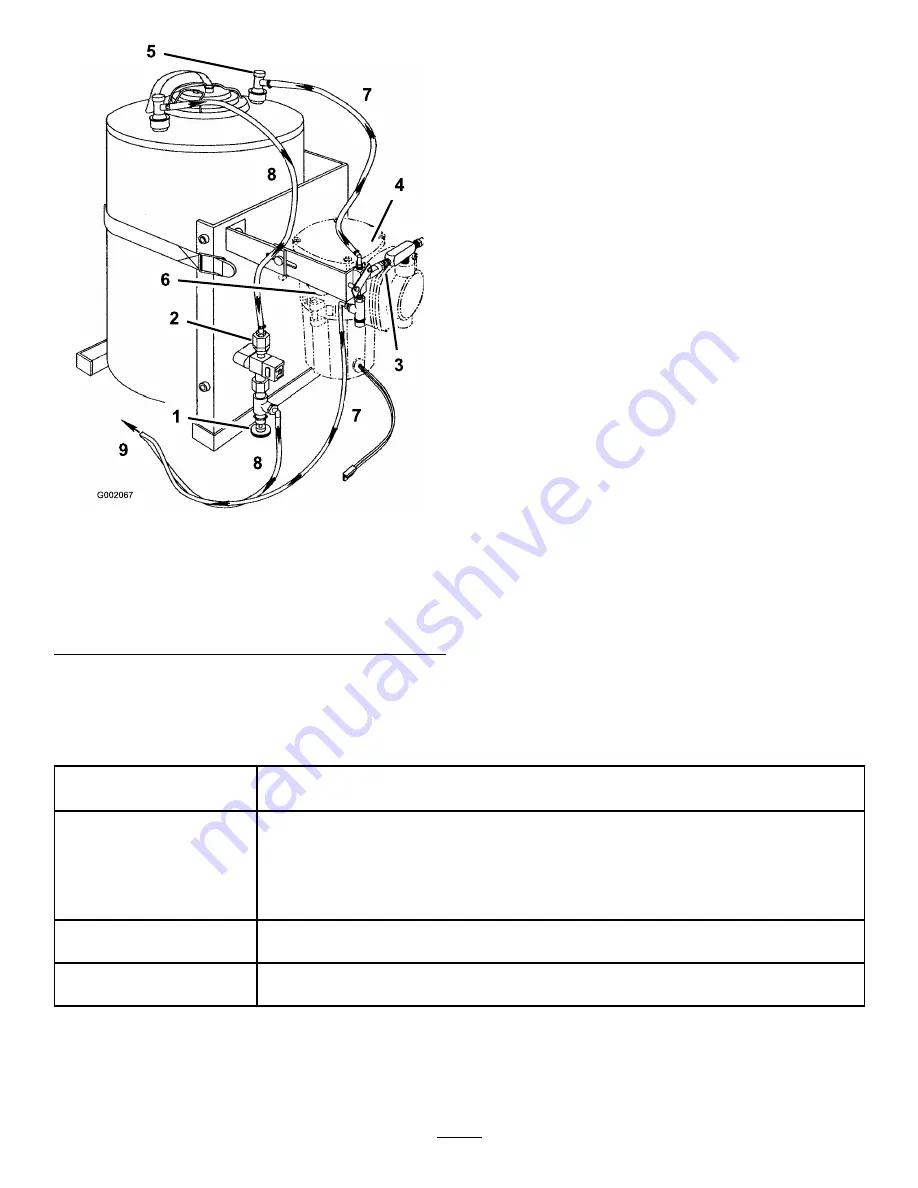
Figure 33
1.
Foam density adjustment
valve
6.
Air filter
2.
Strainer
7.
Air only
3.
Check valve
8.
Liquid
4.
Compressor
9.
To mixer tee
5.
Couplers
9. Start operating the marking system and make a test
pattern on the ground. When you first start the
marking system, allow 1 to 2 minutes for the foam
to flow through the line.
10. Adjust the foam density adjustment valve to obtain
the desired consistency and spray as normal.
Note:
If you leave the foam in the line for more
than 2 hours, it may become watery. Before
operating after a break of 2 or more hours, run the
machine for 1 to 2 minutes to remove the excess
water.
Note:
The mixer tee can flood if the solution-to-air
mixture is too rich, producing watery foam. If the
foam is too dry, the flow will be unsteady with
high-pressure surges.
If the foam in the machine is very watery, do the
following:
A. Close the foam density adjustment valve
completely.
B. Operate for 2 minutes.
C. Wait 1 minute and then check the consistency
of the foam.
D. Adjust the foam to achieve the desired
consistency.
Maintenance
Recommended Maintenance Schedule(s)
Maintenance Service
Interval
Maintenance Procedure
Every 100 hours
• Inspect the hose between the foam tank and the compressor for accumulated water.
• Inspect and clean the check valve in the tee on top of the compressor. Replace
the valve if necessary.
• Remove and clean the strainer at the top of the solenoid valve, next to the
compressor.
• Ensure that the bottom of the compressor is free from debris.
Every 250 hours
• Replace the compressor air filter.
• Check for and rinse out debris from the inside of the tank.
Every 500 hours
• Replace the plastic check valve at the “Y” near the mixer tee assembly, located at
the rear of the machine, on the center boom.
Cleaning the Strainer
Important:
Dried foam agent and debris can
clog the strainer (Figure 34), causing slow or no
foam production. This can be mistaken for a bad
foam pump or incorrect foam mix. If experiencing
15


