


23
Note:
Warm oil flows better and carries more
contaminants.
Warning
Oil may be hot after engine has been run, and
contact with hot oil can cause severe personal
injury.
Avoid contacting the hot engine oil when you
drain it.
2.
Stop the engine and wait for all moving parts to stop.
3.
Disconnect the wire from the spark plug (Fig. 7).
4.
Place a suitable drain pan under the dipstick/oil drain
(Fig. 7).
5.
Clean around the dipstick.
6.
Remove the dipstick by rotating the cap
counterclockwise and pulling it out.
7.
Raise the
left
side of the lawn mower to drain the oil
from the dipstick fill tube into the drain pan.
8.
After draining the oil, return the lawn mower to the
operating position.
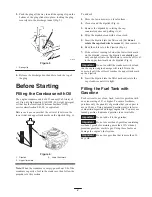
9.
Fill the crankcase with fresh oil to the upper limit
mark on the dipstick. Refer to the Filling the
Crankcase with Oil on page 9.
10.
Insert the dipstick into the filler neck and rotate the
cap clockwise until it is tight.
11.
Wipe up any spilled oil.
12.
Connect the wire to the spark plug.
13.
Recycle the used oil according to local codes.
Servicing the Spark Plug
Check the spark plug after every 100 operating hours or
yearly; replace it after every 250 operating hours or every
2 years. Use an
NGK
)
BPR5ES
or
Nippondenso
)
W16EPR-U
spark plug or equivalent.
1.
Stop the engine and wait for all moving parts to stop.
2.
Disconnect the wire from the spark plug (Fig. 7).
3.
Clean around the spark plug.
4.
Remove the spark plug from the cylinder head.
Important
Replace a cracked, fouled, or dirty spark
plug. Do not clean the electrodes because grit entering the
cylinder can damage the engine.
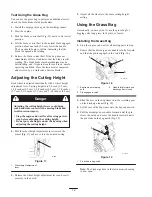
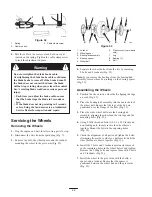
5.
Set the gap on the plug to 0.030 inch (0.76 mm)
(Fig. 32).
m-110
1
Figure 32
1. 0.030 inch (0.76 mm)
6.
Carefully install the spark plug by hand (to avoid cross
threading) until it is hand tight.
7.
Tighten the spark plug an additional 1/2 turn if it is
new; otherwise, tighten it an additional 1/8 to 1/4 turn.
Important
A loose spark plug can become very hot
and can damage the engine; overtightening a spark plug
may damage the threads in the cylinder head.
8.
Connect the wire to the spark plug.
Lubricating the Gear Case
After every 100 operating hours, grease the gear case.
1.
Remove the grass bag.
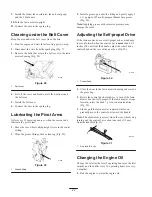
2.
Install a grease gun onto the fitting through the belt
cover opening (Fig. 33).
m-224
2
1
Figure 33
1. Belt cover
2. Grease fitting
3.
Gently apply one to 2 pumps of #2 multi-purpose
lithium-base grease.
4.
Install the grass bag.
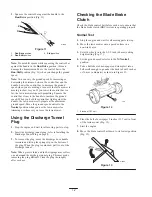
Adjusting the Blade Brake
Cable
Whenever you install a new blade brake cable assembly or
replace the belt, adjust the blade brake cable.
1.
Stop the engine and wait for all moving parts to stop.
2.
Disconnect the wire from the spark plug (Fig. 7).
3.
Loosen the cable clamp screw until the brake cable
conduit slides (Fig. 34).
Summary of Contents for 22168TE
Page 28: ......