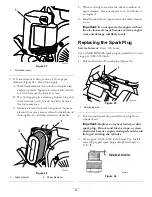
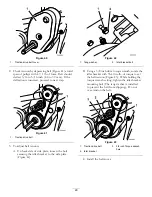
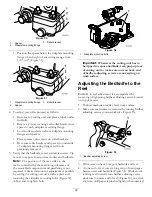
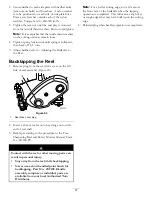

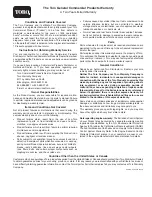
from the front, parallel to the bedknife. A slight drag
will be noted as the paper is pulled.
Figure 54
Note:
Each time adjusting screw is rotated one click
clockwise, the bedknife moves .0007 inch closer to
reel. Do not overtighten the adjusting screws.
5. Check for light contact at other end of reel using
paper and adjust as required.
6. After adjustment is accomplished, check to see if reel
can pinch paper when inserted from the front and cut
paper when inserted at a right angle to the bedknife
(Figure 54). It should be possible to cut paper with
minimum contact between the bedknife and the reel
blades. Should excessive reel drag be evident it will
be either necessary to backlap or regrind the cutting
unit to achieve the sharp edges needed for precision
cutting (see Toro reel sharpening manual).
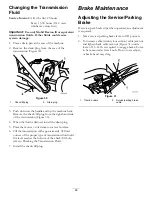
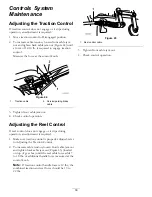
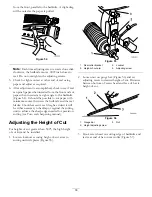
Adjusting the Height of Cut
For heights of cut greater than .500", the high height
of cut kit must be installed.
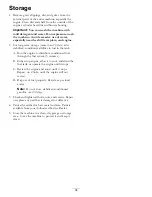
1. Loosen locknuts securing height-of-cut arms to
cutting unit side plates (Figure 55).
Figure 55
1.
Rear roller bracket
3.
Locknut
2.
Height-of-cut arm
4.
Adjusting screw
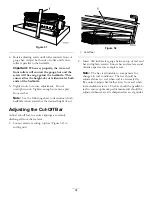
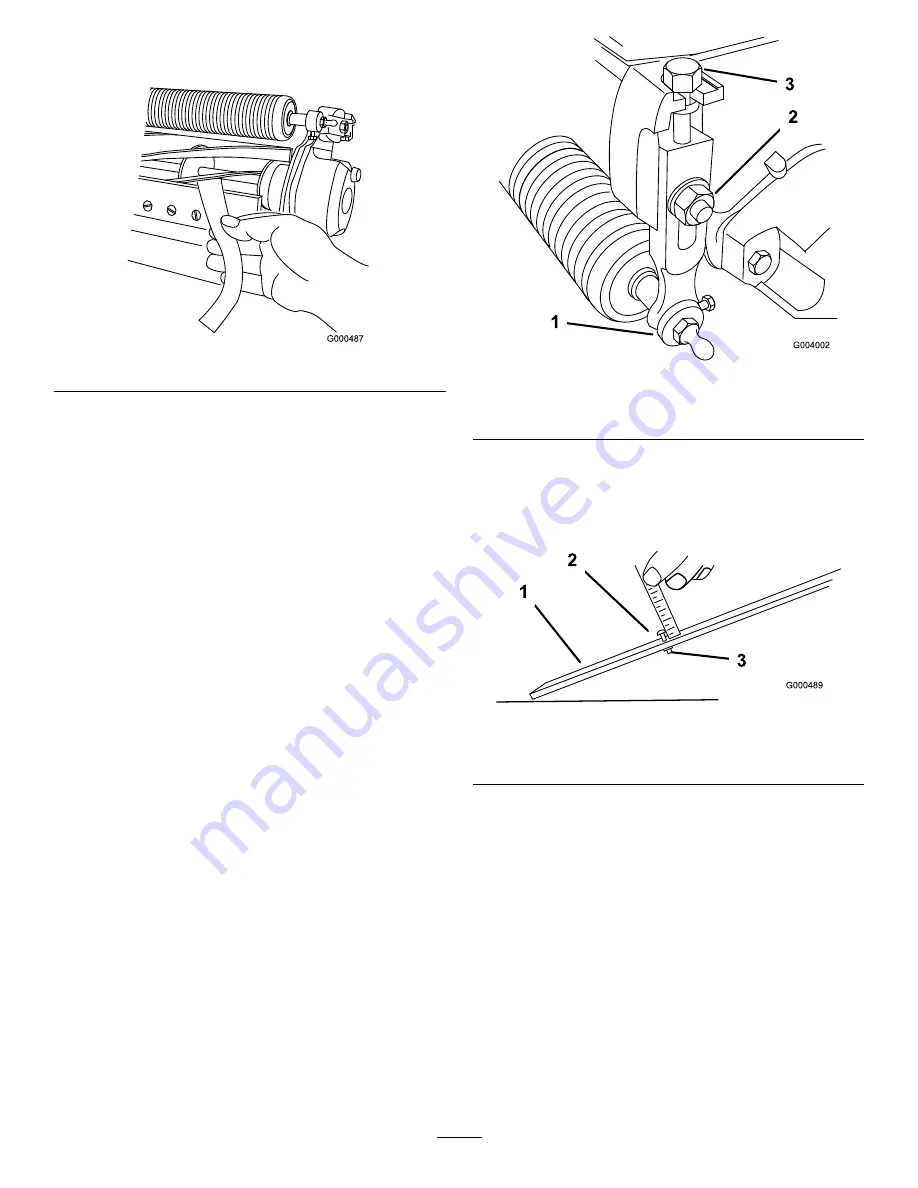
2. Loosen nut on gauge bar (Figure 56) and set
adjusting screw to desired height-of-cut. Distance
between bottom of screw head and face of bar is
height-of-cut.
Figure 56
1.
Gauge bar
3.
Nut
2.
Height adjusting screw
3. Hook screw head on cutting edge of bedknife and
rest rear end of bar on rear roller (Figure 57).
33
Summary of Contents for 04018 Greensmaster Flex 18
Page 9: ...104 2621 1 Read the Operator s Manual 9 ...
Page 39: ......


