


Bedknife Replacement and Grinding
Removing the Bedknife
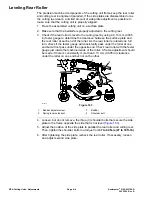
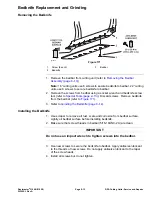
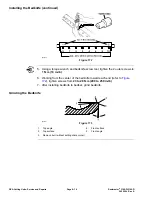
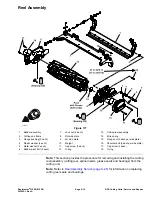
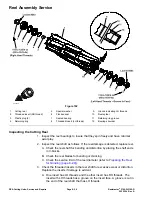
g214675
Figure 171
1.
Screw (8 each)
3.
Bedbar
2.
Bedknife
1. Remove the bedbar from cutting unit (refer to
).
Note:
18” cutting units use 6 screws to secure bedknife to bedbar. 22” cutting
units use 8 screws to secure bedknife to bedbar.
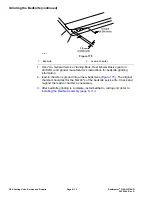
2. Remove the screws from bedbar using a socket wrench and bedknife screw
tool (refer to
Special Tools (page 2–13)
). Discard screws. Remove bedknife
from the bedbar (refer to
3. Refer to
Grinding the Bedknife (page 8–14)
.
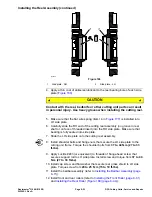
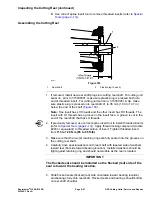
Installing the Bedknife
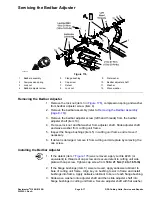
1. Use scraper to remove all rust, scale and corrosion from bedbar surface.
Lightly oil bedbar surface before installing bedknife.
2. Make sure that screw threads in bedbar (5/16-18UNC-2A) are clean.
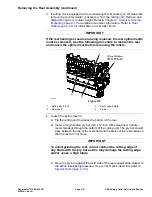
IMPORTANT
Do not use an impact wrench to tighten screws into the bedbar.
3. Use new screws to secure the bedknife to bedbar. Apply antiseize lubricant
to the threads of new screws. Do not apply antiseize lubricant to the taper
of the screw heads.
4. Install all screws but do not tighten.
Reelmaster
®
3100-D/3105-D
Page 8–13
DPA Cutting Units: Service and Repairs
20252SL Rev A
Summary of Contents for 03200 Reelmaster 3100-D
Page 4: ...NOTES NOTES Page 4 Reelmaster 3100 D 3105 D 20252SL Rev A ...
Page 6: ...g341979 Figure 1 Preface Page 6 Reelmaster 3100 D 3105 D 20252SL Rev A ...
Page 10: ...Preface Page 10 Reelmaster 3100 D 3105 D 20252SL Rev A ...
Page 20: ...Safety Safety and Instructional Decals Page 1 10 Reelmaster 3100 D 3105 D 20252SL Rev A ...
Page 44: ...Specifications and Maintenance Special Tools Page 2 24 Reelmaster 3100 D 3105 D 20252SL Rev A ...
Page 224: ...Hydraulic System Service and Repairs Page 5 148 Reelmaster 3100 D 3105 D 20252SL Rev A ...
Page 385: ......