


3
OPERATING INSTRUCTIONS
GENERAL INSTRUCTIONS
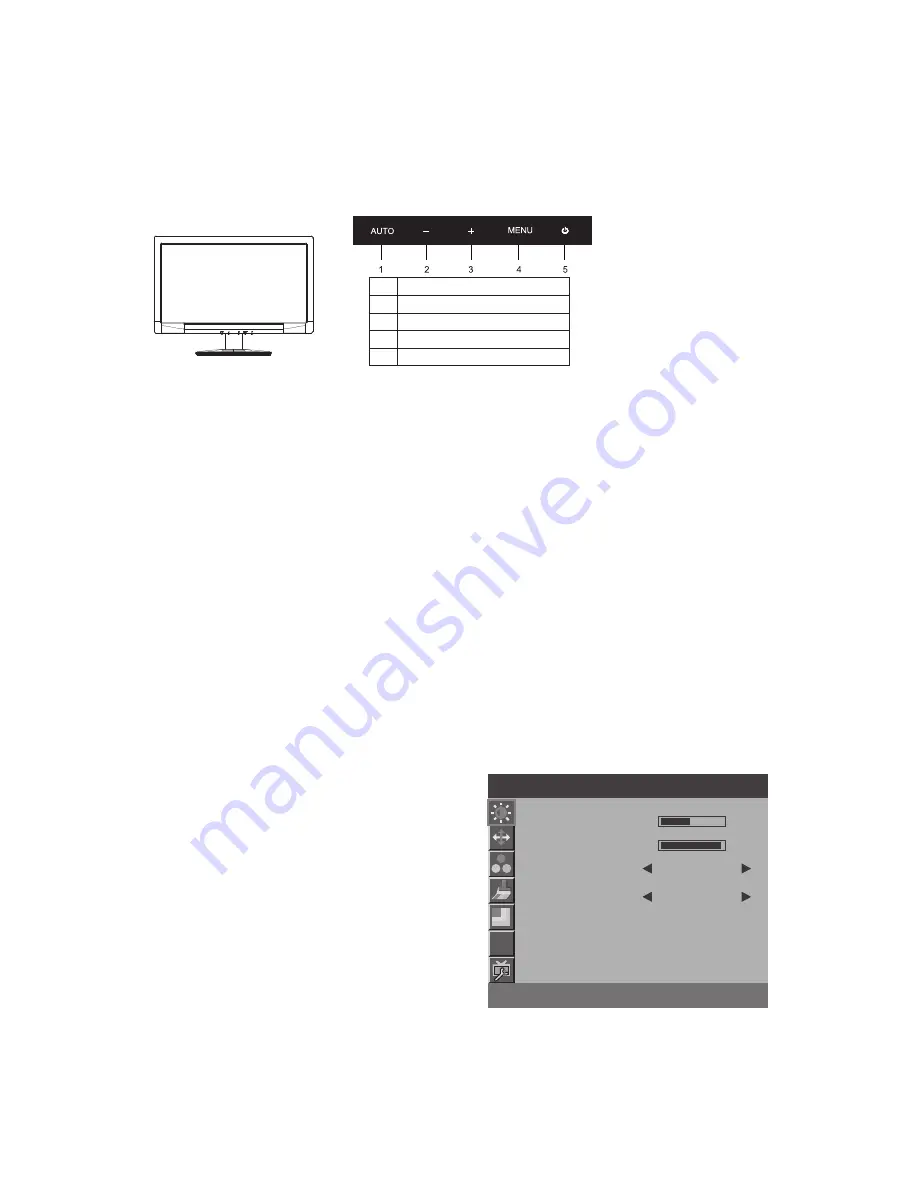
Press the power button to turn the monitor on or off. The other control buttons are located at front panel of the monitor (See Figure 4). By changing
these settings, the picture can be adjusted to your personal preferences.
•
The power cord should be connected.
•
Connect the video cable from the monitor to the video card.
•
Press the power button to turn on the monitor position. The power indicator will light up.
EXTERNAL CONTROLS
1. Auto/Exit
2. ECO/-
3. Full&4:3/+
4.
n
o
tt
u
B
r
e
w
o
P
.
5
Figure 4 External Control Button
FRONT PANEL CONTROL
•
Menu / Enter:
Activate OSD menu when OSD is OFF or activate/de-activate adjustment function when OSD is ON.
•
ECO / -
:
When OSD menu is in off status, press this key continuously to select the different ECO mode.( Eco mode hot key may not be
available in all models).
When OSD menu is in active status, press this key as function select key.
•
Full&4:3/+:
•
When OSD menu is in off status, press this button to activate the Auto Adjustment function.
The Auto Adjustment function is used to set the HPos, VPos, Clock and Phase.
When OSD menu is in active status, this button will act as EXIT-KEY (EXIT OSD menu).
•
Power Button:
Press the button to turn on or turn off the monitor.
When OSD menu is in off status, press this key continuously to change 4:3 or wide image ratio( If the product screen size is
4:3 or input signal resolution is wide format, the hot key is disable to adjust.).
When OSD menu is in active status, press this key as function select key.
•
Power Indicator:
Blue-Power On mode, Flickering Blue-Standby mode.
•
OSD Lock Function:
To lock the OSD, press and hold the MENU button while the monitor is off and then press power button to turn the
monitor on. To un-lock the OSD - press and hold the MENU button while the monitor is off and then press power button to turn the monitor on.
NOTES
•
Do not install the monitor in a location near heat sources such as radiators or air ducts, or in a place subject to direct sunlight, or excessive
dust or mechanical vibration or shock.
•
Save the original shipping carton and packing materials, as they will come in handy if you ever have to ship your monitor.
•
For maximum protection, repackage your monitor as it was originally packed at the factory.
•
To keep the monitor looking new, periodically clean it with a soft cloth. Stubborn stains may be removed with a cloth lightly dampened with
a mild detergent solution. Never use strong solvents such as thinner, benzene, or abrasive cleaners, since these will damage the cabinet. As a
safety precaution, always unplug the monitor before cleaning it.
•
Do not scratch the screen with hard things, it may cause permanent damage.
•
Don’t leak liquid into monitor which will result in the damage of component.
HOW TO ADJUST A SETTING
1. Press the MENU-button to activate the OSD window.
2. Press - or + to navigate through the functions. Once the desired function
is highlighted, press the MENU-button to activate it. If the function
selected has a sub-menu, press - or + again to navigate through the sub-
menu functions. Once the desired function is highlighted, press MENU-
button to activate it.
3. Press - or + to change the settings of the selected function.
4. To exit and save, select the exit function. If you want to adjust any other
function, repeat steps 2-3.
Figure 5 The OSD Message
O
S
D
Luminance
Contrast
0
50
0
90
Standard
Off
Brightness
Eco mode
DCR
Auto/Exit:
Menu/Enter


