WFSM
WIFI Single Relay Smart Switch Module
SPECIFICATIONS
Voltage.......................................................................120-277VAC, 50/60Hz
Maximum Load requirement....................................................................10A
FEATURES
z
z
z
z
DESCRIPTION
INSTALLATION
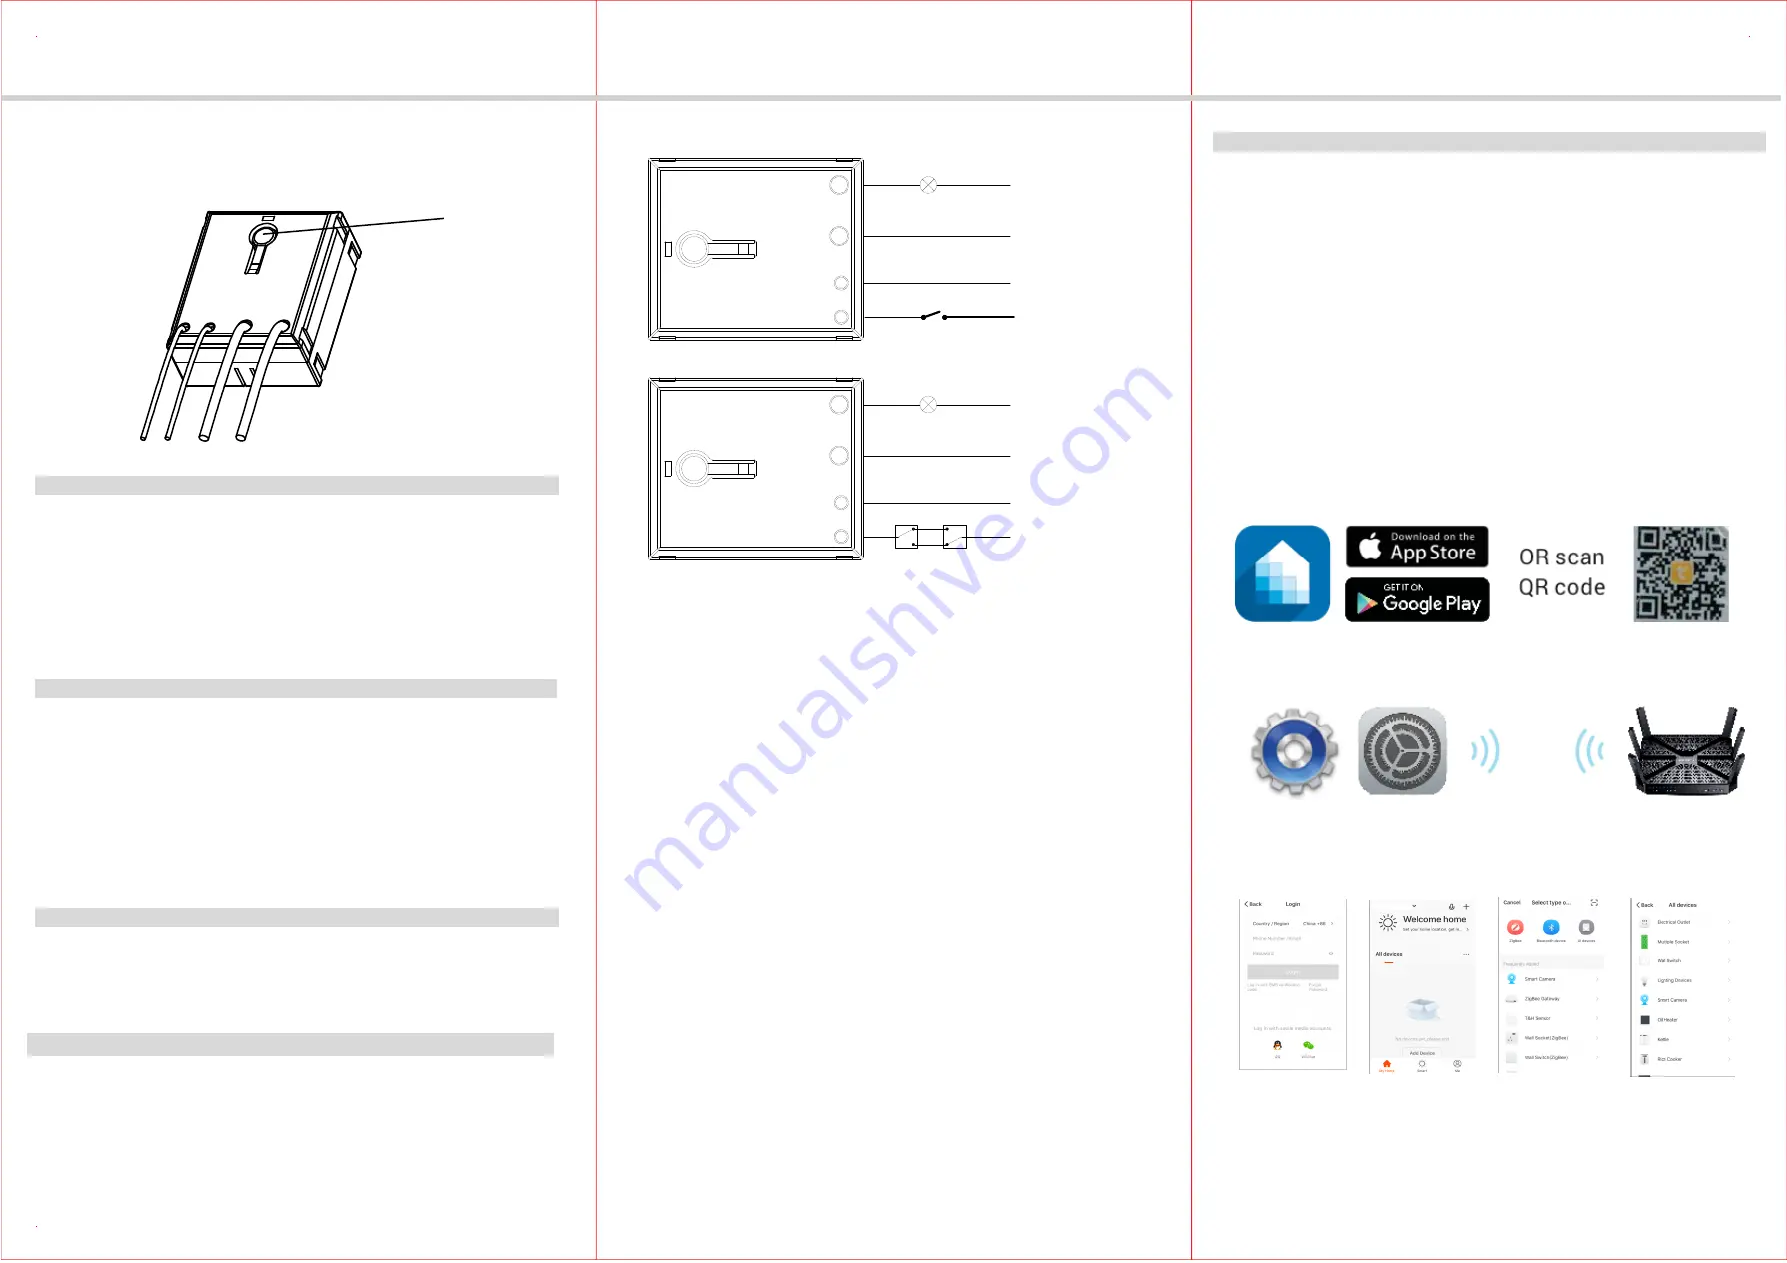
Simple Wiring Diagram:
Fig1
3-way Circuits
Wiring Diagram:
Fig2
IMPORTANT NOTE ABOUT 3-WAY CIRCUITS
The term “3-way circuit” refers to a circuit with two switches and one load (light)
like you find at the top and bottom of a stairway. There are many ways
to physically wire a 3-way circuit and it is important to understand how the
circuit you wish to upgrade to WIFI device is wired. One of the ways, the of
WFSM to wire a 3-way switch 2(Fig2), then wire to 3-way switch, and then
wire to the Neutral. Although very common and by no means a standard, it is
the easiest to convert to WIFI device. with this type of circuit, WFSM is seting
behind the switch 2. Do not change the wiring of switch1. Please note that
both switch 1 and switch 2 must be 3-way switch.
Please consult an electrician if you have trouble indentifying the type of wiring
circuit you wish to convert or if you do not feel confident in your ability to convert
the circuit to WIFI device.
1. WARNING : To avoid fire, shock, or death. Turn off power at circuit breaker or
fuse and test that power is off before wiring.
2. Remove wall plate and switch mounting screws.
3. Carefully remove the switch from the switch box.
4. Disconnect the wiring from the existing switch.
5. Connect the WFSM module as shown in the wiring diagram
6. Check connections to be sure they are tight and no bare conductors are exposed.
7. Insert the WFSM module into the box first, then wire the existing switch.
8. Attach the wall plate.
9. Restore power at the circuit breaker and test the system.
INSTALLATION INSTRUCTIONS
Protocol.....................................................................................IEEE 802.11b/g/n
System Requirements...............................Android 4.1 or higher, iOS 8 or higher
Indoor Use Operating Temperature................................32°F~104°F(0°C~40°C)
Type 1.B action, operating control
Wireless Type......................................................................................... 2.4GHz
You can control lights, fans, humidifiers, Air conditioner, and any small appliances
in accordance with the Smart Switch Module’s specifications.
You can Turns your devices on or off at any time or any where have Internet
using the free Tuya Smart App on your smartphone.
Compatible with the Amazon Echo, the free Tuya app compatible with any
Android (4.1 and higher) or iOS (iOS 8 and higher) smartphone.
You can efficiently conserve energy and save money while using this Smart
Switch Module.
controlled by manual or you can through App to remote control turn on/off light,
The WFSM Plug is our industry's first WIFI Single Relay Smart Switch Module,
which can make our life more convenient. This Smart Switch Module can be
countdown and make weekly plan after connect 2.4GHz WIFI .
-01-
-02-
-03-
Load
OPERATIONS
Power/ Program Button
Manual Control
The Power/ Program Button or connected switch on the WFSM smart switch
1. Manually turn ON the Module: press and release the program button or toggle
the connected switch. The Blue LED indicator will turn ON, and the appliance
2. Manually turn OFF the Module: press and release the program button toggle
the connected switch. The Blue LED indicator will turn ON, and the appliance
Tuya Smart App Control
1. Download Tuya Smart app from the App Store or Google Play.
2. Connect mobile device to your 2.4GHz WIFI network. Please note this
Smart outlet can only be connected to 2.4GHz network.
3. Launch Tuya and follow the in-app instructions to connect the WIFI outlet
to your network.
a. Login the Tuya
b. Click the
d. Select the
"Electrical outlet"
" Add Device"
c. Click the
" All device"
Hot
Neutral
Aux
Neutral
(White)
Hot
(Black)
Neutral
(White)
Neutral
(White)
~100-240V, 50/60Hz
Switch 1 Switch 2
Load
Hot
Neutral
Aux
Neutral
(White)
Hot
(Black)
Neutral
(White)
Neutral
(White)
~100-240V, 50/60Hz
Switch
Connected Switch Control
Toggle the connected switch to turn on and off three times and repeat the operation
two times after waiting above 10 seconds. When the load lamp turn on and off
module allows the user to:
will turn ON.
will turn OFF.
twice and then turn off that means you can connect the WIFI .