


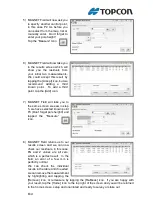
5) MAGNET Field will now ask you
to specify another control point,
in this case P2. As before you
can select from the map, list or
manually enter. Don’t forget to
enter your pole height!
Tap the “Measure” Icon
6) MAGNET Field will now take you
to the results screen which will
show you the residuals from
your initial two measurements.
We could accept this result by
tapping the [Accept] icon, but we
recommend adding a third
known point. To add a third
point, tap the [Add] icon.
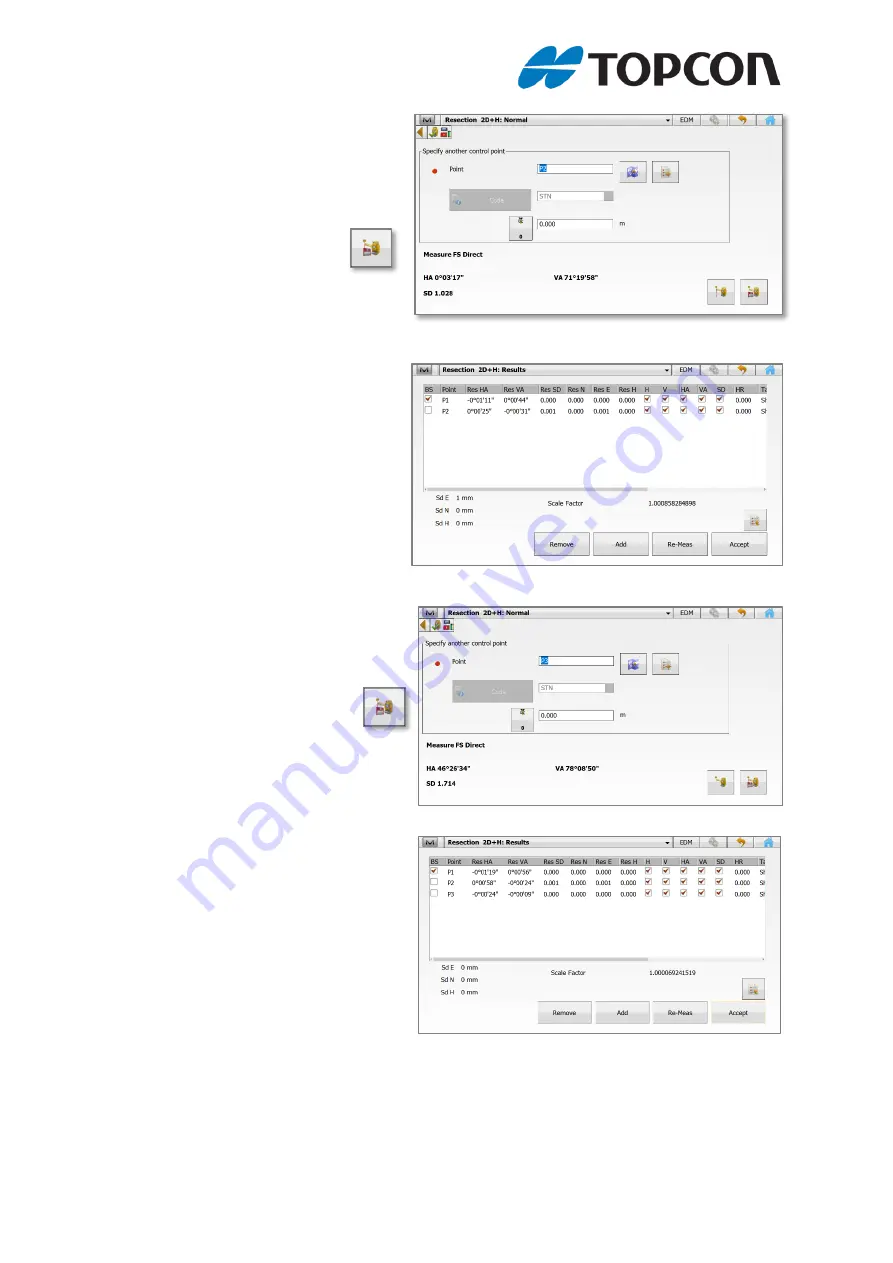
7) MAGNET Field will take you to
the same screen we saw in step
5, we have selected known point
P3 (Don’t forget pole height!) and
tapped the “Measure”
icon.
8) MAGNET Field returns us to our
results screen and we can now
check our residuals, in this case,
EN and Z values are all zero,
which is a perfect result. In the
field, an error of a few mm is
perfectly normal.
We can check the individual
results in the table and if needed,
we can remove the measurement
by highlighting and tapping the
[Remove] icon, or remeasure by tapping the [Re-Meas] icon. If you are happy with
your result, tap the [Home] Icon to the top right of the screen and you will be returned
to the home screen, setup and orientated and ready to survey or stake out.
End.


