background image


www.TOPAZDIGITAL.com 


17        

©2017 TOPAZ Digital –  E&OE v1.1


Although the screen has a built in Android operating system and accompanying software, you 
can also connect it to an external source. The touch screen must be connected to the PC in two 
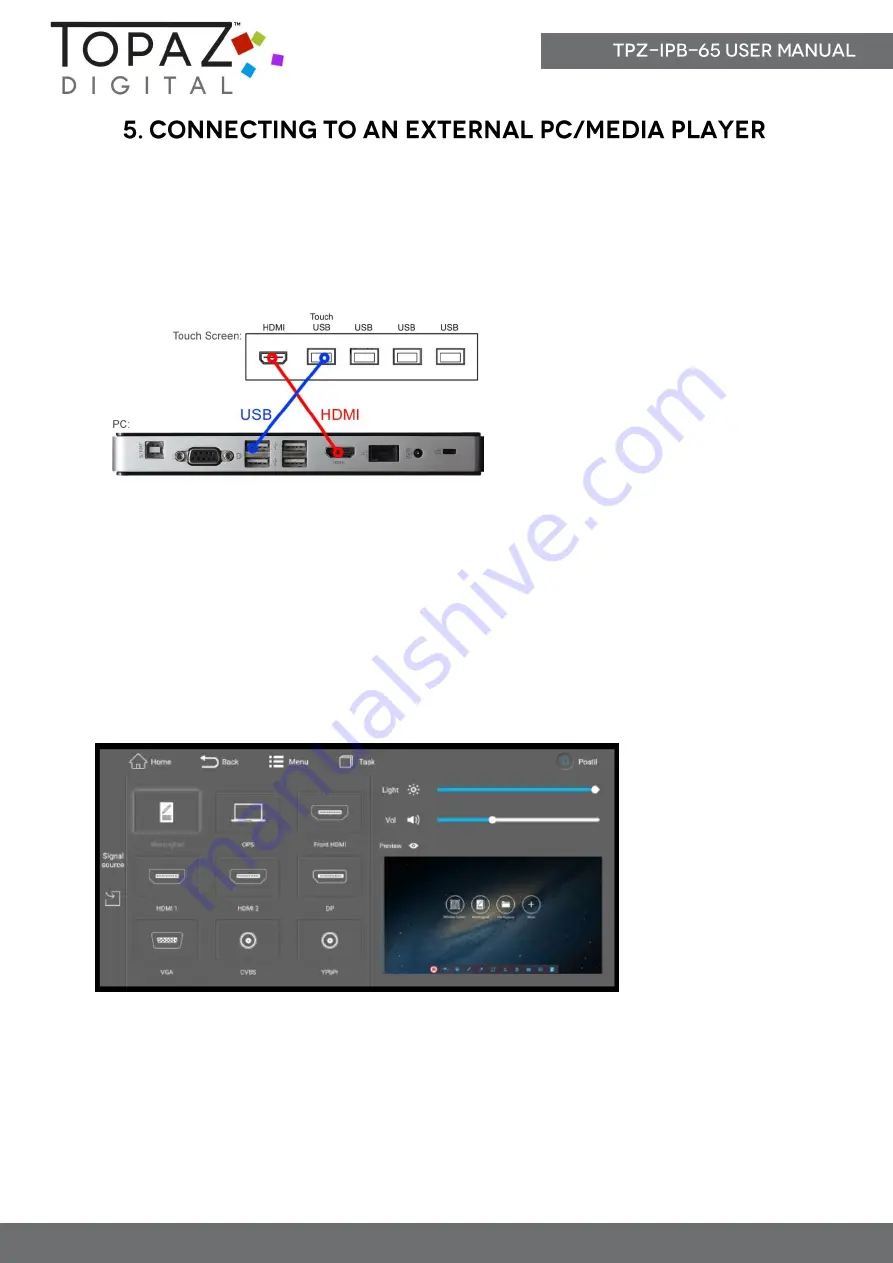
ways: visually and interactively. The recommended visual connection is via a HDMI Cable 
(included) meaning that the display acts like a monitor for the PC. The touch function is achieved 
by linking the touch panel on the screen directly to the PC via the USB Cable (included). 


Figure 5 Screen to PC Connections 


Connect the screen to the PC via HDMI cable and USB cable using the screen’s front ports (as 
shown above). Once these connections have been made and the PC powered ON take the power 
lead and insert it into the screen and connect to mains outlet. The unit should power ON 
automatically, if it doesn’t please turn the power switch (next to the power input) to the ON 
position. If the video signal of the PC does not display then please ensure that the screen is 
sourcing its display from the PC. Begin by accessing the Control Panel: swipe your finger up from 
the bottom of the screen to the middle of the screen: 


From here you can preview a different input source, such as VGA, then once selected you can 
touch the “Signal source” panel on the left hand side, or the preview window, to switch the touch 
screen to this input.  

IMPORTANT: If the touch screen is the only monitor connected to your PC DO NOT take the 
following step. Only proceed with the following if you are using a laptop or another monitor is 
connected to your PC. 


Summary of Contents for TPZ-IPB-65

Page 1: ...www TOPAZDIGITAL com 1 2017 TOPAZ Digital E OE v1 1 Manual Version 1 1...

Page 2: ...es or openings with any objects Remove protective covering from the screen before you use the display As the display surface is vulnerable to scratches avoid touching the surface with sharp items Shut...

Page 3: ...DMI cable and USB cable using the screen s front ports as shown above Once these connections have been made and then PC powered ON take the power lead and insert it into the screen and connect to a ma...

Page 4: ...ts 12 3 Connecting your Touch Screen to a network 14 4 MeetingPad Software 16 5 Connecting to an external PC Media Player 17 6 F A Qs and Troubleshooting Guide 19 6 1 My Screen is not displaying what...

Page 5: ...AZ Digital E OE v1 1 Figure 1 Screen to PC Connections 3 Figure 2 Product Overview Error Bookmark not defined Figure 3 Front Inputs 12 Figure 4 Rear Inputs Side 12 Figure 5 Rear Inputs Bottom 13 Figur...

Page 6: ...ber of operations can be performed through the remote control Attention 1 Do not change any default setting when it is unnecessary 2 Keep the product far away from water during installation and use 1...

Page 7: ...www TOPAZDIGITAL com 7 2017 TOPAZ Digital E OE v1 1 1 Active Touch Area 2 IR Remote Sensor Buttons 3 AV Inputs 4 Power Cable Switch 5 VESA Mounting Holes 6 OPS PC Slot 1 2 3 5 5 3 5 5 3 6 4...

Page 8: ...www TOPAZDIGITAL com 8 2017 TOPAZ Digital E OE v1 1...

Page 9: ...om here you can preview a different input source such as VGA then once selected you can touch the Signal source panel on the left hand side or the preview window to switch the touch screen to this inp...

Page 10: ...e on the main control panel you can also select the Media Browser input this is a basic media player application for running photos videos and music files Picture Here you can adjust the picture setti...

Page 11: ...e modes include Standard Music Movie Sports or User where you can define the values Setting Under this menu are settings such as on screen display duration time HDMI EDID Version and power settings Yo...

Page 12: ...ont HDMI Front High Definition Multimedia Interface Signal Input HDMI 1 Rear High Definition Multimedia Interface Signal Input HDMI 2 Rear High Definition Multimedia Interface Signal Input DP Display...

Page 13: ...l Panel the Source option in the Menu section and also using the remote control and front control button If using the remote or front controls please select the Input button to bring up the following...

Page 14: ...your touch screen to your network using an Ethernet cable Please connect your Ethernet cable to the LAN port on the touch screen s rear input To connect your screen to your Wi Fi network begin by ens...

Page 15: ...een select More then Settings Next select Wi Fi from the Settings menu Then select the Wi Fi network that you want to connect to this will bring up another box allowing you to enter your password Once...

Page 16: ...erform wireless mirroring and file sharing with external devices as well as other features such as annotating documents web browsing and cropping existing documents The software is ideal for conductin...

Page 17: ...en made and the PC powered ON take the power lead and insert it into the screen and connect to mains outlet The unit should power ON automatically if it doesn t please turn the power switch next to th...

Page 18: ...or Screen resolution You should now click Detect to allow the PC to discover the Video Monitor then Identify to establish which display is the Video Monitor Select the display that corresponds with t...

Page 19: ...ghted then wait a few seconds for the screen to automatically switch input source If you are souring your video signal from a PC your keyboard may have a display monitor button on it especially if you...

Reviews: