background image

Diese Leuchte enthält eingebaute LEDs. Die LEDs in dieser Leuchte können nur vom Hersteller 

ausgetauscht werden. A-A++

A-A++

Inspected and certified to european lighting norm EN60598

GUARANTEE:
You have purchased a high-quality product that was produced and packaged with the utmost care. Should you 
nevertheless have grounds for complaint, please contact your retailer quoting the final inspection number as 
stated on the last page of this document. We will deal with your complaint immediately. This warranty applies 
only to products that have been fitted appropriately – we therefore recommend fitting by qualified personnel. 

ENGLISH

EN 12464 Based on EN 12464 the lamp is suitable for workstations.

PRI: AC 220-240V / 50-60 Hz / SEC: max. 60V max. 730mA / 50W LED    

PRI: AC 220-240V / 50-60 Hz / SEC: max. 60V max. 730mA / 95W LED    

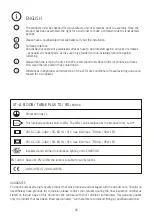
This luminaire contains built-in LEDs. The LEDs can be replaced by the producer only. A-A++

A-A++

15

2006/95/EG | 2004/108/EG

XT-A FLOOR / TABLE PLUS 70 / 90 

LED OSA

Protection class 1

The products must be checked for visual defects, and/or scratches, prior to assembly. Once the 

product has been assembled, the right for a customer to make a complaint due to visual defects 

expires.

Please have a qualified electrical specialist carry out the installation.

Surface protection:

All polished, lacquered or galvanised surfaces have to be protected against all types of stresses 

- especially all copper parts, as they are only provided with an invisible protection against 

tarnishing.

Differences in brightness and white tone of the LED’s are conditional of manufacturing and are no 

reason for a complaint.

Please clean the lamp with a dry cloth. We recommend microfibre cloths for sensitive surfaces. 

Only clean the lamp after it has cooled down.

4

1

2

3

5

Summary of Contents for XA40-0

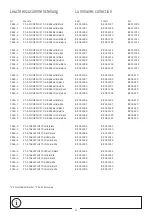
Page 1: ...XC45 1 XC45 2 XC45 3 XC45 5 XC45 6 XA46 0 XA46 1 XA46 2 XA46 3 XA46 5 XA46 6 XC46 0 XC46 1 XC46 2 XC46 3 XC46 5 XC46 6 XA40 0 XA40 1 XA40 2 XA40 3 XA40 5 XA40 6 XC40 0 XC40 1 XC40 2 XC40 3 XC40 5 XC40 6 XA41 0 XA41 1 XA41 2 XA41 3 XA41 5 XA41 6 XC41 0 XC41 1 XC41 2 XC41 3 XC41 5 XC41 6 XA42 0 XA42 1 XA42 2 XA42 3 XA42 5 XA42 6 XC42 0 XC42 1 XC42 2 XC42 3 XC42 5 XC42 6 ...

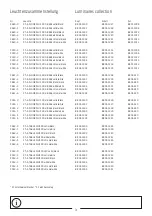
Page 2: ...FLOOR PLUS 70 V BASE white white BR 06 1389 BR 06 1301 BR 06 630 XA45 5 XT A FLOOR PLUS 70 V BASE chrome black BR 06 1388 BR 06 1302 BR 06 640 XA45 6 XT A FLOOR PLUS 70 V BASE chrome white BR 06 1389 BR 06 1303 BR 06 630 XC45 0 XT A FLOOR PLUS 70 V BASE satin black BR 06 1386 BR 06 1326 BR 06 610 XC45 1 XT A FLOOR PLUS 70 V BASE satin white BR 06 1387 BR 06 1327 BR 06 620 XC45 2 XT A FLOOR PLUS 70...

Page 3: ...FLOOR PLUS 90 V BASE white white BR 06 1393 BR 06 1301 BR 06 630 XA41 5 XT A FLOOR PLUS 90 V BASE chrome black BR 06 1392 BR 06 1302 BR 06 640 XA41 6 XT A FLOOR PLUS 90 V BASE chrome white BR 06 1393 BR 06 1303 BR 06 630 XC41 0 XT A FLOOR PLUS 90 V BASE satin black BR 06 1390 BR 06 1326 BR 06 610 XC41 1 XT A FLOOR PLUS 90 V BASE satin white BR 06 1391 BR 06 1327 BR 06 620 XC41 2 XT A FLOOR PLUS 90...

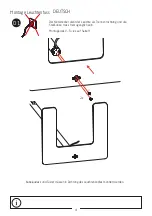
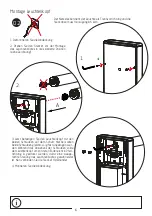
Page 4: ...D OSA 2x Montage Leuchtenfuss Der Netzstecker dient der Leuchte als Trennvorrichtung und die Steckdose muss frei zugänglich sein Kabelauslass und Taster müssen in Richtung des Leuchtenkopfes montiert werden Montage des V Fußes auf Seite 9 4 ...

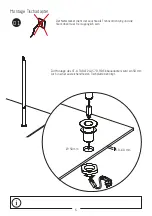
Page 5: ...dapter 01 Zur Montage des XT A TABLE PLUS 70 90 Einbauadapters wird ein 50 mm Loch in einer ausreichend festen Tischplatte benötigt Der Netzstecker dient der Leuchte als Trennvorrichtung und die Steckdose muss frei zugänglich sein 5 ...

Page 6: ...dem Schaft Hierbei sollten beide Schrauben gleichmäßig fest angezogen wer den Während des Anziehens der Schrauben sollte der Leuchtenkopf am vorderen Ende leicht in Pfeil richtung A gedrückt werden damit eine waage rechte Stellung des Leuchtenkopfes gewährleistet ist Nun verbinden Sie die Stecker miteinander 4 Montieren Sie die Abdeckung Der Netzstecker dient der Leuchte als Trennvorrichtung und d...

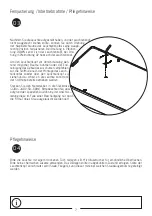
Page 7: ...Stoffhülle nach der Montage des Leuch tenkopfes wieder über den Leuchtenkopf zu ziehen und zu schließen Die Leuchte kann trotz der Stoffhülle bereits betrieben werden Stecken Sie den Netzstecker in die Steckdose 220V 240V 50 60Hz Bitte beachten Sie dass aufgrund der speziellen Ausführung der Anschluß leitung diese im Falle einer Beschädigung nur durch die Firma Tobias Grau ausgetauscht werden darf...

Page 8: ...edrückt halten Leuchte wird dunkler 1 x Taster kurz drücken Leuchte geht aus 01 02 SENSOR und FERNBEDIENUNG Zur Funktionsweise des Sensors und der Fernbedienung nutzen Sie bitte die gesonderte Bedienungsanleitung c a 2 m ca 3m 03 Erfassungsbereich des Sensors Der Erfassungsbereich des Sensors kann je nach Einbausituation variieren 8 ...

Page 9: ...A 2x Mounting the Base ENGLISH The power plug is used as a circuit breaker and the plug socket must be easily accessible Cable outlet and switch must be assembled in vertical alignment with the lamp head Mounting the V BASE on page 15 9 ...

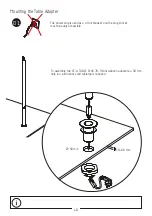
Page 10: ...e Table Adapter 01 To assemble the XT A TABLE PLUS 70 90 installation adapters a 50 mm hole in a sufficiently solid tabletop is required The power plug is used as a circuit breaker and the plug socket must be easily accessible 10 ...

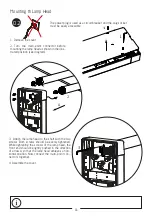
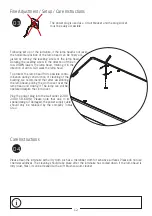
Page 11: ...mp head as shown in the illus trated position see diagram 3 Attach the lamp head to the shaft with the two screws Both screws should be evenly tightened While tightening the screws of the lamp head the front end should be lightly pushed in the direction of arrow A so that the lamp head achieves a hori zontal position Now connect the multi point con nectors together 4 Assemble the cover 1 4x 11 ...

Page 12: ... assembling the lamp head pulling the cloth cover over the lamp head and closing it The lamp can still be operated despite the cloth cover Plug the power plug into the wall outlet 220V 240V 50 60Hz Please note that due to its special design if damaged the power supply cable should only be replaced by the company Tobias Grau 03 Please clean the luminaire with a dry cloth such as a microfiber cloth ...

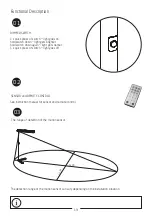
Page 13: ...ld switch down again light gets darker 1 x quick press of switch light goes off 01 02 SENSOR and REMOTE CONTROL See instruction manual for sensor and remote control c a 2 m ca 3m 03 The range of detection of the motion sensor The detection range of the motion sensor can vary depending on the installation situation 13 ...

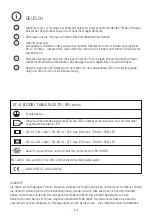
Page 14: ...0598 Diese Leuchte enthält eingebaute LEDs Die LEDs in dieser Leuchte können nur vom Hersteller ausgetauscht werden A A A A 14 2006 95 EG 2004 108 EG XT A FLOOR TABLE PLUS 70 90 LED OSA Schutzklasse 1 Die Ware muss vor Montage auf optische Fehler bzw Kratzer überprüft werden Mit der Montage erlischt der Reklamationsanspruch auf optische Mängel der Ware Bitte lassen Sie die Montage von einem Elektr...

Page 15: ... built in LEDs The LEDs can be replaced by the producer only A A A A 15 2006 95 EG 2004 108 EG XT A FLOOR TABLE PLUS 70 90 LED OSA Protection class 1 The products must be checked for visual defects and or scratches prior to assembly Once the product has been assembled the right for a customer to make a complaint due to visual defects expires Please have a qualified electrical specialist carry out ...

Page 16: ...6 1506 N Stand 01 18 Endkontrollnummer 2 Jahre Garantie 5 Jahre Garantie auf die LED Final inspection number 2 years guarantee 5 years guarantee of LED Numéro de contrôle final 2 ans de garantie 5 ans de garantie sur les LED Numero di controllo finale 2 anni di garanzia 5 anni di garanzia per i LED ...

Reviews: