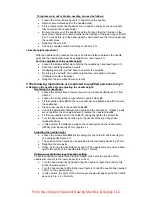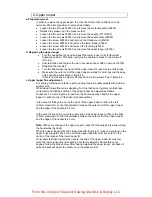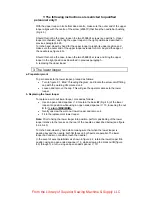
!! The following instructions are restricted to qualified personnel only !!
c. Adjusting the upper looper to the lower looper
Prior to adjusting, perform the steps detailed in previous paragraphs.
On the upper looper upward stroke and with the lower looper moving to its forward
dead point, as illustrated in figure 4.5, the outer end of the upper looper
V
must pass
right in the centre of the recess of the lower looper
S
.
In other words, when both loopers cross each other, the end of the upper looper
V
must pass right in the centre of the recess of the lower looper
S
.
Should this not be the case, follow the steps below to adjust the position of the lower
looper
inside
the sewing machine.
•
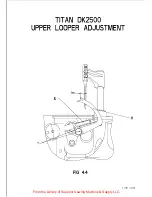
Loosen the screw
R
, therefore enabling the lever
M
to move freely on the shaft
(Fig. 4.1).
•
Turn the hand-wheel whilst making sure that the outer end of the upper looper
passes right in the centre of the recess located at the rear of the lower looper,
when both loopers cross one another.
•
If necessary, adjust the position of the lever
M
.
•
Retighten the screw
R
thus securing the lever
M
position.
d. Adjusting the distance between needle and lower looper
Prior to adjusting, perform the steps detailed in previous paragraphs.
Turn the hand-wheel such that the outer end of the lower looper
S
passes the rear of
the needle. Make sure that the distance between the needle and the lower looper is in
the range 0.2mm to 0.3mm (Fig. 4.2).
(These measures apply to machines equipped with standard needles, size 230.
When using different needles, contact our Service Department at +32/2.216.31.40).
If the distance measured above is either inferior to 0.2mm or superior to 0.3mm,
proceed as follows.
•
Loosen the screw
Q
of figure 4.5.
•
Manually move the part
N
forward or backward, so that the distance between
the needle and the lower looper is in the range 0.2mm to 0.3mm (figure 4.2).
Gently turn the flying wheel by hand while making sure that the distance between the
outer end of the upper looper
V
and the flat face of the recess on the rear of the lower
looper
S
is 1mm (see figure 4.5).
Should this not be the case, follow the steps below
.
Unscrew the screw
U
(see figure 4.5) by
1/4 of a turn maximum
, to enable the part
L
to move freely in the holder
M
. Manually move the part
L
a little forward or backward
whilst ensuring the distance between the outer end of the upper looper and the rear
of the lower looper is approximately 1 to 2 mm (see figure 4.5). Retighten the screw
U
.
Note:
After every change, it is essential to check the position of the outer end of the
upper looper in relation to the rear of the needle and if necessary to adjust as
described in the previous chapters.
Upon completion of any such adjustment, turn the handwheel and re-check the
position of the upper looper relative to the lower looper. Adjust, if necessary.
For each adjustment, remember to re-check all the positions and adjust until the
positions of the three parts are concordant.
From the Library of Superior Sewing Machine & Supply LLC


