background image


7


 OPERATION

IMPACT 1040

3.4 

PREPARING A NEW SPRAYER

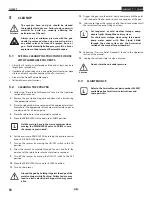
If this sprayer is new, it is shipped with test fluid in the fluid section to 

prevent corrosion during shipment and storage.  This fluid must be 

thoroughly cleaned out of the system with mineral spirits before you 

begin spraying.

Attention

Always keep the trigger lock on the spray gun in the 

locked position while preparing the system.

1. 

Place the siphon tube into a container of mineral spirits.

2. 

Place the return hose into a metal waste container.

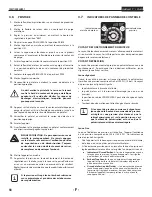
3. 

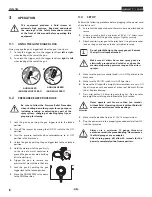
Set the pressure to minimum by turning the pressure control 

knob to the “MIN” setting.

RapidClean

RAPID

CLEAN

Pump OFF

Pressure

Control Knob

Pressure

Indicator

4. 

Move the PRIME/SPRAY valve down to the PRIME position.

5. 

Turn on the sprayer by moving the ON/OFF switch to the ON 

position.

6. 

Allow the sprayer to run for 15–30 seconds to flush the test fluid 

out through the return hose and into the waste container.

7. 

Turn off the sprayer by moving the ON/OFF switch to the OFF 

position.

3.5 

PREPARING TO PAINT

Before painting, it is important to make sure that the fluid in the system 

is compatible with the paint that is going to be used.

i

Incompatible fluids and paint may cause the valves 

to become stuck closed, which would require 

disassembly and cleaning of the sprayer’s fluid 

section.

Attention

Always keep the trigger lock on the spray gun in 

the locked position while preparing the system.

1. 

Place the siphon tube into a container of the appropriate solvent.  

Examples of the appropriate solvent are water for latex paint or 

mineral spirits for oil-based paints.

2. 

Place the return hose into a metal waste container.

3. 

Set the pressure to minimum by turning the pressure control 

knob to the “MIN” setting.

4. 

Move the PRIME/SPRAY valve down to the PRIME position.

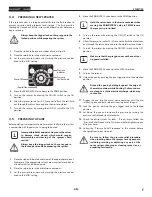
i

Hold the return hose in the waste container when 

moving the PRIME/SPRAY valve to PRIME in case 

the sprayer is pressurized.

5. 

Turn on the sprayer by moving the ON/OFF switch to the ON 

position. 

6. 

Allow the sprayer to run for 15–30 seconds to flush the old solvent 

out through the return hose and into the metal waste container.

7. 

Turn off the sprayer by moving the ON/OFF switch to the OFF 

position.

i

Make sure that the spray gun does not have a tip or 

tip guard installed.

8. 

Move the PRIME/SPRAY valve up to the SPRAY position.

9. 

Turn on the sprayer.

10. 

Unlock the gun by pushing the gun trigger lock to the unlocked 

position.

Ground the gun by holding it against the edge of 

the metal container while flushing.  Failure to do so 

may lead to a static electric discharge, which may 

cause a fire.

11. 

Trigger the gun into the metal waste container until the old 

solvent is gone and fresh solvent is coming out of the gun.

12. 

Lock the gun by pushing the gun trigger lock to the locked 

position.

13. 

Set down the gun and increase the pressure by turning the 

pressure control knob slowly clockwise.

14. 

Check the entire system for leaks.  If leaks occur, follow the 

“Pressure Relief Procedure” in this manual before tightening any 

fittings or hoses.

15. 

Follow the “Pressure Relief Procedure” in this manual before 

changing from solvent to paint.

Be sure to follow the pressure relief procedure 

when shutting down the sprayer for any purpose, 

including servicing or adjusting any part of the 

spray system, changing or cleaning spray tips, or 

preparing for cleanup.

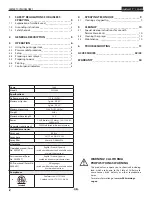
Summary of Contents for 0552600

Page 1: ...552896F AIRLESS HIGH PRESSURE SPRAYING UNIT GROUPE DE PROJECTION À HAUTE PRESSION AIRLESS EQUIPO DE ALTA PRESIÓN PARA PULVERIZAR OPERATING MANUAL EN OPERATING MANUAL 2 F MODE D EMPLOI 12 ES INSTRUCCIONES DE USO 22 Model 0552600 ...

Page 2: ...____________10 6 TROUBLESHOOTING_____________________ 11 ACCESSORIES_____________________________ 32 33 WARRANTY__________________________________ 34 Name 1040 Model 0552600 Specifications Gallons per minute 1 15 4 35 LPM Maximum tip sizes 1 gun 0 033 2 gun 0 021 Maximum pressure 3300 PSI 22 8 MPa Weight 98 lbs Maximum hose length 300 Power 2 5 HP Brushless DC Motor 100 120V AC 50 60Hz 15A Generat...

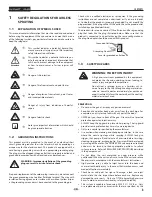
Page 3: ...ug that looks like the plug illustrated below Make sure that the product is connected to an outlet having the same configuration as the plug No adapter should be used with this product Grounded Outlet Grounding Pin Cover for grounded outlet box 1 3 SAFETY HAZARDS WARNING INJECTION INJURY A high pressure stream produced by this equipment can pierce the skin and underlying tissues leading to serious...

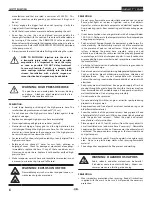
Page 4: ... open flame pilot lights or sources of ignition such as hot objects cigarettes motors electrical equipment and electrical appliances Avoid creating sparks from connecting and disconnecting power cords Use extreme caution when using materials with a flashpoint below 100ºF 38ºC Flashpoint is the temperature that a fluid can produce enough vapors to ignite Paint or solvent flowing through the equipme...

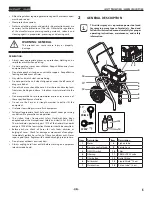
Page 5: ... a strength member to pull or lift the equipment Use lowest possible pressure to flush equipment Follow all appropriate local state and national codes governing ventilation fire prevention and operation The United States Government Safety Standards have been adopted under the Occupational Safety and Health Act OSHA These standards particularly part 1910 of the General Standards and part 1926 of th...

Page 6: ...ove the PRIME SPRAY valve down to the PRIME position 3 3 SETUP Perform the following procedure before plugging in the power cord of an electric unit 1 Ensure that the siphon tube and the return hose are attached and secure 2 Using a wrench attach a minimum of 50 of 1 4 airless spray hose to the outlet fitting on the sprayer Tighten securely 3 Attachanairlesssprayguntothesprayhose Usingtwowrenches ...

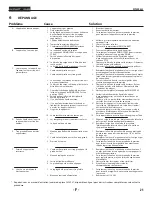
Page 7: ...oil based paints 2 Place the return hose into a metal waste container 3 Set the pressure to minimum by turning the pressure control knob to the MIN setting 4 Move the PRIME SPRAY valve down to the PRIME position i Hold the return hose in the waste container when moving the PRIME SPRAY valve to PRIME in case the sprayer is pressurized 5 Turn on the sprayer by moving the ON OFF switch to the ON posi...

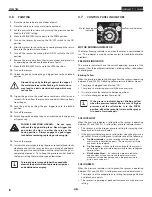
Page 8: ...3 7 CONTROL PANEL INDICATORS RAPID CLEAN Pressure Indicator Motor Running Indicator MOTOR RUNNING INDICATOR The Motor Running indicator is on when the motor is commanded to run This indicator is used by service centers to troubleshoot motor problems PRESSURE INDICATOR The pressure indicator shows the current operating pressure of the sprayer It has three different indications blinking yellow solid...

Page 9: ...should be moving when the trigger is pulled and released Overlap each stroke by about 30 This will ensure an even coating 25 30 cm 25 30 cm C i If very sharp edges result or if there are streaks in the spray jet increase the operating pressure or dilute the coating material 4 1 CLEANING A CLOGGED TIP i If the spray pattern becomes distorted or stops completely while pulling the trigger perform the...

Page 10: ...te container when moving the PRIME SPRAY valve to PRIME in case the sprayer is pressurized 6 Set the pressure to RAPID CLEAN by turning the pressure control knob to its RAPID CLEAN position 7 Turn on the sprayer by moving the ON OFF switch to the ON position 8 Allow the solvent to circulate through the unit and flush the paint out of the return hose into the metal waste container 9 Turn off the sp...

Page 11: ...he siphon tube suction set connection and tighten or re tape the connection with PTFE tape 4 Remove the pump filter element and clean Remove the inlet screen and clean 5 Remove the siphon tube suction set and clean 1 Replace the spray tip following the instructions that came with the spray gun 2 Replace the spray tip with a tip that has a smaller orifice following the instructions that came with t...

Page 12: ..._______________________ 35 12 CONTENU CARACTÉRISTIQUES TECHNIQUES IMPACT 1040 Nom 1040 Nº de modèle 0552600 Caractéristiques techniques Débit GPM 1 15 4 35 LPM Embout dimension max 1 pistolet 0 033 2 pistolet 0 021 Pression max 22 8 MPa Poids 44 5 kg Tuyau de pulvérisation dimension max 91 4 m Source de puissance 2 5 HP moteur DC de Brushless 100 120V AC 50 60Hz 15A Génératrice 5000 W désactiver l...

Page 13: ... configuration que la fiche mâle Ne pas utiliser d adaptateur avec ce produit Prise trifilaire Broche de mise à la terre Plaque murale de la prise 1 3 DANGERS POUR LA SÉCURITÉ RISQUE BLESSURE PAR PROJECTION Un courant de liquide à haute pression produit par cet équipement peut percer la peau et les tissus sous cutanés et entraîner des blessures graves ou une amputation Ne traitez pas une blessure ...

Page 14: ...oser PRÉVENTION Ne pulvérisez pas de matières inflammables ou combustibles près d une flamme nue de voyants lumineux ou de sources d ignition telles que des objets chauds cigarettes moteurs matériel et appareils électriques Évitez de produire des étincelles en connectant et en déconnectant les cordons électriques S entourer de toutes les précautions possibles lorsqu on utilise des produits ayant u...

Page 15: ... vide peut présenter des fuites suite à l usure les nœuds ou les mauvais traitements Une fuite risque d injecter du produit dans la peau N exposez pas le tuyau à des températures ou des pressions supérieures à celles spécifiées par le fabricant N utilisez pas le tuyau pour tirer ou soulever l équipement Utilisez la plus basse pression possible pour rincer l équipement Respecteztouslescodeslocaux é...

Page 16: ...ÉRIFICATIONS PRÉLIMINAIRES On doit procéder aux étapes suivantes avant de brancher le cordon d alimentation de l appareil 1 S assurer que le flexible et le bloc d aspiration soient solidement fixés 2 Fixer un flexible de vaporisation à tresse de Nylon conçu pour les appareils à dépression et mesurant au moins 15 mètres 50 pi 3 Fixer un pistolet à dépression au flexible de vaporisation ne pas fixer...

Page 17: ...e métallique 3 Régler la pression au minimum en mettant le bouton de régulation à la position MIN 4 Abaisser la soupape PRIME SPRAY à la position PRIME i Tenez le tube de retour dans le conteneur de déchets en faisant passer le PRIME SPRAY soupape de PRIME dans le cas où le pulvérisateur est sous pression 5 Mettre l appareil en marche en mettant le commutateur à la position ON 6 Laisser le vaporis...

Page 18: ...maturée et produira des éclaboussures de surpulvérisation 3 7 INDICATUERS DE PANNEAU DE CONTRÔLE RAPID CLEAN Indicateur de pression Indicateur de marche du moteur VOYANT DE FONCTIONNEMENT DU MOTEUR Le voyant de fonctionnement du moteur s allume quand le moteur est mis en marche Ce voyant est utilisé par les centres de réparation pour dépanner les moteurs défectueux VOYANT DE PRESSION Le voyant de ...

Page 19: ...z la gâchette avant la fin du passage Le pistolet pulvérisateur doit être en mouvement au moment d appuyer sur la gâchette ou de la relâcher Faites chevaucher les passages sur environ 30 pour garantir une couche uniforme 25 30 cm 25 30 cm C i Si les bords de projection sont trop nets ou s il y a des bandes dans le jet il faut soit augmenter la pression de projection soit diluer davantage le produi...

Page 20: ...ur de déchets en faisant passer le PRIME SPRAY soupape de PRIME dans le cas où le pulvérisateur est sous pression 6 Régler la pression pour le rapid clean par pulsations en mettant le bouton de régulation à la position RAPID CLEAN 7 Mettre l appareil en marche en mettant le commutateur à la position ON 8 Laisser le solvant circuler dans l appareil pour évacuer le produit de peinture par le flexibl...

Page 21: ... d une montre en position PRIME 3 Vérifier le branchement du flexible du siphon d aspiration et serrer ou recoller le raccord avec du ruban en PTFE 4 Démonter le filtre de la pompe et le nettoyer Démonter le filtre d entrée et le nettoyer 5 Démonter le flexible du siphon d aspiration et le nettoyer 1 Remplacer l embout d aspiration selon les consignes qui accompagnent le pistolet de vaporisation 2...

Page 22: ..._____________________ 32 33 GARANTÍA___________________________________ 35 Nombre 1040 Núm de modelo 0552600 Datos técnicos Capacidad GPM 1 15 4 35 LPM Tamaño max de soportes 1 pistola 0 033 2 pistola 0 021 Max presión de pulverización 22 8 MPa Peso 44 5 kg Manguera dimensión máxima 91 4 m Suminstro eléctrico 2 5 HP motor DC de Brushless 100 120V AC 50 60Hz 15A Requistos eléctricos de generado 500...

Page 23: ...stale un receptáculo adecuado Este producto es para utilizarse en un circuito de 120 voltios nominales y tiene un enchufe a tierra que tiene un aspecto similar al ilustrado más abajo Asegúrese que el producto esté conectado a un tomacorriente que tenga la misma configuración que el enchufe No deben utilizarse adaptadores para este producto Receptáculo conectado a tierra Pata a tierra Tapa de la ca...

Page 24: ...én dispuestos de forma que minimicen el peligro de deslizamientos tropiezos y caídas PELIGRO EXPLOSIONES E INCENDIOS Los vapores inflamables como los vapores de las pinturas y los solventes pueden encenderse o explotar en el área de trabajo PREVENCIÓN Nopulvericematerialesinflamablesnicombustiblescercadellamas desnudas pilotos o fuentes de ignición como objetos calientes cigarrillos motores equipo...

Page 25: ...na fuga puede inyectar material en la piel No exponga la manguera a temperaturas o presiones que superen las especificadas por el fabricante No utilice la manguera como elemento de fuerza para tirar del equipo o levantarlo Utilice la presión más baja posible para enjuagar el equipo Cumpla todos los reglamentos locales estatales y nacionales pertinentes relativos a ventilación prevención de incendi...

Page 26: ...a PRIME SPRAY a la posición PRIME 3 3 CONFIGURACIÓN Realice el procedimiento a continuación antes de enchufar el cable de alimentación de una unidad eléctrica 1 Fíjese que el juego de succión y la manguera de retorno estén conectados y seguros 2 Conecte un mínimo de 50 pies de manguera rociadora sin aire de nilón a la unidad 3 Conecte la pistola rociadora sin aire a la manguera rociadora No conect...

Page 27: ...o en un recipiente metálico para desecho 3 Fije la presión al mínimo girando la perilla de control de presión al ajuste MIN 4 Mueva hacia abajo la válvula PRIME SPRAY a la posición PRIME i Sujete el tubo de retorno en el contenedor de residuos al mover el PRIME SPRAY válvula de PRIME en caso de que el pulverizador es presurizado 5 Encienda la unidad moviendo el interruptor de ON OFF a la posición ...

Page 28: ...dicador de motor encendido INDICADOR DE FUNCIONAMIENTO DEL MOTOR El indicador de funcionamiento del motor se enciende al poner en marcha el motor Este indicador se utiliza en los centros de servicio para solucionar problemas del motor INDICADOR DE PRESIÓN El indicador de presión muestra la presión de funcionamiento actual del pulverizador Muestra tres indicaciones diferentes amarillo intermitente ...

Page 29: ...prieta y suelta el gatillo Superponga cada trazo cerca de 30 Esto garantizará un recubrimiento parejo 25 30 cm 25 30 cm C i Al presentarse zonas con bordes y franjas en el chorro de pulverizado aumentar la presión de servicio o diluir el material de recubrimiento 4 1 LIMPIEZA DE LA BOQUILLA PULVERIZADORA i Si el patrón de pulverización se distorsiona o se detiene completamente durante la pulveriza...

Page 30: ... el PRIME SPRAY válvula de PRIME en caso de que el pulverizador es presurizado 6 Fije la presión en RAPID CLEAN girando la perilla de control de presión a su posición RAPID CLEAN 7 Encienda la unidad moviendo el interruptor de ON OFF a la posición ON 8 Deje circular el solvente a través de la unidad y purgue la pintura de la manguera de retorno hacia el recipiente metálico para desecho 9 Apague la...

Page 31: ...hasta la posición PRIME 3 Compruebe la conexión del tubo de sifón juego de succión y apriete o vuelva a asegurar la conexión con cinta PTFE 4 Quite el elemento del filtro de bomba y límpielo Quite la malla de entrada y límpiela 5 Quite el tubo de sifón juego de succión y límpielo 1 Quite la punta rociadora siguiendo las instrucciones suministradas con la pistola rociadora 2 Reemplace la punta roci...

Page 32: ...s 651 139 Tip Swivel Pivot de buse Dispositivo giratorio de la boquilla 661 020 Tip seat and seal kit 5 pack Trousse de siège rondelle 5 pièces Juego de asiento de montura arandela 5 piezas Filters Filtres Filtros 0089957 Coarse Mesh Filter Green Filtre à grosses mailles vert Filtro de malla gruesa verde 0089958 Medium Mesh Filter White Filtre à mailles moyennes blanc Filtro de malla media blanco ...

Page 33: ...ula antisalpicaduras 0538900 Spray Guide Kit Trousse de Spray Guide Juego de Spray Guide Lubricants and cleaners Lubrifiants et nettoyeurs Lubricantes y limpiadores 314 482 Liquid Shield 1 Quart Liquid Shield 0 95 l Liquid Shield 0 95 l 314 480 Piston Lube 8 oz Piston Lube 8 oz Piston Lube 8 onzas 700 926 Piston Lube 1 Quart Piston Lube 0 95 l Piston Lube 0 95 l 0297055 Pump Shield Pump Shield Pum...

Page 34: ...paid by the End User Repaired or replaced equipment will be returned to the End User transportation prepaid THERE IS NO OTHER EXPRESS WARRANTY TITAN HEREBY DISCLAIMS ANY AND ALL IMPLIED WARRANTIES INCLUDING BUT NOT LIMITED TO THOSE OF MERCHANTABILITY AND FITNESS FOR A PARTICULAR PURPOSE TO THE EXTENT PERMITTED BY LAW THE DURATION OF ANY IMPLIED WARRANTIES WHICH CANNOT BE DISCLAIMED IS LIMITED TO T...

Page 35: ...NARÁ UNA ASISTENCIA RAZONABLE AL COMPRADOR PARA REALIZAR CUALQUIER RECLAMACIÓN POR EL INCUMPLIMIENTO DE ESTAS GARANTÍAS GARANTIE Titan Tools inc Titan garantit qu au moment de la livraison à l acheteur original Utilisateur l appareil couvert par la présente garantie sera exempt de défauts de matériaux et de fabrication Les responsabilités de Titan en vertu de cette garantie se limitent au remplace...

Page 36: ...36 UNITED STATES SALES SERVICE INTERNATIONAL WEB www titantool com PHONE 1 800 526 5362 1770 Fernbrook Lane Minneapolis MN 55447 EMAIL international titantool com IMPACT 1040 ...

Reviews: