No.6539-F
No.6540-F
Thunder Tiger Corporation guarantees this model kit to be free from defects in both material and workmanship. The total monetary value under
warranty will in no case exceed the cost of the original kit purchased. This warranty does not cover any components damaged by use or modification.
Part or parts missing from this kit must be reported within 60 days of purchase. No part or parts will be sent under warranty without proof of
purchase. To receive part or parts under warranty, the service center must receive a proof of purchase and/or the defective part or parts. Should
you find a defective or missing part, contact the authorized Thunder Tiger Service/Distributor nearest you. Under no circumstances can a dealer
or distributor accept return of a kit if assembly has started.
WARRANTY
品質保證事項
本公司對於製造過程中產生之瑕疵,負完全品質保證責任。
保證事項僅限於產品本身與隨產品所附之零配件。
品質保證不包含下列事項
因使用、組裝或調整本產品所發生之損壞。
其他所有非產品本身品質所造成之損壞。
Instruction Manual
The contents are subject to change without prior notice due to product improvements and specificatrion changes.
操作說明書
1/10 ELECTRIC POWERED 2WD TRUCK & BUGGY
1:10
電動四驅越野車
本套件所附之零件可能跟圖示有所差異。因產品後續之設計研發或功能不斷改善之原因,我們將保留產品規格變更權力,不再另行通知使用者。
This radio control model car is not a toy! Before beginning operation, please read this manual thoroughly.
本產品為高性能模型非一般玩具,操作前請詳閱本產品說明書。
Thank you for your purchase of this Thunder Tiger product. You should enjoy many hours of fun and excitement from this advanced
R/C model. Thunder Tiger strives to bring you the highest level of quality and service we can provide. We race and test our cars around
the world to bring you state-of-the-art products.
We offer on-line help on our www.thundertiger.com forum and our product specialists are ready to take your call if you have any technical
questions. Please read all instructions and familiarize yourself with the systems and controls of this model before running. Have fun
and enjoy the exciting world of R/C!
感謝您購買雷虎科技產品。雷虎科技以提供最高品質的產品及服務作為持續努力的目標。並藉由參與競賽及重覆測試產品,不斷累積經
驗,進而提昇設計及製造品質,期望能呈現給您最頂級之工藝產品。本使用說明書包含了操作本產品前所需注意的重要事項,建議您在
開始準備及操作本產品之前,能詳閱此說明書,並熟悉本產品之操控系統。若是您在產品的操作及使用上有任何的疑問,歡迎多加利用
我們所提供的
24
小時諮詢留言版或洽詢雷虎科技授權經銷商。雷虎科技的全球英文網址為
www.thundertiger.com
,我們將竭誠為您服務!
Thanks you for purchasing a Thunder Tiger product.
Please read all instructions thoroughly before operation.
1. This product is not a toy. It is a high performance model product. It is important to familiarize yourself with the model, its manual,
and its construction before assembly or operation. Children's operating under the supervision of the adults is necessary.
2. Always keep this instruction manual ready at your hand for your assembling and operating reference, even after completing the
assembly.
3. Do not operate model products in rain, on public roads, near crowds, near airport, or near areas with restricted radio operation.
4. This product, its parts, and its construction tools can be harmful to your health. Always exercise extreme caution when assembling
and/or operating this product. Do not touch any part of model that rotates.
5. Check your radio frequency with the proper operating frequency of the area or country. Always check if there are any modelers
operating on the same frequency as you are. Also, check your radio for proper operation before operating a model.
6. Use an adequate charger for the batteries and follow the instruction correctly.
7. Right after use, do not touch equipment on the model because they may generate high temperatures!
8. Do not stall the motor. The ESC may fail if power is applied to the motor when car cannot move freely.
9. By the act of assembling or operating this product, the user accepts all resulting liability. If the buyer is not prepared to accept this
liability, then he/she return this product in new, unassembled, and unused condition to the place of purchase.
WARNING: To avoid a possible fire hazard, ALWAYS unplug the battery after use. Do NOT leave your vehicle unattended with
the battery plugged in.
感謝您購買雷虎科技產品,在您開始操作本產品前,請詳閱本產品說明書。
1.
本產品為高性能模型產品非一般玩具,組裝與操作過程皆須由成人陪同。請詳讀此本使用說明書,避免因組裝錯誤與操作不當造成損壞。
2.
請妥善保管此說明書,對於後續維修、操控說明將可提供您協助。
3.
請勿於雨天、公眾空間、道路、機場附近與其他限制遙控模型活動區域,操控本項產品。
4.
此項產品具有相當之危險性,於組裝、調整、操控上的不熟悉都可能造成自身或他人的傷害,當發生這些傷害事件時製造商是可以免除
責任的,建議您於初次使用本產品前,先行請教具有相當程度經驗同好或是專業雷虎經銷商與模型專賣店。
5.
請您確認您所在地區對於頻率規定之相關法規,來選用適當的頻率。避免與其他同好使用相同頻率造成失控事件。
6.
請使用合格之電池充電器並遵循說明書之使用規範,以免發生危險。
7.
車輛操作後,請小心誤觸碰到會產生高溫之零件部分,以避免燙傷。
8.
車輛作動時,請勿以異物強制停止馬達(輪胎)以避免電子速控器超出承載負荷而失效。
9.
如使用者對於產品品質或操作組裝上所須負擔之風險有任何疑慮,請勿開封組裝或進行操作本產品並將產品退回原購買地點。
警告!
為避免因電線短路等因素而引起之可能災害
,
請務必於操作本產品後,將電池接頭拔除以避免可能發生之危險!
請勿在電池接頭
未經拔除前就將產品儲藏於無法留意之處。
CAUTION
注意事項
INDEX
索引
INTRODUCTION
前言
1
CAUTION
注意事項
1
ITEMS REQUIRED FOR OPERATION
周邊配件
2
CHARGING THE BATTERY PACK
電池包充電
3
PREPARING THE CHASSIS
操作前,車體準備
3
PREPARING THE RADIO
遙控器準備工作
4
RADIO BATTERY INSTALLATION
遙控器電池安裝
4
RADIO OPERATION
遙控器操作
4
OPERATING RADIO STEERING FUNCTION
遙控器設定-轉向
5
INTRODUCTION
前言
ADJUSTING ELECTRIC SPEED CONTROL(ESC)
速控器調整
5
VELOCI SPECIAL FEATURE
速控器過溫保護特性
7
SHOCK ADJUSTMENT
避震器懸吊調整
7
WHEEL AND TIRE PREPARATION
輪胎及輪轂
7
MAINTENANCE AFTER RUNNING
車體保養
8
DRIVING BASIC
操控基本動作
8
DRIVING TIPS
操控的小技巧
9
TROUBLESHOOTING
常見問題與解決辦法
10
SET UP
設定
11
CHARGING THE BATTERY PACK
電池包充電
(Battery and Charger are not included in the kit.
本產品不含電池及充電器
)
1
Problem
可能原因
Speed control over heats
速控器過熱
TROUBLESHOOTING
常 見 問 題 與 解 決 辦 法
If you have trouble starting or keeping your PHOENIX ST/BX running, here's a quick checklist of what to look for first.
如果您的
PHOENIX ST/BX
有行駛上的問題,您可以參考下表的說明。
如果問題無法解決,請與原購買經銷商聯絡。
Description
問題
Car dies or slows
車不動或速度變慢
a.
Install 8 AA-size alkaline batteries into transmitter.
b.
Install the power pack (stick type battery pack shown in the picture) and connect to the ESC. (6607)
Caution: Check all the wiring and connections before you connect the speed control to a drive battery. Incorrect polarity
will wreck your speed control.
a.
安裝發射機電池或電池包。
b.
將開關座固定於接收機旁(如圖示)。將模型專用
7.2V
條狀
充電電池裝入底板上並以
R
型固定插銷固定電池上蓋,連接電池條開關與
速控器。
注意!如使用自行焊接之充電電池請注意電池與速控器接線之正負極位置(反裝電極將造或電池短路或速控器之損壞)。
RADIO BATTERY INSTALLATION
遙控器電池安裝
4
a.
Once the battery ready to be charged, first plug the AC quick charger into the outlet of AC power source, and then connect the
battery input/output harness to the charger.
b.
Continued to monitor the battery as it is being charged. As soon as the battery is fully charged, disconnect the battery. from the
charger plug (Over-charging or charging incorrectly using inadequate chargers may cause the battery pack to become dangerously
hot).
c.
Make sure that the battery pack is completely discharged prior to charging. Discharging the battery pack by running the electric
motor until it slows down or using a discharger (Not included).
d.
For best results, let the battery pack cool before charging. Heat may prevent the battery pack from charging to full capacity and
also decreases the performance of the battery.
a.
準備充電時,首先將充電器之插頭插入電源插座,再連接電池之充/放電接頭。
b.
充電過程中請注意電池之充電情況。電池充電完成將電池與充電器接頭分開。(電池過充或是不適當之充電將可能到導致電池產生
危險之過熱情況,如電池溫度超過攝氏
45
度需立即停止充電。)
c.
電池充電前最好先確認電池是否已經完全放電。倘若尚未放電完全,可將車子加速直到馬達轉速變慢或使用專業放電器放電(另購)。
d.
為得到最佳之充電效果,電池使用完畢請勿馬上進行充電,充電前請先確認電池溫度已下降再行充電,以延長電池壽命及電池性能。
a.
When turning radio on, first turn on the transmitter.
b.
Then, turn on the ESC. When turning off, first turn the ESC off, then the transmitter off.(6667)
c.
To reverse the functions of servos, use the small, white servo reverse switches located on side of the pistol transmitter (or the
inset servo reverse switches located at the bottom of the stick transmitter). To trim the servos on pistol transmitter, use the trim
switches on side of the steering wheel (the ST. trims steering, and the TH trims throttle/brake). On a stick transmitter, the trim
levers are located accordingly around the sticks.
Caution: Do not run flat the battery of your transmitter in case of losing control of the car. For more details, please check
the transmitter instruction manual.
a.
為避免車子失控暴衝,先開啟發射機電源。
b.
接著開啟速控器電源。電源的關閉則是相反的順序,先關速控器電源,再關發射機電源。
c.
伺服機的正逆轉開關,槍型發射機在左側
(桿型發射機在底部)
。更詳細的使用說明,請參考遙控器使用說明。
注意!
操作前請先確認電池處於充飽電之狀態,以免發生失控之狀況。其他注意事項請參考發射機說明書。
RADIO OPERATION
遙控器操作
OPERATING RADIO STEERING FUNCTION
遙控器設定-轉向
6
a.
Check the radio steering functions. With the radio transmitter and receiver on, turn the steering wheel/stick to the left. The front
tires/wheels should turn left accordingly. If not, flip the steering servo reverse switch.
b.
Return the steering wheel/stick to neutral. The front tires/wheels should point straight forward. If not, use the steering trim lever
to correct it.
c.
Turn the steering wheel/stick to the right. The front tires/wheels should turn right accordingly.
a.
確認轉向功能。打開發射機及接收機電源,方向轉左邊時,輪胎將朝向左邊,若方向不一致,請調整方向的正逆轉開關。
b.
方向舵(桿)回中立點時,前輪應筆直向前,若有偏差,請調整方向舵(桿)微調旋鈕。
c.
方向舵(桿)轉向右邊時,前輪應轉向右邊。
b
b
a
c
a
b
c
a
b
c
3
a.
Install the antenna into transmitter.
b.
Check the frequency printed on the transmitter crystal.
c.
Check the frequency printed on the receiver crystal, and make sure it matches with the transmitter crystal. Make sure no one will
operate on the same frequency when you are. When there is a radio glitch, it will most likely be caused by improper crystal, damaged
crystal, or people operating on the same frequency.
a.
裝上發射機天線。
b.
檢查發射機頻率。
c.
檢查接收機晶體頻率,確 認發射機與接收機頻率是否相同。大部份搖控器 會失靈可能都是頻率造成或附近有人使用相同的 操控頻
率。並確認所有的電子接線都牢固,且依序連結在接收機的連結插孔,確認完畢後,將接收機放回接收機盒並且安全的固定好。將
多出的線路以束帶纏繞整理並固定於適當地方,線路安排應避免靠近轉動的零件以免線路受損。
PREPARING THE RADIO
遙控器準備工作
b
a
PREPARING THE CHASSIS
操作前,車體準備
2
a
b
a.
Remove the body pins (2pcs.) and detach the body.
b.
Straighten antenna with a screwdriver so it is eaiser to insert into antenna tube.
c.
Put the antenna wire through the antenna pipe. ( Do not cut or shorten antenna wire.!) Push the antenna pipe into the chassis
mount hole.
a.
將車殼固定車銷(共
2
個)拆除以取下車殼
b.
利用螺絲起子將接收機天線桿直以方便將天線穿套進天線管內
c.
將天線開關安裝於底板固定孔上(請勿裁短天線以免影響接收距離)
Hex Wrench Set, 1.5mm / 2.0mm / 2.5mm / 3.0mm
六角扳手
, 1.5mm / 2.0mm / 2.5mm / 3.0mm
AA Alkaline dry batteries 8 pieces for transmitter
發射機用電池
ITEMS REQUIRED FOR OPERATION
周邊配件
7.2V Battery Pack
2974 IB Ni-MH Batter Pack, 7.2V/IB3000
2977 IB Ni-MH Batter Pack, 7.2V/IB4200
7.2V
充電電池條
7.2V Compatible Power Charger
(AC/DC Charger)
7.2V
充電器
4-Way Wrench
4
向六角螺帽套筒板手
2-Channel Surface or Pistol Radio
with Standard Servo.
2
動作發射機、接收機及伺服機
Electric Speed Control
8050 ACE R/C VELOCI RS
電子速控器
Motor SUPER 17
17 turn
馬達
1
CONNECT BATTERY PLUG
TO DC OUTLET PLUG FROM CHARGER.
連接電池與充電器
PLUG INTO AC OUTLET.
插入
AC
插座
2
AFTER CHARGE TIME EXPIRES, DISCONNECT
BATTERY PLUG FROM CHARGER PLUG.
充飽電池後,將電池與充電器接頭分離
3
c
(Picture shows the Ace R/C “Veloci-RS" electric speed control pre-
installing on PHOENIX ST/BX Ready-To-Run version). Before operating
your model, you have to set to either NEUTRAL, HIGH SPEED and
BRAKE position of the electric speed control prior running the motor.
a.
Make sure the motor is disconnected or ensure some other way
that the wheels are free to rotate.
b.
Turn the transmitter on.
c.
Connect your battery pack.
d.
Turn the power (ESC) switch on.
e.
Find the supplied tuning wand in the package or a small screwdriver.
f.
Hold the set-up button pressed in for at least 3 seconds using the plastic tuning wand supplied.
g.
The set-up LED now flashes RED/GREEN to indicate that the ESC is in the set-up mode.
h.
Leave the throttle stick at the neutral position and the throttle trim knob/lever in the middle
i.
Press the set-up button, the neutral setting is now stored, and the set-up LED lightens GREEN.
j.
Move the transmitter stick to full-throttle.
k.
Press the set-up button with the stick still in this position.
l.
The full-throttle setting is now stored, and the set-up LED lightens RED.
m.
Move the transmitter stick to full brake
n.
Press the set-up button with the stick still in this position.
o.
The brake setting is now stored, and the set-up LED flashes 3 times simultaneously and then goes RED/GREEN light still.
CONGRATULATIONS!
Your electric speed control is now completely set-up. Reattach the motor cord, you are ready to run.
●
Remember this! The transmitter is always the
FIRST TO BE TURNED ON
and
THE LAST TURNED OFF
.
●
If you make a mistake during the set-up procedure, don't worry: disconnect the battery for about 10 seconds and start again from
the first step.
●
Refer to the instruction manual for more information on setting the electric speed control.
a.
請先確認馬達之電源線是處於拔除的狀態或是將車子放置於輪胎可懸空的平台上。
b.
先打開發射機電源。
c.
接上電池。
d.
將速控器開關打開。
e.
使用調整棒或小號之螺絲起子調整。
f.
按下速控器上“設定
set-up
”之按鈕,停留約
3
秒鐘。
g.
按鈕旁之
LED
狀態燈將同時閃爍“紅/綠燈”,此燈號表示速控器已進入調整模式。
h.
確認發射機油門位處於中立點位置(油門板機/撥桿不動),油門微調鈕調整至中間位置。
i.
再按一次“設定
set-up
”鈕,將中立點之位址寫入速控器內,此時
LED
狀態燈將同時亮“綠燈”。(不閃爍)
j.
再將油門板機/撥桿扳動至全油門狀態並且暫時按住不放。
k.
接著再按一次“設定
set-up
”鈕。
l.
此時便已將全油門之位址寫入速控器內,此時
LED
狀態燈將同時亮
“紅燈”。(不閃爍)
m.
緊接著將油門板機/撥桿扳動至全煞車/後退狀態並且暫時按住不放。
n.
接著再按一次“設定
set-up
”鈕。
o.
此時便已將全煞車/後退之位址寫入速控器內,此時
LED
狀態燈將同時連續閃爍“紅/綠燈”
3
次之後跳回靜止不閃爍之“紅/綠燈”狀態。
恭喜你
你的速控器已被重新設定完成,重新接上馬達電源線,接下來便可進行車輛之操控。
請注意!
為避免失控暴衝,須先開啟發射機電源
再接著開啟速控器電源。關閉時則順序相反。當設定速控器時若需要重新開始,只要把電源接頭拔除約
10
秒鐘即可重新記憶。更多關
於速控器之資訊,請參考速控器說明書。
g
h
i
GREEN / RED
GREEN
7
ADJUSTING ELECTRIC SPEED CONTROL(ESC)
速控器調整
d
e
f
b
c
j
k
l
m
n
o
SHOCK ADJUSTMENT
避震器懸吊調整
Use the included shock clips to adjust for spring pre-load.
使用內附的避震器調整環,調整車身高度。更詳細的調整方式請參考設定表。
Hard Suspension
懸吊較硬
Soft Suspension
懸吊較軟
a.
Hold your elbows in and keep the
transmitter antenna pointing straight
up.
a.
手持發射機時請將雙肘靠緊身體並保
持發射機天線朝上。
DRIVING TIPS
操控的小技巧
12
e.
At first, set the steering D/R function
for less steering response.
e.
初學者可參考發射機說明書調整
D/R
功
能,以避免轉向太過靈活不易操控。
b.
Squeeze the throttle trigger or pull the
throttle stick gently and steer the car
to left and right.
b.
開始操控前按扣油門板機(油門拉桿)
時請緩慢增加油門並試著熟悉前輪轉
向操作。
c.
Squeeze the throttle trigger and
release. Repeat this action to control
car speed.
c.
初學者請先熟悉油門操控再慢慢加快
車子行進速度。
d.
If you are of unsure of the steering
direction, practice with the transmitter
facing towards you.
d.
假設你不確定發射機的轉向,將發射
機轉輪面向自己,先熟悉左右轉向。
h.
Practice doing figure 8S.
h.
建議可以使用繞
8
字來熟悉發射機操控動作。
f.
Be careful not to squeeze the throttle
trigger abruptly while steering.
f.
轉向時請勿將油門全開以避免速度過
快導致失控翻覆。
g.
After you become used to the controls, experiment with high
performance possible at full throttle and full steering.
g.
熟悉前述基本操控後再試著將油門全開進行高速操控。
Solution
解決方法
Let it cool and try later
先冷卻,稍後再試
Car has a problem on power
車子的動力有問題
Car is glitching
車故障
Check for loose wires, dead radio batteries or loose crystals.
檢查電線、震盪晶體是否脫落或遺失
Check motor capacitors, losse wires or crystals.
檢查馬達之焊接電容是否鬆脫或是連結電線脫落
Gear mesh is too tight
馬達驅動齒輪太緊
Motor is overheats
馬達過熱
Let motor cool and check recommended gearing for motor
type. Reset gear mesh
先讓馬達冷卻,再重新調整合適的齒隙
Battery is discharged
電池沒充電
Battery not plugged in
電池沒接好
No power
失去電力
Charge battery
將電池充電
Charge battery
將電池接頭確實連接遙控車
Motor not plugged in
馬達連接線沒接好
Motor failure
馬達損壞
No throttle, only steering
只能控制左右轉向,但不會前進及後退
Motor keeps running
未扣引發射機油門,馬達卻持續轉動
No throttle
失去動力
Plug motor in
確實接上黃、藍端之馬達電源傳輸線(黃對黃、藍對藍)
Replace motor
置換新馬達
A-T-L function works;turn off the vehicle first and follow the
guide to turn on the radio. (Radio first, vehicle second!!!)
可能為內建自動安全鎖保護裝置開啟。重新啟動卡車需先將
電源關掉,並依照正確步驟啟動卡車(先開發射機,再開車子)
Check if the throttle trim knob is in neutral position.
檢查是否油門微調鈕不在中立點的位置
Servo not plugged in
轉向伺服機未安裝好
Locked up steering linkage
轉向裝置卡死
Servo failure
伺服機失靈
No steering
失去控制
Plug servo into ESC unit
將連接電線接上速控器
Free up steering linkage
排除可能的干涉(卡住)的零件部位
Replace servo
置換新伺服機
Goes backwards when you pull the
trigger or goes right when turning the
wheel left
當扣引 放開發射機油門板機,車子卻
後退 前進或是發射機方向轉輪之轉向
跟車子轉向左右相反
Reversing
後退功能
Check throttle / steering reversing switches on transmitter
檢查發射機上之油門 轉向的反轉開關是否反轉?
RTR CONTENTS
完成車輛配備
EQUIPMENT NEEDED
需求配件
WHEEL AND TIRE PREPARATION
輪胎及輪轂
a.
Remove wheel cap crew using equipped 3mm hex wrench and detach wheels.
b.
Replace fresh tires and wheels if the original tires worn out seriously.
c.
Tighten the wheel cap screw down with the washer.
a.
使用內附之六角板手將輪轂上六角固定螺絲取下。
b.
將已磨損嚴重之輪胎組取下後換上新的輪胎組。
c.
將六角固定螺絲及墊片重新鎖緊。
b
c
10
a
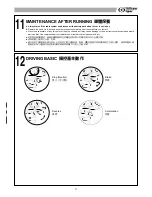
Stop (Neutral)
停止(中立點)
Reverse
後退
Brake
煞車
Acceleration
加速
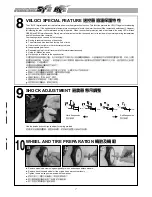
VELOCI SPECIAL FEATURE
速控器過溫保護特性
The VELOCI digital speed controls feature a new overheat protection function. This function protects the VELOCI against overheating
during operation. If the speed controls temperature exceeds safe levels, the motor function will be temporarily switched off. However,
full steering function is still maintained during this period. When the overheat protection mode is activated, the setup LED will flash
GREEN and RED simultaneously. Simply wait a few minutes to allow the speed control to cool down to normal operating temperatures
and full function will be restored.
Overheating may be caused by the following:
a.
Driving in reverse in excess of 8 seconds.
b.
The motor used has less than factory limit of turns.
c.
Gear mesh is too tight or other drivetrain problems.
d.
Inappropriate gear ratios.
e.
Repeatedly going from full reverse to full forward instantaneously.
f.
Using full brakes too often.
g.
Not enough ventilation to the speed control.
本速控器設有過溫保護之功能,此功能將會於下列情況進行過溫斷電保護機制,以避免過高的內部溫損害速控器本體。此時LED狀態
燈將同時連續閃爍“紅/綠燈”,當遇到此狀況時不需驚慌,請靜待幾分鐘冷卻後速控器便可恢復原先之功能
,速控器原先之設定將
會繼續保留,不須重新設定。
速控器過溫保護機制啟動原因可能如下:
a.
連續後退超過
8
秒鐘。
b.
自行改裝之馬達圈數超過此速控器之安全限制
(出廠內定為
17T
改裝馬達)。
c.
齒隙比太緊或是傳動系統問題,造成馬達負荷過重。
d.
自行改裝搭配不適當之驅動齒終傳比。
e.
連續不斷進行“前進-後退”操控。
f.
連續使用全煞車/後退,次數太頻繁。
g.
速控器安裝位置錯誤,散熱空間不足。
8
9
a


