LSK-GG
Chapter 4: Getting Started
Rev A, November 11, 2016
Page 5
Chapter 4 Getting Started
This section is provided for those interested in getting the Laser Scanning Kit-Galvo Galvo Scan Head up and
running quickly.
4.1. Unpacking and Inspection
Open the package, and carefully remove the Laser Scanning Kit and its accessories. The table lists the standard
accessories shipped with the device.
Name
Quantity
Scan Head
1
Galvo/Galvo Controller
1
DB-25 Connector Cable
1
AC Power Cord
1
ER05 Rod
4
Inspect the device and its accessories for any missing parts or damage. If there is any problem, please contact our
nearest office (see
Chapter 12 Thorlabs Worldwide Contacts
for details).
4.2. Setting Up the LSK-GG
Preparation
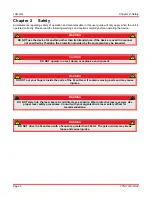
WARNING
If using a high power laser, please consult with your organization’s laser safety officer to make sure
that the entire system is laser safe. The output port includes SM1 threading to mount lens tubes or
blocks to make the device laser safe.
WARNING
DO NOT switch on the laser while installing the Laser Scanning Kit. This may cause injury due to
laser radiation. Make sure the laser source is off.
1. Place the unit on a dry, level working surface.
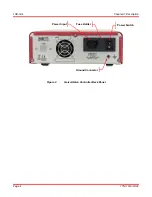
Make sure the vent on the controller’s back panel is free from obstruction.
2. Connect a grounded Banana Plug (not included) to the
Ground Connector
of the Controller.
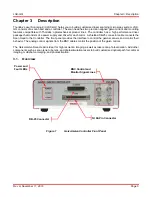
3. Connect the female end of DB-25 Connector cable to the
Scanner
port of the Controller and the other end
to the Scan Head.
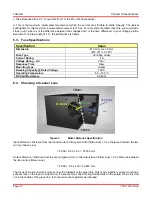
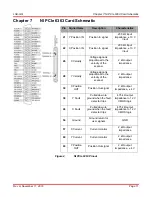
4. Connect either an NI 68-Pin Connector (not included) to the
DAQ
port or two BNC cables (not included) to
the
X IN
and
Y IN
port to control each galvo mirrors. . The analog input signal impedance is 200 kΩ. The
input signal can be a DC or a sine wave.
♦
If using an NI 68-Pin Connector, connect the other end to a NI Breakout Box or NI card. The analog
input pins 21 and 22 control the position of Y mirror and X mirror respectively.
We recommend a high density shielded NI connector (NI SH68-68 cable to connect to NI Breakout box or
NI SHC68-68-EPM cable to connect to NI card).
♦
If using BNC cables, connect the other end of the cables to a voltage generator.


