

1
I
mportant
GB
GB
ON THIS USER MANUAL: This user manual being common to several VCR models, some
functions or settings may not be available on the model you have bought.
J
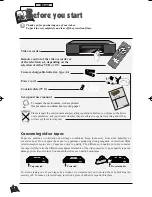
Before you start . . . . . . . . . . . . . . . . . .2
Concerning video tapes
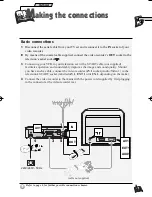
Making the connections . . . . . . . . . . . .3
Basic connections
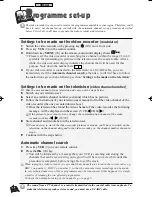
Programme set-up . . . . . . . . . . . . . . . .4
Settings to be made on the video recorder
(modulator)
Settings to be made on the television
(video channel number)
Automatic channel search
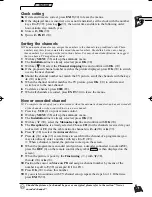
Clock setting
Sorting the channels
New or encoded channel
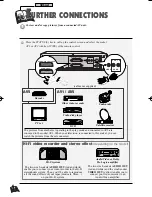
Further connections . . . . . . . . . . . . . . .6
AV1 / AV2
Hi-Fi video recorder and stereo effect
(depending on the model)
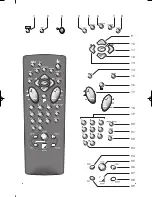
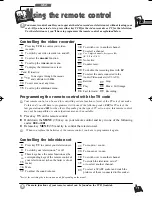
Using the remote control . . . . . . . . . . .7
Controlling the video recorder
Programming the remote control
with the TV code
Controlling the television set
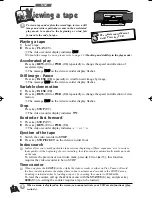
Viewing a tape . . . . . . . . . . . . . . . . . . . . . . .8
Playing a tape
Accelerated play
Still image - Pause
Variable slow motion
Stop
Rewind or Fast forward
Ejection of the tape
Index search
Time counter
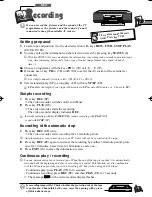
Recording . . . . . . . . . . . . . . . . . . . . . . . . . . .9
Getting prepared
Simple recording
Recording with automatic stop
Continuous play / recording
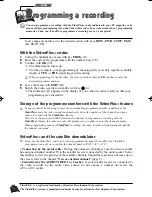
Programming a recording . . . . . . . . .10
With the Vi codes
Storage of the programme numbers with the
Vi feature
Vi and the satellite demodulator
Without the Vi codes
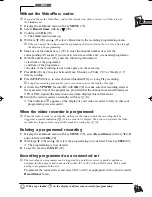
When the video recorder is programmed
Deleting a programmed recording
Recording programmed on a connected set
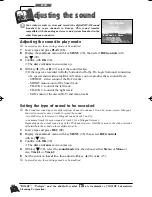
Adjusting the sound . . . . . . . . . . . . . .12
Adjusting the sound in play mode
Setting the type of sound to be recorded
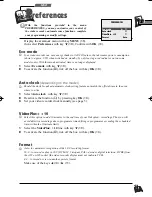
Preferences . . . . . . . . . . . . . . . . . . . . .13
Eco mode
Auto clock
Vi +10 mn
Format
More information . . . . . . . . . . . . . . . .14
Playing NTSC tapes
Tracking and stability in the play mode
Technical data
Contents
Set-up
Use
The type and production number of your appliance are printed on the
guarantee certificate delivered with your video recorder. Keep this
certificate as well as the invoice. These documents are indispensable for
claiming your guarantee rights. All repairs during the guarantee period
must be carried out by an authorised technician representing our brand. If
this condition is not met, your rights will no longer be valid. Never open
the appliance yourself, since this may be dangerous for you or damage the
equipment. Thomson Multimédia is not liable if the television is used
other than in accordance with this manual.
Guarantee
SETTING UP
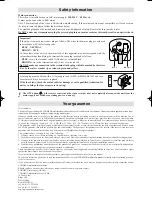
- Ensure that the mains supply in your house complies with
that indicated on the identification sticker located on the back of your
appliance. Install the video recorder horizontally, away from any source of
heat (fireplace) or appliances creating strong magnetic or electric fields.
The components of this video recorder are sensitive to heat. The
maximum ambient temperature should not exceed 40° Celsius. Leave
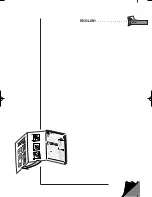
sufficient space around the video recorder to allow adequate ventilation:
10 cm on either side and at the rear, as well as 7 cm above the top are
minimum requirements. The humidity of the room should not exceed
80%. If you have to use the video recorder outdoors, do not expose it to
water from rain or splashing. Moving it from a cold atmosphere into a
warm one is likely to cause condensation on some components inside the
video recorder. Let the condensation disappear by itself before turning the
video recorder on again.
USE
- If your appliance, or a cassette, has been stored in a very cold
atmosphere for a certain amount of time (transported during winter for
example), wait approximately 2 hours before using your video recorder.
The openings located on the top and the bottom are for ventilation
purposes. They should not be obstructed. During thunder storms, we
recommend that you disconnect the video recorder from the mains and
aerial so that it is not affected by electrical or electromagnetic surges that
could damage it. For this reason, keep the mains socket and aerial socket
accessible so they can be disconnected. When the unit is on standby,
some components remain connected to the mains. To fully disconnect
your set, you have to unplug the mains connector from the mains socket.
Immediately disconnect the video recorder if you notice it giving off a
smell of burning or smoke. Under no circumstances whatsoever must
you open the video recorder yourself. You risk electrocution if you do so.
CLEANING
– Use a soft, dry and clean cloth. Regularly dust the vents at the
back or sides. Using solvents, abrasive or alcohol based products risks
damaging the set. If an object or liquid enters inside the appliance, unplug
it immediately and have it checked by an authorised technician. To avoid
deterioration of your video recorder’s heads, never use a cleaning tape.
Precautions
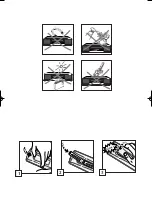
Prior to using your video recorder, you'll have to follow the set-up
procedure and make the settings described on pages 2 to 5.
10 cm
7 cm
10 cm
10 cm
7 cm
r9-1EN01 24/02/00 12:18 Page 1