23
•
ASSEMBLING THE HOOD
Warning
The hood must be installed in
compliance with all applicable regulations
concerning the ventilation of premises. In
France these regulations are described in
DTU 61.1 from the CSTB. In particular, the
evacuated air should never be conveyed to
a duct used to evacuate smoke from
appliances that use gas or other
combustible fuels. Unused ducts may only
be used after approval from a competent
specialist.
The distance between the supporting surface for
the cooking vessels on the hob and the lower part
of the hood must be at least 650 mm. If the
instructions for installation for the hob specify a
greater distance, this has to be taken into account.
IMPORTANT: So as not to damage your
product, during installation USE ONLY THE
SCREWS PROVIDED. Make sure these are
used as shown in the following instructions.
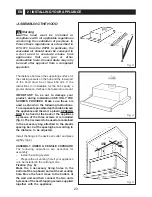
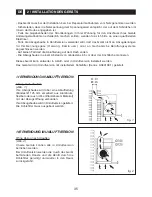
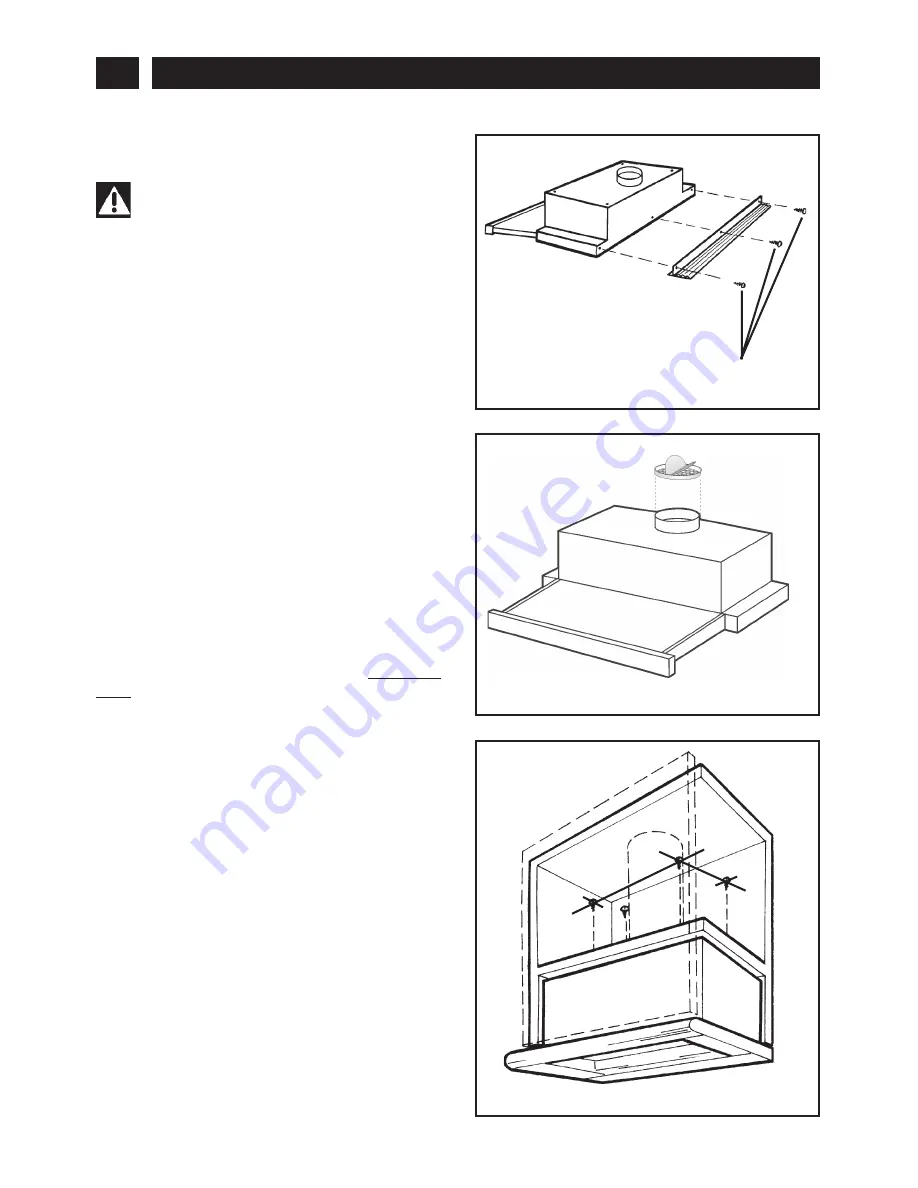
To compensate possible depth voids between
the appliance and the wall, a plastic SPACING
BAR to be fixed at the back of the appliance
by means of the three screws A is included
(fig. 3). The 3 screws A to be used are contained
in the accessory bag attached to the plastic
spacing bar. Cut the spacing bar according to
the distance to be adjusted.
Install the flange in the device air outlet and press
slightly (fig.4).
ASSEMBLY UNDER A PENSILE CUPBOARD
The following operations are essential for
assembly:
–
Install the wiring system
–
Prepare the air venting hole if your appliance
is to be installed in the ducting mode.
Fixation (fig. 5):
Make the 4 necessary fixing holes in the
bottom of the cupboard and cut the air venting
hole. Move the hood close to the bottom of
the wall unit and then connect the two units
by means of the 4 self-tapping screws supplied
together with the appliance.
2 / INSTALLING YOUR APPLIANCE
EN
fig. 3
fig. 5
A
450
217
fig. 4

