background image

11

ENGLISH

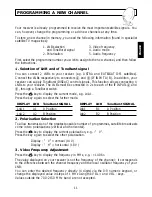
Your receiver is already programmed to receive the most important satellite signals.  You

can, however, change the programming or add new channels at any time.
To store a new channel in memory, you need the following information (found in specialist
satellite TV magazines):

1. LNB selection

3. Video frequency

and ToneBurst signal

4. Audio mode

2. Polarisation

5. Audio frequency

First, select the programme number you wish to assign to the new channel, and then follow

the instructions.

1. Selection of LNB and of ToneBurst signal

You can connect 2 LNBs to your receiver (e.g. ASTRA and EUTELSAT II-F1 satellites).
Connect the LNBs respectively to connectors 

d

and 

e

(IF INPUT A/B). In addition, your

receiver can supply ToneBurst (DiSEqC) control signals. This function allows connecting 4

LNBs to your receiver. The LNBs must be connected in 2s to each of the IF INPUTs 

d

and

e

, through a ToneBurst switch.

Press the

key to display the current mode, e.g. LnA1.

Press the key again to select the further mode.

DISPLAY

LNB

ToneBurst SIGNAL

DISPLAY

LNB

ToneBurst SIGNAL

LnA1   

A1

A Position

Lnb1   

B1

A Position

LnA2   

A2

B Position

Lnb2   

B2

B Position

2. Polarisation Selection
To allow transmission of the greatest possible number of programmes, satellite broadcasts
come in two polarisations (vertical and horizontal).
Press the

key to display the current polarisation, e.g. : "  V". 

Press the key again to select the other polarisation. 

Display : "  V" = vertical (14 V) 

Display : "  H" = horizontal (18 V)

3. Video Frequency Adjustment
Press the

key to display the frequency in MHz, e.g. : «1406».

The value displayed on your receiver is not the frequency of the channel;  it corresponds
to the difference between the channel frequency and the local oscillator frequency of your
LNB.

You can enter the desired frequency directly (4 digits) via the 0-9 numeric keypad, or

change the displayed value in steps of 1 MHz using the VOL + and VOL - keys.

Values outside the 700-2150 MHz band are not accepted. 

VIDEO

V/H

LNB

PROGRAMMING A NEW CHANNEL

Summary of Contents for ASR08T

Page 1: ...compartment cover located at the back of the remote control unit Insert the two 1 5 V AAA batteries Be sure to observe polarity For your information If the remote control seems to have stopped operati...

Page 2: ...doubts about the installation operation or safety of your set Do not continue to use your set if you think it is operating abnormally or if it is damaged in any way Switch it off unplug the mains lead...

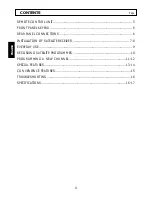
Page 3: ...NT PANEL KEYPAD 6 REAR PANEL CONNECTIONS 6 INSTALLATION OF SATELLITE RECEIVER 7 8 EVERYDAY USE 9 RECORDING SATELLITE PROGRAMMES 10 PROGRAMMING A NEW CHANNEL 11 12 SPECIAL FEATURES 13 14 CONVENIENCE FE...
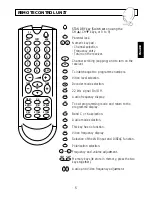
Page 4: ...play To exit programming mode and return to the programme display Band C or Ku selection Audio mode selection This key has no function Video frequency display Selection of the LNB input and DiSEqC fun...

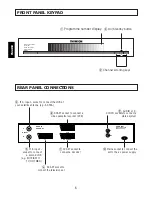
Page 5: ...AT II F1 HOTBIRD f SCART socket to connect the television set i AUDIO L R CINCH sockets to connect a stereo system h SCART socket to connect a video cassette recorder VCR d IF A input socket to connec...

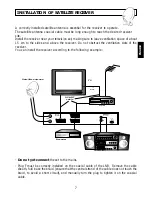
Page 6: ...eceiver You can install the receiver according to the following example Do not yet connect the set to the mains Plug F must be correctly installed on the coaxial cable of the LNB Remove the cable shea...

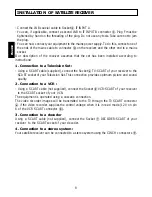
Page 7: ...plied connect the Socket f TV SCART of your receiver to the SCART socket of your Television Set This connection provides optimum picture and sound quality 2 Connection to a VCR Using a SCART cable not...

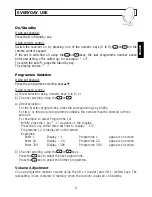
Page 8: ...rogrammes press the corresponding key briefly For two or three digit programme numbers the number must be entered in three seconds For example to select Programme 14 Briefly press the 1 key 1 appears...

Page 9: ...record then on the VCR select the programme number assigned to the satellite receiver e g AV and begin recording To avoid recording a different programme or nothing at all do not change satellite chan...

Page 10: ...t switch Press the key to display the current mode e g LnA1 Press the key again to select the further mode DISPLAY LNB ToneBurst SIGNAL DISPLAY LNB ToneBurst SIGNAL LnA1 A1 A Position Lnb1 B1 A Positi...

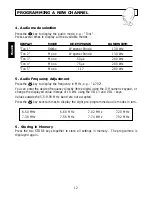
Page 11: ...nt Press the key to display the frequency in MHz e g A702 You can enter the desired frequency directly three digits using the 0 9 numeric keypad or change the displayed value in steps of 10 kHz using...

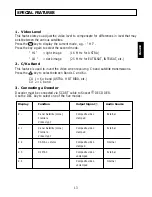
Page 12: ...atellite transmissions Press the key to select between Bands C and Ku CU 1 Ku band ASTRA HOT BIRD etc CU 2 C band 3 Connecting a Decoder Decoder must be connected via SCART cable to Socket g DECODER U...

Page 13: ...22 kHz switching signal in service 22 22 kHz switching signal stopped If you wish to exit Special Features press the remote control key briefly The receiver returns to programme display without storin...

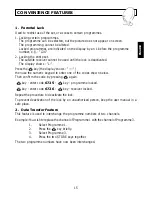
Page 14: ...ws then use the numeric keypad to enter one of the codes shown below Then confirm the code by pressing again key enter code 6725 key programme locked key enter code 6726 key receiver locked Repeat the...

Page 15: ...oor picture quality Satellite antenna not installed according to instructions Damaged cable Satellite antenna too small Excessively poor weather conditions Remote control inoperative Batteries incorre...

Page 16: ...OF 10 kHz MODES MONO STEREO WEGENER PANDA AUDIO BANDWIDTH 130 kHz and 280 kHz DE EMPHASIS 50 S 75 S J17 FREQUENCY RESPONSE 50 Hz 15 kHz OUTPUT SOCKET SCART CINCH FRONT PANEL CONTROLS DISPLAY STANDBY 4...

Reviews: