


Option
OSD Language
OSD Duration
Blue
Restore Default
English
Off
Off
18
MENU OPERATION
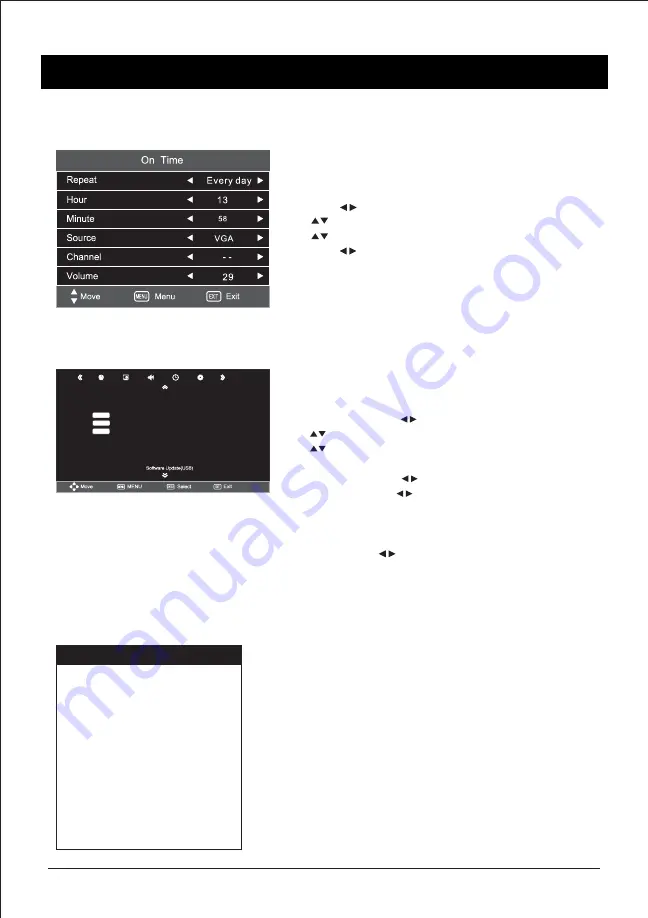
On Time
- Press the “MENU” button on the remote control to enter
the OSD menu.
Then press buttons to select the “TIME”.
- Press button to select On Time, then press ENTER to enter.
- Press buttons on the remote control to adjust desired item,
then press buttons on the remote control to set the time.
- Press the “MENU” button on the remote control to return to
upper menu.
Option Setting
You can adjust the OSD language, OSD Duration
- Press the “MENU” button on the remote control to enter the
OSD menu, then press buttons to select the “OPTION’.
- Press button to select the desired item to enter.
- Press button on the remote on the remote control to return
to upper menu.
OSD Lanugage :
Press buttons to select the OSD language.
OSD Duration :
Press buttons to select your desired item
(Off, 5S, 10S, 15S, 30S, 45S, 60S).
Blue Screen :
If no signal is being received or the signal is very
weak, a blue screen automatically replaces the noisy picture
background. Press buttons to select On/Off.
Restore Factory Default :
Restore the default setting.
Note :
Restore factory default will clear all the programs &
passwords
Hotel Setting
Hotel Lock
Menu Lock
Power On Source
Channel Number
Key Lock
Max Volume
Power On Volume
Source Lock
Clear Lock
Data Base Export
Data Base Import
On
Off
1
Off
100
30
Hotel Mode :
To enter Hotel setting mode dial
Menu + 2580 from remote control.


