background image

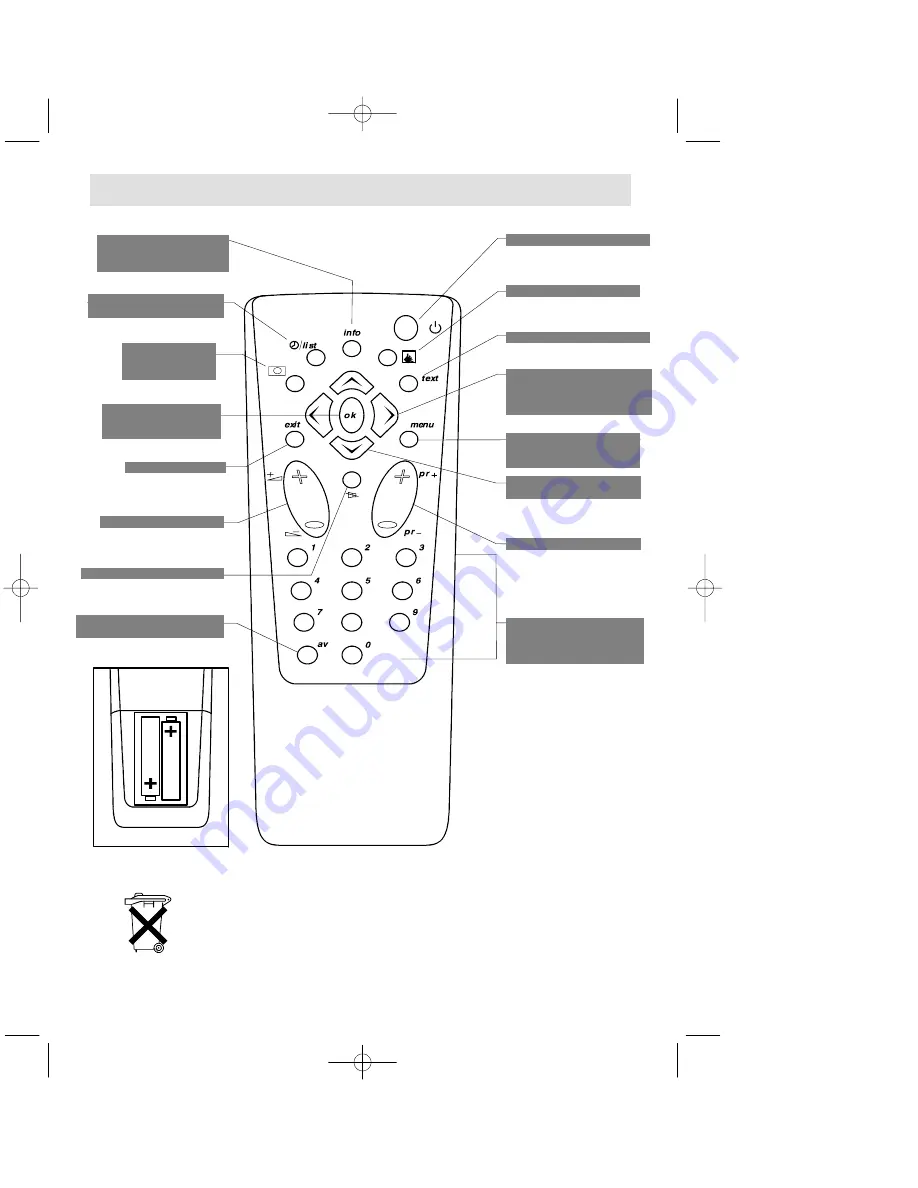
Batteries: Remove the lid at the back of the remote control and insert two 1.5
V, LR06 batteries.

8

Display programme No.

and sleep timer

(Yellow

button)

Display Timer Menu

(Green button)

Call up personal

adjustments

(Red button)

Confirm an action or

validate a menu

option

To switch to connected

equipment

(e.g.: video recorder)

To leave a menu

Sound mute

Volume level

Stand-by

Inactive

Inactive

Adjustment: move to
Right/Left in menus and
select one of the proposed
options

Move Up and Down in
the menus

To go to Picture and
Channel Adjustment
menus

Direct access to
programmes and entering
numerical values in
menus

To change programme

”Please respect the environment! Before throwing any batteries away, consult
your distributor who may be able to take them back for specific recycling..”

4

Remote Control

Summary of Contents for 14MG10U

Page 1: ...U s e r m a n u a l U s e r m a n u a l U s e r m a n u a l 1 4 M G 1 0 U...

Page 2: ...fying the terminals in your plug proceed as follows BLUE wire to the terminal coded N Neutral or coloured black BROWN wire to the terminal coded L Live or coloured red DO NOT make any connection to th...

Page 3: ...2 Connections 220 240V 50Hz...

Page 4: ...o recorder or camcorder a PAY TV decoder a video games console To use the connected device select the audiovisual programme by pressing the button This selection is automatic for some devices AV is di...

Page 5: ...nt e g video recorder To leave a menu Sound mute Volume level Stand by Inactive Inactive Adjustment move to Right Left in menus and select one of the proposed options Move Up and Down in the menus To...

Page 6: ...ins on stand by press one of the buttons on the remote control numerical keypad When the television set is turned on for the first time the Installation menu appears automatically If this is not the c...

Page 7: ...l Press the button to confirm the change The programmes stored under the old and new numbers are then swapped Repeat this operation to change other programme numbers Erasing a Programme Select the pro...

Page 8: ...for the menu to go to the bottom of the screen for optimum reception If the picture corresponds to the channel required go to the 4th line PR otherwise continue the search If you wish to stop the aut...

Page 9: ...cessary adjust the picture using the buttons Select the 4th line PR using the button to allocate a programme number to the channel and store it in memory see Programme Number and Storing in Memory If...

Page 10: ...ve the menu Sleep Timer Press the green button to call up the Stand by Menu Set the stand by time in 10 minute steps up to 4 hours using the buttons Press the button to leave the menu The television s...

Page 11: ...y time if sleep timer command is activated If the channel has been fine tuned the symbol is also displayed This information disappears automatically after a few seconds Press the yellow button again t...

Page 12: ...ipment for example with curtains or soft furnishings Overheating will cause damage and shorten the life of the equipment Don t listen to headphones at high volume as such use can permanently damage yo...

Page 13: ...d for automatic switching when the equipment connected provides switching volta ges as follows Pin 8 9 5 V to 12 V Auto switching to auxiliary O AUX channel Pin 16 1 V to 3 V Auto switching to RGB SIG...

Page 14: ...2 T H O M S O N m u l t i m e d i a Sales UK Limited Crown road Enfield Middlesex EN 1 1DZ 253 256 00...

Reviews: