Thermo Scientific AquaSensors
™
DataStick
™
Ethernet Communications User Guide
22
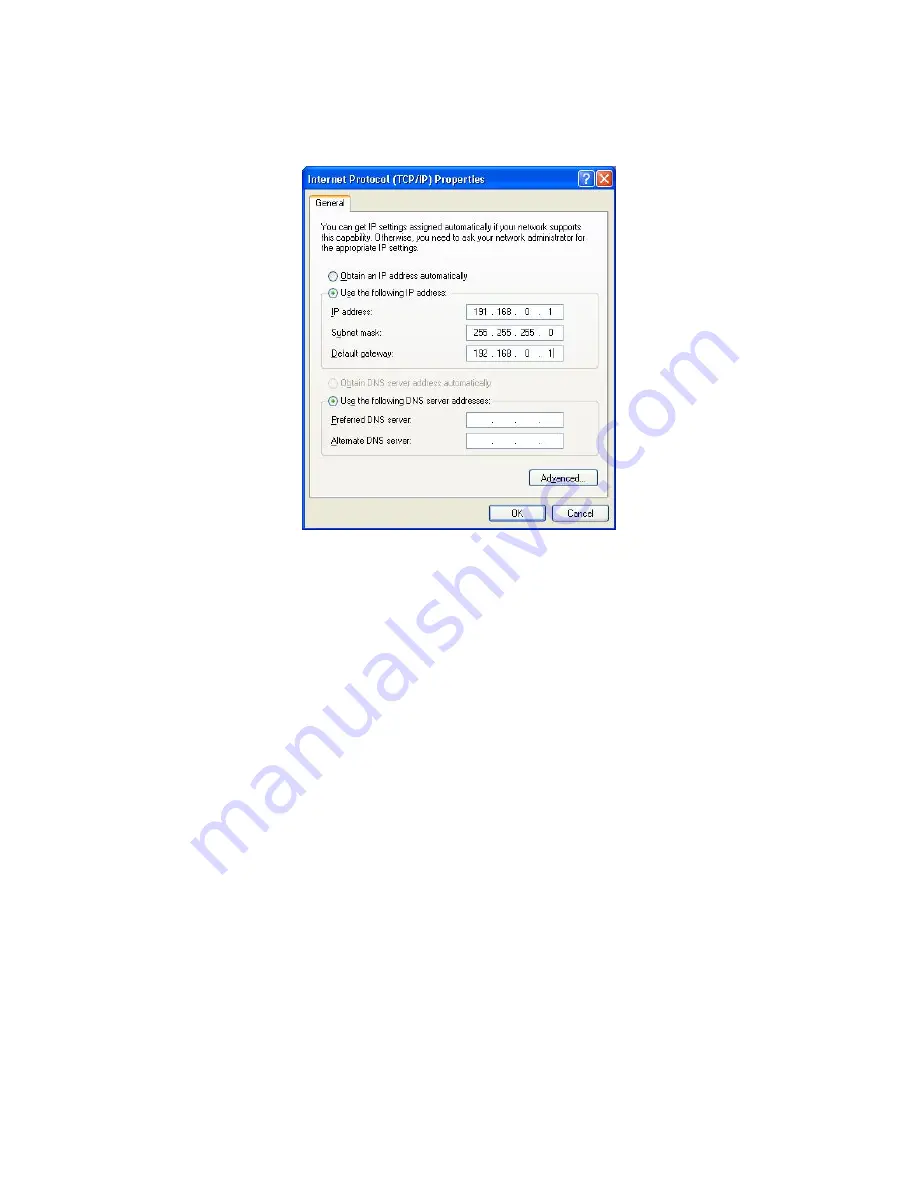
Click the “Use the following IP address” radio button and enter the IP address, Subnet
mask and Default gateway values as shown in Figure 23.
Figure 23: Giving the laptop a static IP address.
Click OK until you return to the Network Connections window.
The laptop now has a static IP address of 192.168.0.1 and its subnet is 192.168.0.0.
The next step is to connect the Ethernet DataStick to the laptop. Follow the procedure
below to accomplish this.
Connect the power injector to the laptop using the CAT5 cross-over cable. Be careful not
to plug the cross-over cable into the jack that has the DC power on it. This jack is
typically identified with a warning sticker that says “Connect to PoE device only!”
Connect the Ethernet DataStick to the power injector by plugging the Ethernet
DataStick’s integral CAT5 cable to the PoE jack.
Plug the power injector into an AC outlet and verify that the Link LED on the laptop
lights.
Start a Web browser on the laptop and enter the Ethernet DataStick’s IP address in the
Address field. This will bring up the DataStick’s Home Page as shown in Figure 24.


