background image

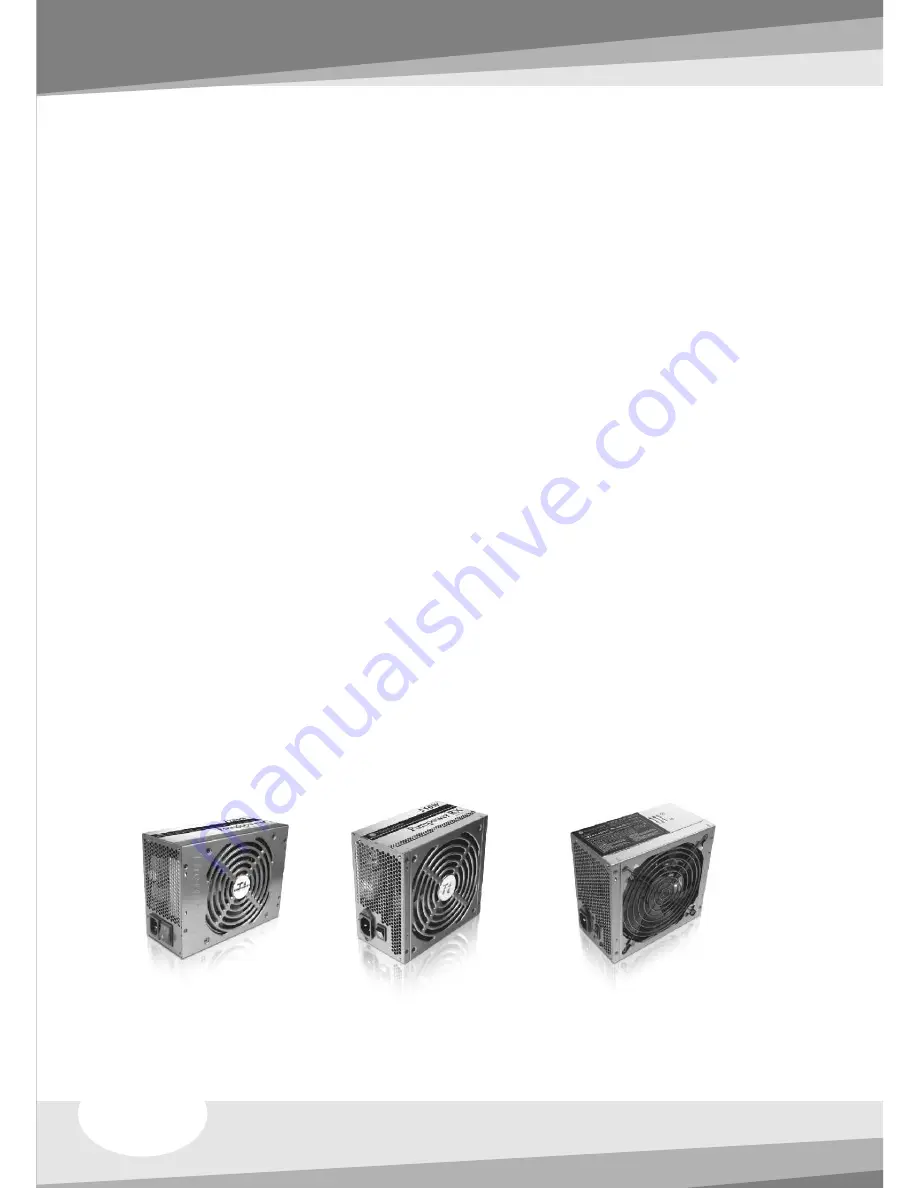
6.1  Toughpower / Purepower / TR2 
        power supply series (optional)

The Thermaltake Power Supply series specification meets latest 

Intel & AMD dual & Quad core processors and NVIDIA & AMD 

high performance graphic cards; it offers plenty of functions, 

which mainly include:

1. Automatic Fan Speed Control: All power supply can detect the inside 

    heat and automatically adjust the fan speed to provide adequate airflow.

2. Ultra Silent: Ball bearing fans with high reliability 140mm or 120mm 

    cooling fan and super low acoustic noise under all load condition.

3. Modularized Cable Management: To eliminate clutter and improve 

    airflow inside the case.

4. Dedicated Graphic Card Power: reduce the loading on current PSU and 

    no need to upgrade current PSU while running multi graphic cards mode.

The functions can assure all Thermaltake Power Supply meets the balance in 
noise control and heat exhausted. All power supply provides complete protection 
function as follow:
1. Over power protection.
2. Short circuit protection on all output.
3. Over voltage protection / Under voltage protection.
4. Over current protection.
5. Over temperature protection.

Besides, Thermaltake enables the quality assurance of all power supply: 100% 
Hi-POT and ATE Function Test, 100% Burn-In and AC Input cycled on/off under 
high temperature condition. Furthermore, it has been approved by 

UL, CUL, TUV, 

CB, FCC, CE, and BSMI.

There are three main products line of Thermaltake PSU which divided into 
Toughpower, Purepower (include Purepower RX) and TR2 (include TR2 RX) 
series. Please refer to 

http://www.thermaltake.com/product/Power/power_index.asp

Chapter 6  Other

Chapter 6  Other

22

Summary of Contents for DH 101

Page 1: ...d To Comply With FCC Standards FOR HOME OR OFFICE USE 2007 Thermaltake Technology Co Ltd All Rights Reserved 2007 07 C All other registered trademarks belong to their respective companies www thermaltake com ...

Page 2: ...VF7000 Series User Manual ...

Page 3: ...allation 3 2 Case LED connections 3 3 USB2 0 IEEE1394 Firewire connection 3 4 Audio connection 3 5 Case open alarm function Intrusion switch Chapter4 Front Buttons Instruction Chapter4 Front Buttons Instruction 4 1 Media LAB Hot keys Module function instruction 1 2 2 3 6 7 8 9 10 12 13 14 Chapter 5 DH101 Media Kits Quick Guide Chapter 5 DH101 Media Kits Quick Guide 5 1 IR remote control for DH101 ...

Page 4: ... Black Color Panel Al Body SECC Chassis Material 426 5 x 435 x 153 5 mm 16 8 x 17 1 x 6 0 inch Dimension W D H Home Theater Media PC Case Type 7 32 kg 16 14 lb Weights Front 120mm fan x 1 1500rpm Rear 60mm fan x 2 1800rpm Media kits 7 Expansion Slots USB 2 0 x 2 IEEE 1394 Firewire HD Audio Front I O x 1 x 3 Drive Bays ATX Micro ATX form factor Motherboard Cooling System Black Color Chassis Materia...

Page 5: ...ation Chapter 2 Case Mechanical Operation Remove these 3 thumb screws Remove the cover please refer to the orientation of the picture 2 2 How to install PSU Place the PSU over the location as shown Secure it by the screws 2 1 How to open the case 2 ...

Page 6: ...2 2 1 1 3 3 4 4 2 3 5 25 device installation Remove the top cover Remove the screw as shown picture then take offthe rod Release the screw of 3 5 cage Remove outward the 3 5 cage 3 ...

Page 7: ... ward the tool free clip There are 3 springs in the front doors push to release it Push and release the 3 springs of front door After loosing the spring of front door pull out it as arrow shows Insert the device into the 1st 5 25 drive bay 4 ...

Page 8: ...d push in ward the tool free clip Secure the opposite 5 25 device with screws Place the HDD cage back to where it was in the chassis Secure the HDD cage with the screw as shown After finish 5 25 device installation push the front door back 5 ...

Page 9: ...erating 5 25 drive bay insert the 5 25 device into the 2nd or 3rd bay is not recommended 2 4 HDD installation Squeeze and pull out ward the tool free clip Slide the HDD into the cage as shown and move it to the desired location Squeeze and push in ward the tool free clip 6 ...

Page 10: ...peration Open the PCI tool free bar then turn it clockwise Pull out the plastic clips of PCI slots Remove the PCI slot as shown Install the tuner card then pull back the plastic clips of PCI slots Turn the PCI tool free bar anti clockwise then close it 7 ...

Page 11: ...manufacturer On most standard motherboards the edge with external ports goes to the rear part of the chassis It is highly recommended that you install CPU heat sink and modular components before fixing the motherboard inside the chassis the locations of the screw holes Note these locations and place included standoffs on the chassis first This side towards the rear of the chassis Above illustratio...

Page 12: ...herboard These leads are usually labeled if not please trace them back to the case front to find out their source POWER LED connects to your M B at the PLED POWER SW connects to the PWR connector on the motherboard H D D LED connects to the 2 pin labeled HDD LED connector RESET SW connects to the RSW connector on the motherboard SPEAKER connector find out the 4 pin labeled SPEAKER on the M B then ...

Page 13: ...Please consult your motherboard manual to find out the section of USB connection USB connection USB2 0 GND1 Data 1 Data 1 GND2 Data 2 Data 2 Vcc 2 Brank Vcc1 3 3 USB2 0 IEEE1394 Firewire connection 10 ...

Page 14: ...IEEE1394 Firewire connection Please consult your motherboard manual to find out the section of IEEE1394 Firewire connection IEEE1394a TPA VG TPB VP TPA Brank TPB Brank GND 11 ...

Page 15: ...below Please check with your motherboard manual before installing PRESENCE BLACK SENSE1_RETURN AUD GND SENSE2_RETURN YELLOW BROWN RED PORT1 R PORT2 R PORT1 L BLUE PORT2 L SENSE_SEND KEY PURPLE GREEN AUDIO AZALIA Function ORANGE BLACK GROUND Front Audio Ground L RET Rear Left Channel Audio Signal Rear Right Channel Audio Signal R RET NC BROWN RED MIC IN MIC POWER Front Microphone Power Front Microp...

Page 16: ...Intrusion switch To find out the cable with 2pin connector Micro SW from the rear of inside the chassis To find out the position of Chassis Alarm on your motherboard please consult your motherboard manual 1 2 Black Wire White Wire 13 ...

Page 17: ...olumeControl Button This is used for volume up and down pressing for mute iMEDIAN Button MCE This allows to go to the application program directly It can be user defined App Exit Button This quits the application program It works same as ALT F4 Esc button This is used to go backward on iMEDIAN or MCE Direction button This is arrow key to move up down left right Star Button This is the same as the ...

Page 18: ...tray 16 iMEDIAN Quick Launch Button Running iMEDIAN 17 Application Launcher Running Application Launcher Easiest way to run the application 18 Task Switcher Running Task Switcher select the application window among the running applications ALT TAB 19 System Volume Mute Button 20 iMON Timer Running iMON Timer management of power on off and alarmschedule 21 VOL CH Button Control of Volume and TV cha...

Page 19: ...5 2 Your Media LAB kit Optional 1 Media LAB LCD Internal IR Receiver 1 Media LAB Remote Control 1 Quick Guide 1 Media LAB Application CD 1 Extension USB Cable 2 AAA Batteries 16 ...

Page 20: ... internal type Media LAB IR receiver is that you can power on your PC system using the power button of the remote control After turn off your PC system open your PC cover and connect the cable to its proper pin refer to the following picture Internal IR receiver is connected to motherboard with two cables PC case with one cable Power Supply with another cable You should be careful to connect these...

Page 21: ...h Connection Cable B1 2pin Media LAB Inside M B PWR connector B2 2pin Motherboard power switch connector 4 Motherboard USB Connection Cable D1 5pin Media LAB Inside USB connector D2 4pin Motherboard USB internal connector 3 PC Case Power Switch Connection Cable C1 2pin Media LAB Inside PWR S W connector C2 2pin PC Case power button connector 18 ...

Page 22: ...ll the connection finished turn on your system You may see the Found New H W Wizard when Windows starts Assign the CD ROM drive for searching H W driver 3 Execute Media LAB Software After finish S W and H W installation please execute the Media LAB Software using the desktop icon Please refer to the Media LAB User Guide in order to learn about the various settings and usage of Media LAB Software P...

Page 23: ...e network PC which is a part of local network CD DVD Removable HDD You can enjoy the media files on the CD DVD and Removable Disk Drive News Weather You can find the news and weather all over the world also customize to user s preferences Webcasting You can enjoy the internet radio stations that we prepared and also you can edit the list of internet radio TV stations using Webcasting station edito...

Page 24: ...ontroller PAD Controller is used as like 4 way Arrow Keys Control in the iMEDIAN You can move the focus of the object of the iMEDIAN Enter button ENTER button is used to go to the next view of iMEDIAN Backspace ESC button Backspace and ESC button are used to go back to the previous view of iMEDIAN Select Space button Select button is used to select unselect the median folder file to current playli...

Page 25: ...to upgrade current PSU while running multi graphic cards mode The functions can assure all Thermaltake Power Supply meets the balance in noise control and heat exhausted All power supply provides complete protection function as follow 1 Over power protection 2 Short circuit protection on all output 3 Over voltage protection Under voltage protection 4 Over current protection 5 Over temperature prot...

Reviews: