CoolShell CS-3U Installation Manual
2-4
Themis Computer
3.
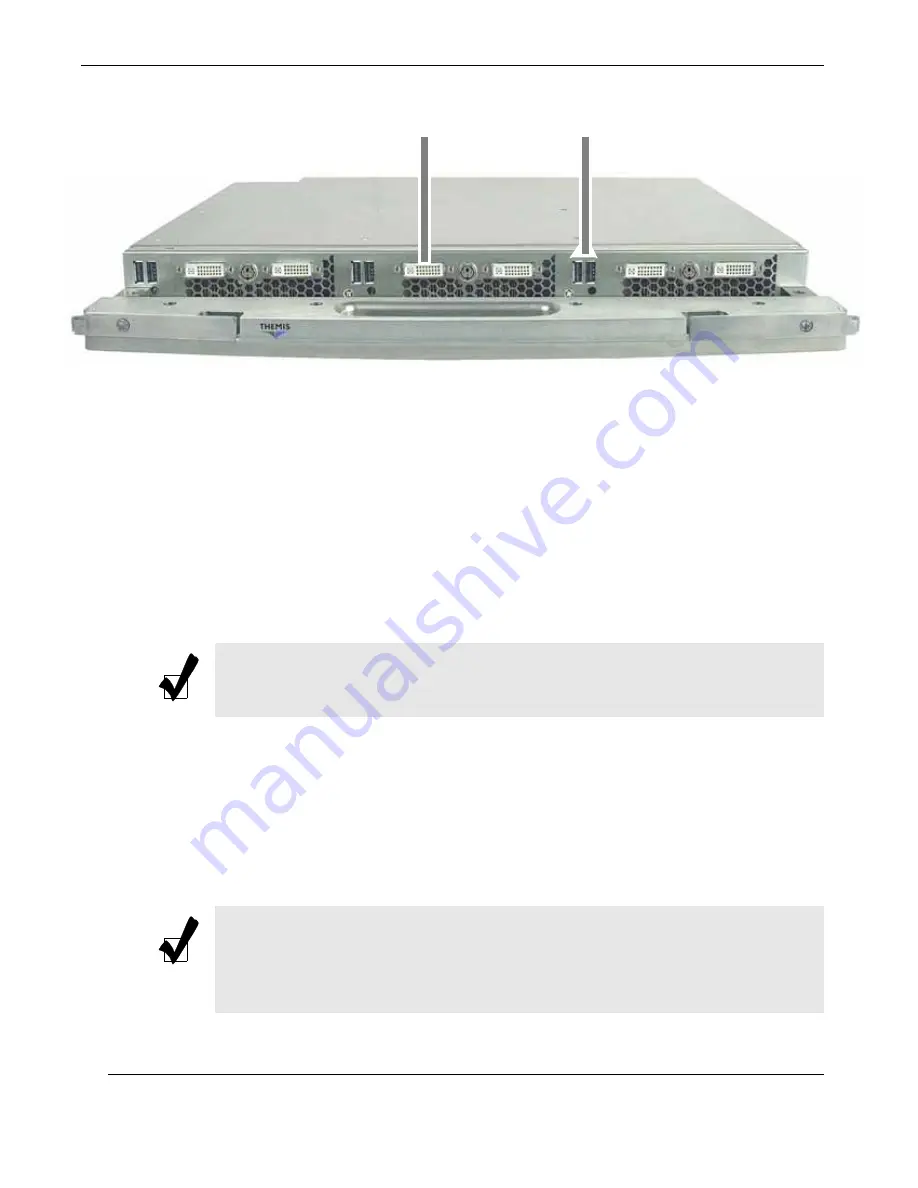
Connect the keyboard and mouse cables to the USB ports on the right-hand
PCI-Express card or the right of the I/O Blade (see
). These right-
hand USB ports are connected directly to the system motherboard.
Connect the other ends of the keyboard/mouse cables to a keyboard and
mouse, respectively.
4.
Install the Storage Expansion Subsystem into the 19” rack above (or below)
the CoolShell CS-3U 3RU subrack.
5.
Connect the three cables (Power & Reset, PCI-Express, and Clock/I2C Bus)
from the Storage Expansion Subsystem to the appropriate connectors of the
CPU Blade (see
6.
Connect the power cords to the AC outlets on the power supplies (see
, page 2-5) and the other ends to an isolated AC wall circuit. This will
cause the CoolShell CS-3U to power on automatically (see following
Note
).
Figure 2-5.
Connect the Video Display Cable to One of the Two Middle
DVI Connectors and the KB/M Cable to the Right-Hand USB Connectors
To Video Display
To Keyboard & Mouse
Note:
Step 4 and Step 5 are applicable only if the
optional
Storage Expansion
Subsystem is being installed.
Note:
There is no master switch for turning power on or off. Instead, the system
becomes active when power cords are connected to the power supplies. Depend-
ing on BIOS settings and the most recent state of the motherboard, it is possible
that the CPU Blade may immediately begin firmware boot followed by OS boot.
Summary of Contents for CoolShell CS-3U
Page 16: ...xiv Themis Computer CoolShell CS 3U Installation Manual...
Page 22: ...xx Themis Computer CoolShell CS 3U Installation Manual...
Page 40: ...2 8 Themis Computer CoolShell CS 3U Installation Manual...
Page 52: ...A 12 Themis Computer CoolShell CS 3U Installation Manual...
Page 90: ...CoolShell CS 3U Installation Manual B 38 Themis Computer...
Page 110: ...C 20 Themis Computer CoolShell CS 3U Installation Manual...


