


50
The testing result will be stay till system reboot with “Yet to start” displayed as
default.
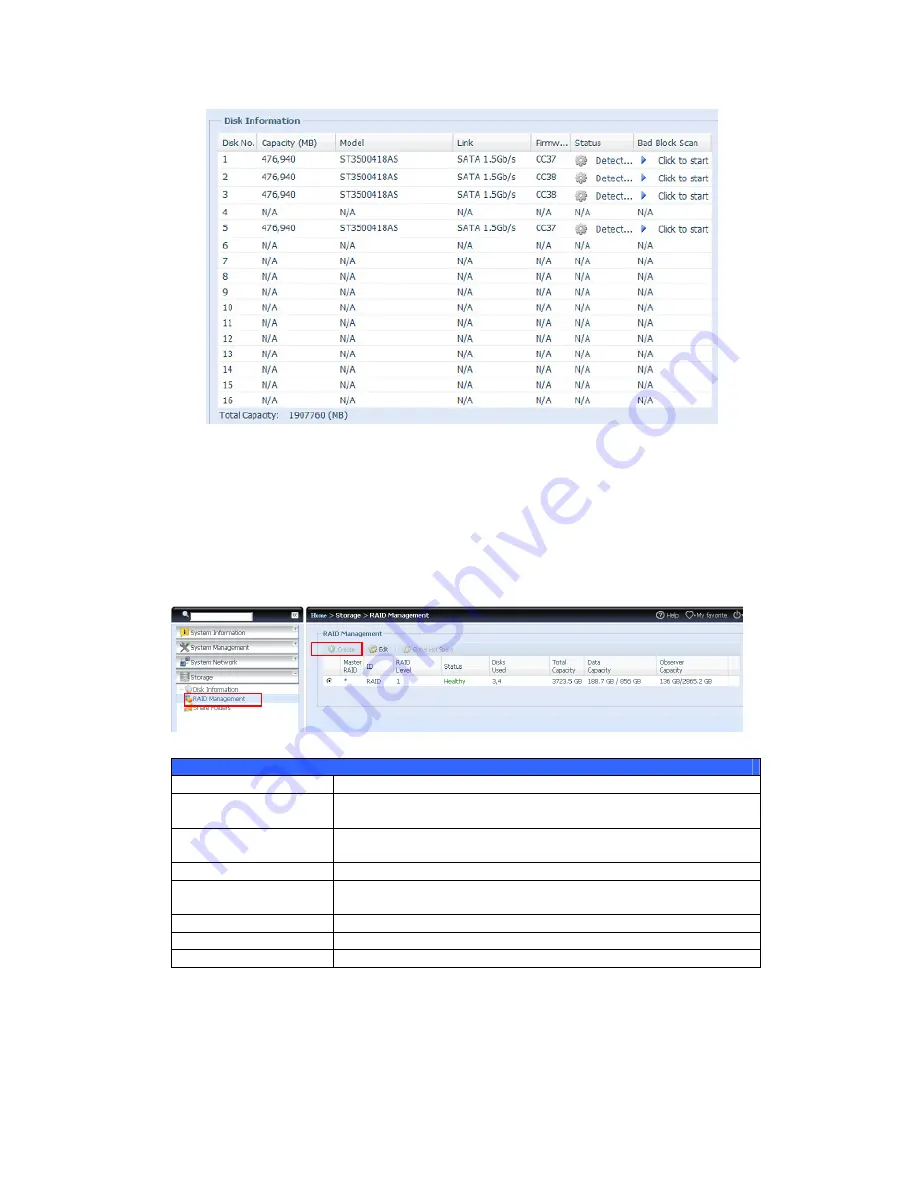
RAID Information
From the
Storage
menu, choose the
RAID
item and the
RAID Information
screen appears.
This screen lists the RAID volumes currently residing on the Thecus VisoGuard.
From this screen, you can get information about the status of your RAID volumes,
as well as the capacities allocated for data.
RAID Information
Item
Description
Master RAID
The RAID volume currently designated as the Master RAID
volume.
ID
ID of the current RAID volume.
NOTE: All RAID IDs must be unique.
RAID Level
Shows the current RAID configuration.
Status
Indicates status of the RAID. Can read either
Healthy
,
Degraded
, or
Damaged
.
Disks Used
Hard disks used to form the current RAID volume.
Total Capacity
Total capacity of the current RAID.
Data Capacity
Indicates the used capacity and total capacity used by user data.
Create a RAID
On the
RAID Information
screen, press the
create
button to go to the
CREATE
RAID
screen. In addition to RAID disk information and status, this screen lets you
make RAID configuration settings.


