background image

For assistance, email us at 

[email protected]

 or call 

800.754.1455

.

22

WIRELESS LINK

TROUBLESHOOTING

TROUBLE PAIRING HUB TO WIFI NETWORK

1. Make sure that the latest version of the app has been downloaded.
2. Make sure that you are attempting to connect the correct hub to the correct app.

•   Wi-Fi Bridge (v1) = The Shade Store V1 app
•   Wireless Link (v2) = The Shade Store V2 app

3. Make sure that you are attempting to connect to a 2.4 GHz network.

•   If there is only one network broadcasting, make sure that it is the 2.4 GHz and not a 5 GHz.

4. Make sure that the device (phone or tablet) you are setting the app up on is connected to the 2.4 GHz network during the set up.

•  If the device is connected to both the 2.4 GHz network and the 5 GHz network, you will need to forget the 5 GHz network  

until the setup is complete. Once complete, you can reconnect to the 5 GHz network.

5. Make sure that the hub is within range of the router. 

•  If necessary, move the hub next to the router during set up and after completed, it can be moved to another location (that location  

must still be within range of the router).

6. Make sure that if there are any Wi-Fi extenders/WAP’s, they are disconnected during the set up process (they can be turned back on after set up is complete).

•  Please note that this applies to mesh networks as well.

7. Make sure that the hub has not been connected to the router via the supplied Ethernet cable until after the hub has been successfully  
    paired to the Wi-Fi network.
8. Make sure that the network that you are attempting to connect to is visible. If it is not, it must be made visible during the set up.
9. Make sure that there is an active internet connection on the device you are working from.
10. There may be security settings on the Wi-Fi network that are preventing connection. If so, they may have to be temporarily disabled to allow for connection.

•   IT Network Administrators, please note;

•  Bridge Mode must be turned on
•  Client Isolation must be turned off
•  The Wireless Link uses TCP commands via port 1487
•  Static IP addresses are not used. MAC address for hub can be used to reserve a static IP address.

•  MAC address is found by going to applicable “Location” in app > Select applicable hub

 
TROUBLE PAIRING SHADES TO HUB (AFTER HUB HAS BEEN PAIRED TO WIFI)

1.  Make sure that the bridge is within range of the shade/motor (approx. 60ft.).
2.  Ensure that the hub is positioned on its base and not standing on its side (so that antenna within hub is properly positioned).
3.  Move the hub around to different outlets to see which location gets the best reception.
4. Make sure that the bridge is not enclosed within a cabinet, closet, etc. as that will dampen the signal.
5.  Expose the antenna on the motor and angle in towards room.
6.  A TSS Repeater (or additional Wireless Link hub) may be needed to increase the radio frequency coverage range.

HUB DISCONNECTED FROM WI-FI DUE TO POWER OUTAGE

1. Unplug the hub from the outlet and plug it back in. Hub will reconnect to Wi-Fi automatically.

 
CONNECTING TO A NEW ROUTER / CHANGED PASSWORD ON EXISTING ROUTER

1. Will need to re-pair the hub to the Wi-Fi network via the steps outlined in the set up instructions (factory reset is not required). 

Summary of Contents for V2 APP

Page 1: ...otorized window treatments with your smartphone or tablet Control individual and multiple window treatments Control scenes Timer functionality To control your motorized window treatments with The Shad...

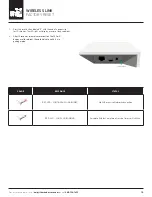
Page 2: ...dio Frequency Range 100 feet no obstructions Radio Frequency 433 MHz WiFi 2 4 GHz or Ethernet Connectivity CAT 5 Power 5V DC For Indoor Use Only Bridge must be within signal range of motorized window...

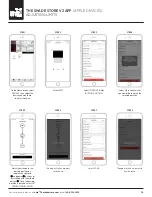
Page 3: ...NUE to proceed to the Sign Up screen Create a new account by selecting SIGN UP If you already have an account simply enter your information and select LOG IN ALREADY HAVE AN ACCOUNT Enter an email add...

Page 4: ...lity scan the QR Code on the bottom of the hub STEP 6 STEP 7 STEP 8 Select ADD NEW HUB STEP 1 STEP 2 STEP 3 STEP 4 Select the hub you would like to pair to and select NEXT Select the appropriate time...

Page 5: ...the hub access to your WiFi network To allow Apple HomeKit functionality scan the QR Code on the bottom of the hub You will receive confirmation that Apple HomeKit functionality has been enabled Sele...

Page 6: ...your hub s location Select NEXT to continue STEP 9 Select desired location access PLEASE NOTE Always Allow will allow for the most accurate sunrise and sunset times at your hub s location STEP 10 Sele...

Page 7: ...n once The motor will respond by jogging up and down Press the button a second time and the motor will jog again indicating it is now paired Make sure both the hub and the motors are turned on and sel...

Page 8: ...ame your device Select DONE to complete setup The information will take a moment to save Once saved it will show on the Home screen under Devices If the pairing process was successful select NEXT If p...

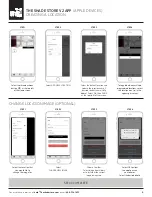
Page 9: ...upper right corner Select ADD NEW LOCATION Select the three bar menu button __ at the top left of the Home screen STEP 1 STEP 2 STEP 3 STEP 4 SETUP COMPLETE Choose to either Select Image from Library...

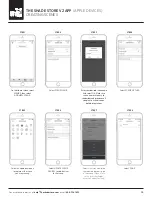
Page 10: ...hade to a custom height drag the shade illustration to the desired point in the window To close the shade select the down button at the lower left of the screen or drag the shade illustration to the b...

Page 11: ...appropriate icon to represent the room you are creating Select ROOM NAME Select ROOM DEVICES Enter a name for your room and select OK Select devices to be added to room Select ROOM PICTURE Select DON...

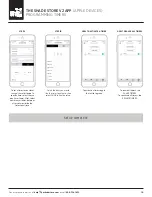
Page 12: ...RE V2 APP APPLE DEVICES CREATING OPERATING ROOMS The app will take a moment to finalize setup STEP 9 Select the Room you would like to operate Choose whether you want all shades to open close or move...

Page 13: ...f you plan to use voice con trolled integrations Select an appropriate icon to represent the scene you are creating Select UPDATE SCENE DEVICES to add devices to the scene Select what you would like t...

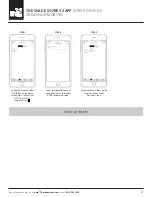
Page 14: ...tore com or call 800 754 1455 14 THE SHADE STORE V2 APP APPLE DEVICES CREATING SCENES The app will take a moment to finalize setup STEP 9 Select DONE again to complete setup Simply select GO STEP 10 H...

Page 15: ...Home screen then select ADD NEW TIMER Select an appropriate icon to represent the timer you are creating STEP 5 Select TIMER NAME Select TIMER SCENE Enter your desired timer name and select OK Select...

Page 16: ...ect the sun icon insert here Next select how many minutes before or after you would like the timer to activate STEP 9 Select the days you would like the timer to activate then select DONE to finalize...

Page 17: ...TING FAVORITES Select your desired device or scene from the list then select DONE to complete setup Your favorites will show on the Favorites screen under Device or Scene To create a Favorite select F...

Page 18: ...take a moment to configure Select TOP POSITION or BOTTOM POSITION Select DONE Select OK to confirm that you would like to adjust the selected position The app will take a moment to finalize setup STE...

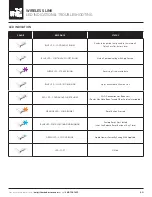
Page 19: ...twork connection RED LED SOLID NO BLINKING Paired to Wifi but no internet service Timers will still run 1 Press the reset button labeled R with the end of a paper clip for 10 seconds The LED light wil...

Page 20: ...ommunicating with App Servers PURPLE LED STEADY BLINKS Receiving Firmware Update BLUE LED SOLID NO BLINKING App Connected to Wireless Link RED LED CONTINUOUS SHORT BLINKS Wi Fi Connection Has Been Los...

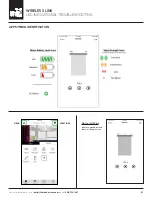
Page 21: ...DENTIFICATION WIRELESS LINK LED INDICATION TROUBLESHOOTING For assistance email us at help theshadestore com or call 800 754 1455 21 MENU LOCATIONS Motor Is Offline Icons are greyed out and show last...

Page 22: ...that the network that you are attempting to connect to is visible If it is not it must be made visible during the set up 9 Make sure that there is an active internet connection on the device you are w...

Page 23: ...ed How to delete any Wireless Link hubs off of Apple Home Open Apple Home Click the home icon at the top left corner of the screen Scroll to Hubs Bridges Select the applicable Wireless Link hub or hub...

Reviews: