


TPS23861EVM-612 PI Commander GUI Setup
4.3
MSP-EXP430G2 Details
The TPS23861EVM-612 accepts the MSP-EXP430G2 evaluation module when the application requires
management of the TPS23861 devices with an external controller. Before inserting the MSP-EXP430G2
into the TPS23861EVM-612, make the following jumper changes and ensure that the target MSP430
(MSP430G2553) device is installed:
1. Remove the shunt on J5 in the P1.6 slot
2. Remove the shunts on J3 in the RXD and TXD slot. Re-install these in the vertical position as
described in the MSP-EXP430G2 LaunchPad user guide (
, page 10).
3. Install MSP-EXP430G2 onto TPS23861EVM-612 and ensure that the USB-TO-GPIO ribbon cable is
NOT installed into J2
4. Connect the PC to the LaunchPad as shown in
5. The source code was developed for the MSP430 LaunchPad Development Kit (MSP-EXP430G2
http://www.ti.com/tool/msp-exp430g2
) using the Code Composer Studio™ (CCS) version 5.3
http://www.ti.com/tool/ccstudio-msp430
) development environment. The target MSP430 can be
programmed within this environment.
6. Once CCS is installed, then use the basic set of instructions listed in
to import, build, and
run the project. CCS version 5.3.0 is used in the following examples. Note that a terminal program
such as HyperTerminal or Teraterm is required to view the output from the EVM when it is running.
4.3.1
Basic CCS and Terminal Setup
1. Launch the CCS program on the PC: Start
→
Texas Instruments
→
Code Composer Studio 5.3.0
→
Code Composer Studio 5.3.0.
2. OK the workspace location and CCS starts
3. Import the project: File
→
Import Existing CCS Eclipse Project
4. Navigate to the project location, then click the
Finish
button
5. Set the active project: Project, Build Configurations, Set Active, Auto, Manual, or Semi-Auto
6. Build the project by clicking the hammer symbol
7. Launch debug session from CCS to activate the current project: Run, Debug (or F11).
8. Run the active project: Run, Resume (or play button, F8)
9. Determine the PC COM port connected to the LaunchPad by going into the Device Manager Ports
(COM and LPT) section. Launch the terminal program.
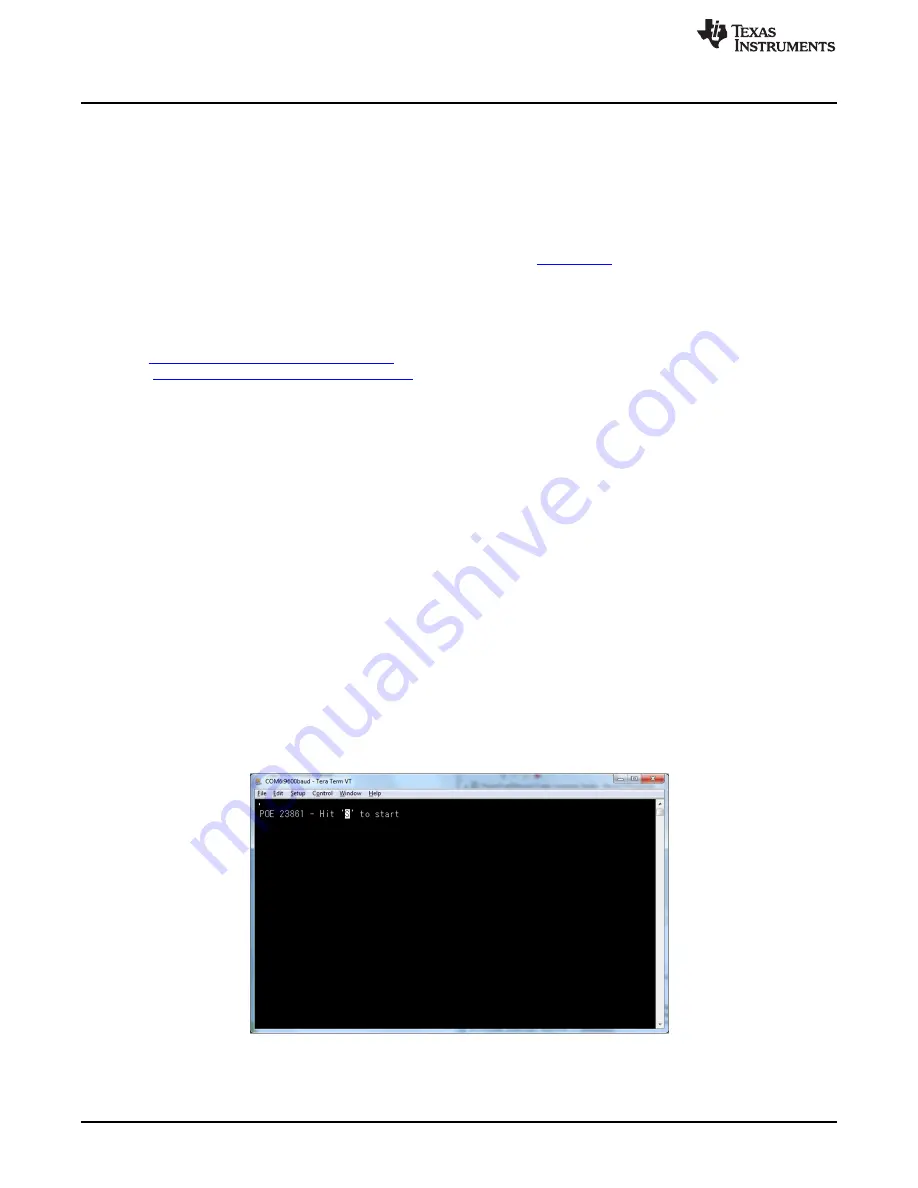
10. Once the terminal program is properly connected to the LaunchPad running the POE firmware, then
text similar to the following image appears
Figure 17. Hit 'S' to Start
18
TPS23861EVM-612: Auto-Mode Evaluation Module for TPS23861
SLUUAY8C – March 2014 – Revised November 2015
Copyright © 2014–2015, Texas Instruments Incorporated