Evaluation Software
3
Evaluation Software
The LM10502 evaluation software is supplied together with documentation regarding the circuit. Copy the
folder “LM10502” to your PC’s hard disk. The software is run by double-clicking the icon of the
LM10502.exe
found in the folder. The software does not require any installation.
The evaluation software allows control of all registers necessary to program the device. To simplify use of
the software, the registers are set by directly named controls. The user does not need the register value
as this is taken care of by the software; e.g., to change BUCK1 output voltage to 1.2V, choose the related
value, and software will send the correct value to the BUCK1 control register. To observe corresponding
change in the probes, the Poll Status must be set.
4
Hardware Setup
Please use ESD protection when handling the evaluation boards to prevent any damage due to ESD
events!
Connect the LM10502 Evaluation board to the USB port of a PC using the USB cable.
When the USB board is plugged in for the first time, the operating system prompts for “New hardware
found” and installs the USB driver. If this does not happen, try unplugging and plugging in the cable again.
Always disconnect the USB cable from the computer when changing jumper settings.
If the evaluation board is not responding or the evaluation software hangs up disconnect the USB cable
for 5 seconds.
5
Using the Evaluation Software
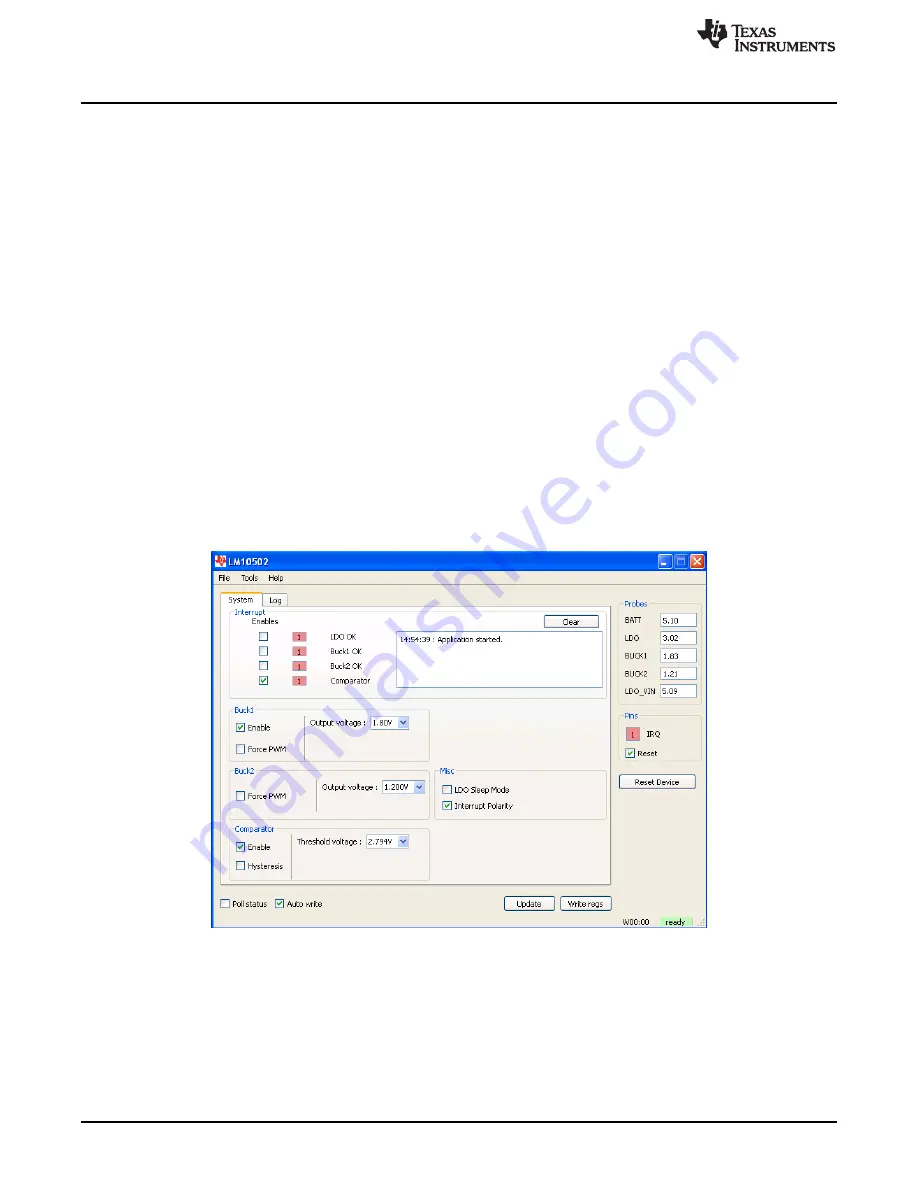
Figure 2. System Settings Tab
The graphical user interface has a main screen with 2 tab screens which allow control and indication for
different functions of the device.
Once the evaluation board is connected to the PC, device can be controlled via the software interface.
The LM10502 should become active as soon as the USB cable is plugged in. When device starts up
correctly, a yellow LED LD1 and green LED LD3 is illuminated. All the device functions can be accessed
via the control buttons.
2
SNVU277 – January 2014
Copyright © 2014, Texas Instruments Incorporated


