– TI recommends to press the
Read All Registers
button after loading data to update the register map with
the actual device values, in case the loaded registers were not compatible with the connected device.
4.2.2.4 Results Data Tab
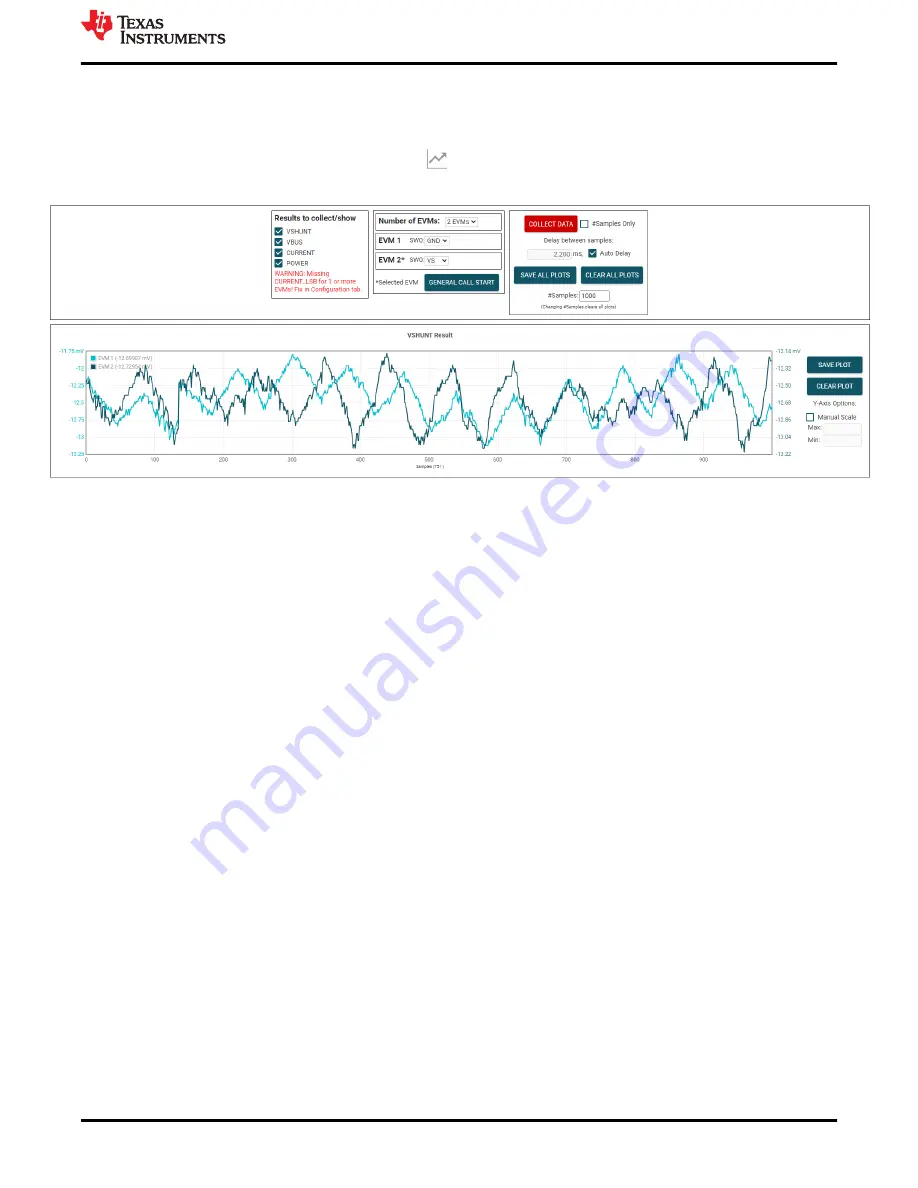
To view and collect results data over time, click the
(Results Data) icon on the menu to the left.
shows part of the results data page for reference, which may look different depending on the connected device.
Figure 4-13. Results Data Tab
Below is a description of how to use the buttons and settings at the top of the results data page and next to each
plot:
• Results to collect/show
– Use this section to select which register values to collect data for. If a results register is unselected before
the
COLLECT DATA
button is pressed, then the plot below will be hidden and the EVM will not try to read
this register during the collect cycle (even if the conversion is enabled).
– If you disable one of these settings while the EVM is collecting data, then the plot will not show, but data
will still be collected and the plot will update in the background. Simply reselect to show data.
• Number of EVMs
– Set the
Number of EVMs
drop-down menu to the number of EVMs currently in use.
• See
for how to attach multiple EVMs together.
• Changing this here also changes the same setting in the
Configuration
tab.
– The GUI only supports one EVM/device type at a time, up to 4 EVMs total.
– Switch settings
• Use the onboard switch(es) to select a different address/chip select for each EVM.
• Set the switch settings in the GUI to match the setting for each connected EVM.
–
EVM 1
will automatically populate with the lowest addressed device unless a setting has already
been selected.
– Changing this here also changes the same setting in the
Configuration
tab.
• If more than one device is being used, a * symbol will appear next to the selected EVM that is being
used on the register map and configuration tabs.
– Changing the switch settings of any EVM sets that EVM as the selected EVM.
• Collect/Plots settings
– Collect Data
• Press the
COLLECT DATA
button to start data collection.
• In this mode, the MCU reads and sends the selected result values for each device over a USB BULK
channel. All results from one device are read before moving on to the next device.
– All result values from all EVMs together are considered one "sample set".
• Although you can read and write to other registers through the register map page while collecting data,
it is possible that this adds a delay to the data being collected.
Operation
SBOU264B – MAY 2021 – REVISED DECEMBER 2022
INA232EVM, INA234EVM and INA236EVM
13
Copyright © 2022 Texas Instruments Incorporated


