


10. Select RX Gain Mode
On the receiver, select either high gain or low
gain mode for the CC2592.
The receiver is now ready to receive packets.
Continue with the configuration of the transmitter.
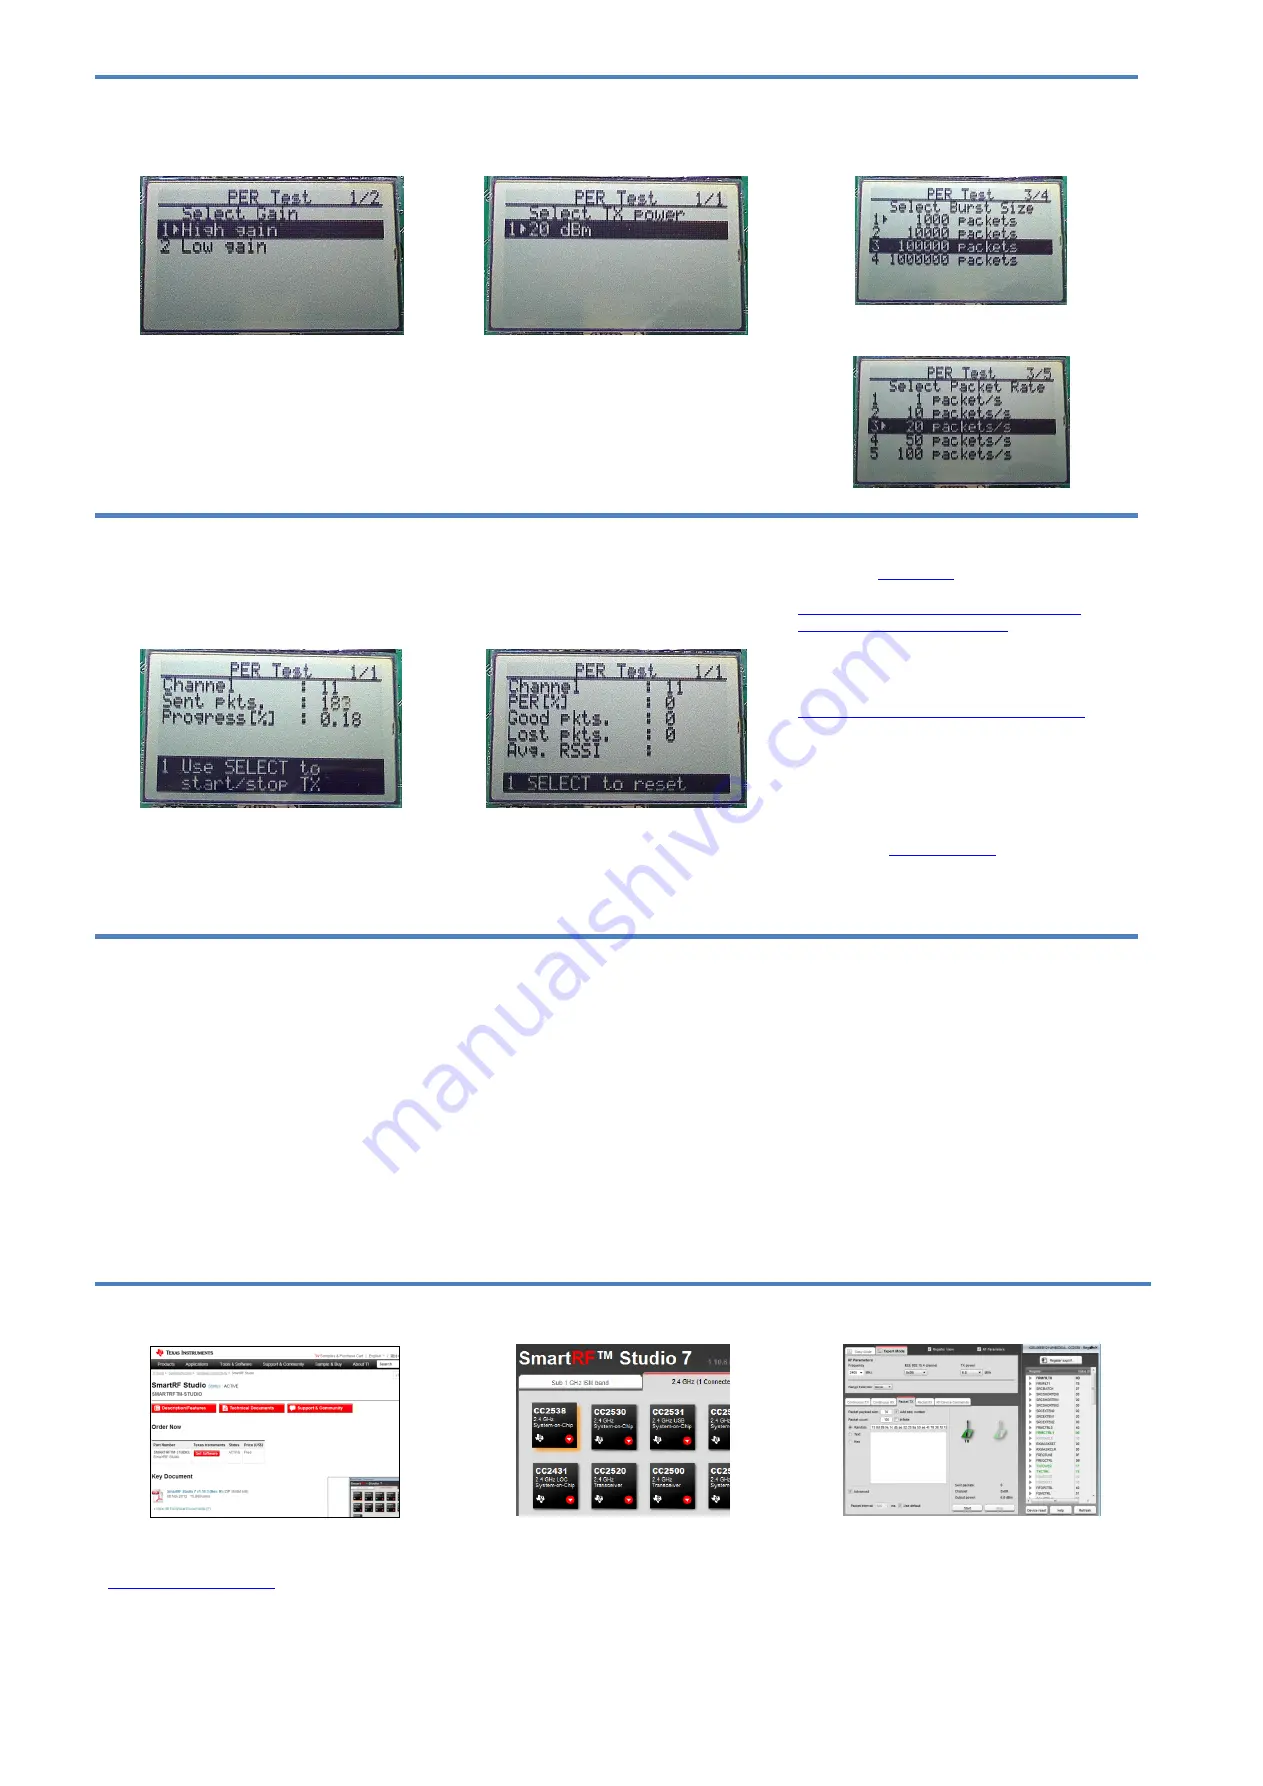
11. Select TX Power
On the transmitter, select desired output power.
12. Select Packet Rate
Still on the transmitter, select the desired burst
size, that is, the number of packets to transmit.
Then select the packet rate.
13. Start Sending Packets
The transmitter is now configured and in idle
state. Sending packets is started and stopped by
pressing the Select button.
14. PER Test Results
On the receiver, the statistics window will show
the error rate based on the number of lost or
erroneous packets divided by the total number of
packets that should have been received.
15. References
Please visit
http://www.ti.com/tool/cc2538-CC2592emk
http://www.ti.com/tool/cc2538dk
The reference design for the evaluation board
can be found here:
http://www.ti.com/tool/cc2538-cc2592em-rd
On the kit product page, you will find additional
documentation, links
to updated
software
examples and software tools like SmartRF
Studio.
You will also find a lot of information on the TI
E2E forum at
We hope that you will enjoy working with the
CC2592 and CC2538 devices.
16. Troubleshooting
It you are experiencing problems with this test,
please check the following:
Nothing is shown in the display! Make sure
the board is powered correctly (see steps 5
and 6 above).
Please visit the kit web page and check for
updated SW and documentation. Updated
SW can be downloaded to the device using
IAR Embedded Workbench for ARM or
SmartRF Flash Programmer.
SmartRF
™ Studio
1. Download and Install
Before connecting SmartRF06EB to your PC,
download and install SmartRF Studio from
2. Launch SmartRF Studio
After installing the tool, connect the EB to the PC
using the USB cable and start SmartRF Studio.
Select the “2.4 GHz” tab and click the refresh
("Find device") button in the lower right corner.
Studio will now find the connected SmartRF06EB.
Double click on the detected SmartRF06EB to
launch the CC2538 device control panel.
3. Test the Radio
You can now configure the radio, run
performance tests, export register settings and
run link tests with another CC2538 on a
SmartRF06EB connected to the PC.