


SWRU285
June 2013
Web sites:
www.ti.com/lprf
E2E Forum:
www.ti.com/lprf-forum
Make sure to subscribe to the Low-Power RF
Newsletter to receive information about updates
to documentation, new product releases and
more. Sign up on the TI web pages.
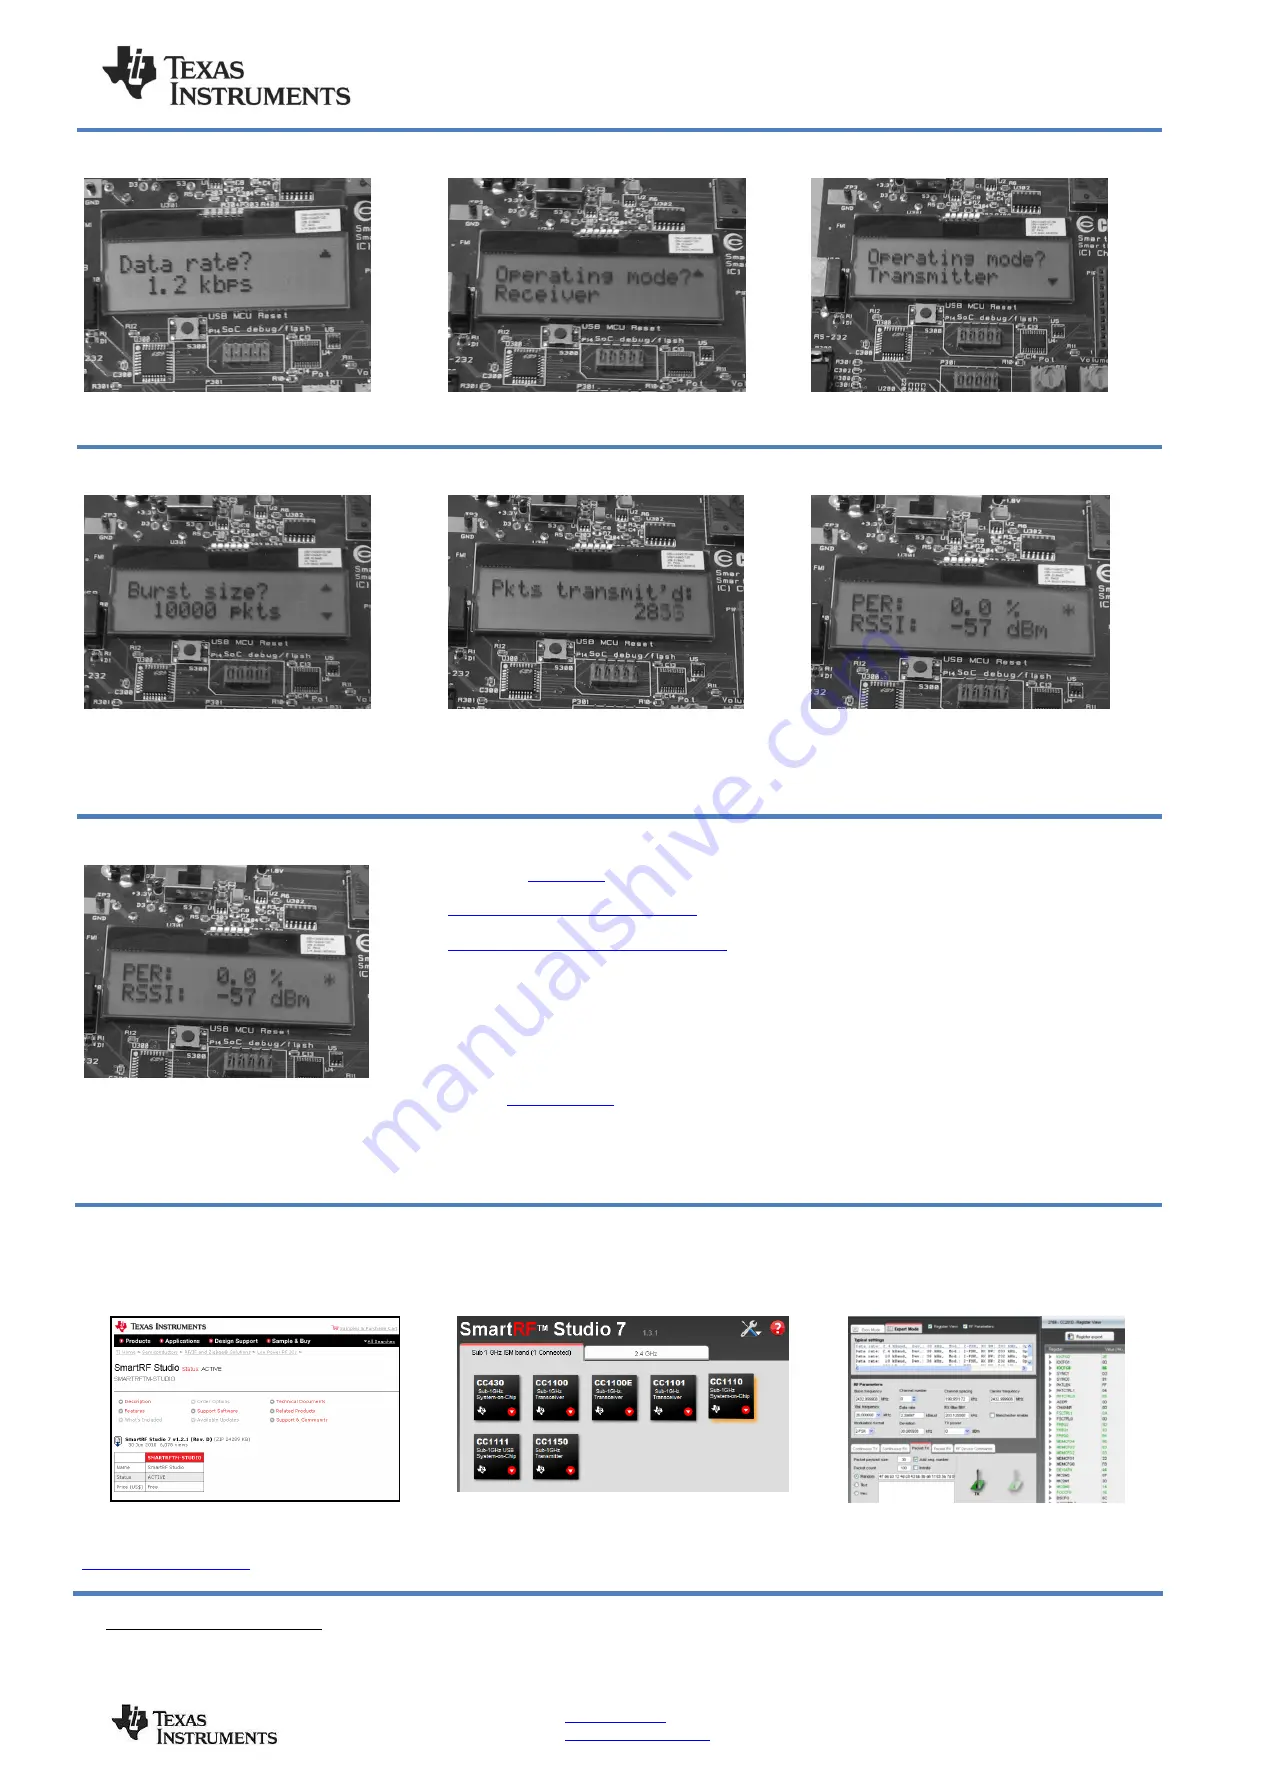
8. Select Data Rate
Select which data rate to use (1.2 kbps, 38.4 kbps
or 250 kbps) by moving the joystick. Confirm your
choice by pushing button S1.
9. EB 1: Select Receiver
Select Receiver on the first EB by moving the
joystick. Confirm by pressing button S1. The
Receiving node will display “Ready to receive”.
10. EB 2: Select Transmitter
Select Transmitter on the other EB by moving the
joystick upward. Confirm by pressing button S1.
11. EB 2: Number of Packets
On the transmitter EB, select the number of
packets to send. More packets take longer, but
give a better statistical result. Confirm by pressing
button S1.
12. PER Test (Transmitter)
Press S1 button again to start transmitting the
packet burst. The transmitter will show a running
counter that shows the number of packets sent.
13. PER Test (Receiver)
The receiver will show the total accumulated packet
error rate (PER) together with the average signal
strength (RSSI) of the previous 32 received
packets. A symbol in the upper right corner will
blink for every 32nd
incoming packet to indicate
whether the link is maintained.
14. Per Test Results
When the PER test is completed, the result will be
displayed on the receiver until a new test is
started. A new test can be started from the
transmitter.
15. References
Please visit
http://www.ti.com/tool/cc1110emk433
http://www.ti.com/tool/cc1110emk868-915
For more information about how to use the
CC1110EM, download the CC1110-CC1111DK
User Manual, the SmartRF™ Studio PC Tool,
software examples, as well as datasheets,
reference designs and application notes.
You will also find a lot of information on the TI E2E
forum at
We hope that you will enjoy working with the
CC1110 device.
16. Troubleshooting
It you are experiencing problems with this test,
please check the following:
a. If you get poor PER results at short distances,
try to move the transmitter and receiver further
apart. The CC1110 receiver may experience
saturation if it is too close to the other CC1110
transmitting at full output power.
b. The data rate affects the range (higher data
rate give shorter range).
c. Please visit the kit web page and check for
updated SW and documentation. Updated SW
can be downloaded to the device using IAR or
the Flash Programmer application.
d. The source code for the packet error rate
application is available on the web. You may
modify the source code to test at other
frequencies or data rates.
See "DN300 -- SmartRF04EB Troubleshooting" for
general troubleshooting of your EB board.
SmartRF
™ Studio
1. Download and Install
Before connecting SmartRF04EB to your PC,
download
SmartRF
Studio
from
2. Launch SmartRF Studio
After installing the tool, connect the EB to the PC
using the USB cable and start SmartRF Studio.
Select the “Sub 1 GHz” tab and double click the
CC1110 device icon.
3. Configure the Radio
You can now configure the radio, run tests,
export register settings and run link tests with
another CC1110 on a SmartRF04EB connected
to the PC.
i
When using an external power supply, make sure it meets the listed requirements in addition to complying with applicable regional product regulatory and
safety certification requirements such as UL, CSA, VDE, CCC, and PSE.