background image

Test Summary

www.ti.com

8

SLUUBR4A – February 2018 – Revised December 2018

Submit Documentation Feedback

Copyright © 2018, Texas Instruments Incorporated

bq25970 PWR893 Evaluation Module

2.5

Charger Mode Verification

Use the following steps for charger mode verification:

1. Select

Charge Enable

2. Input and output voltage/current:

After enabling charge, the output current should be two times of the input current.

3. Change charge current:

By increasing the input voltage, the input current should increase together with the output current. The
output current should always be two times of the input current.

4. Unselect

Charge Enable

(

disable charge)

5. Measure the current at J3 and J5, both should go to zero amps.

6. Turn off and disconnect load

7. Turn off and disconnect PS

3

Board Layout, Schematic, and Bill of Materials

3.1

Board Layout

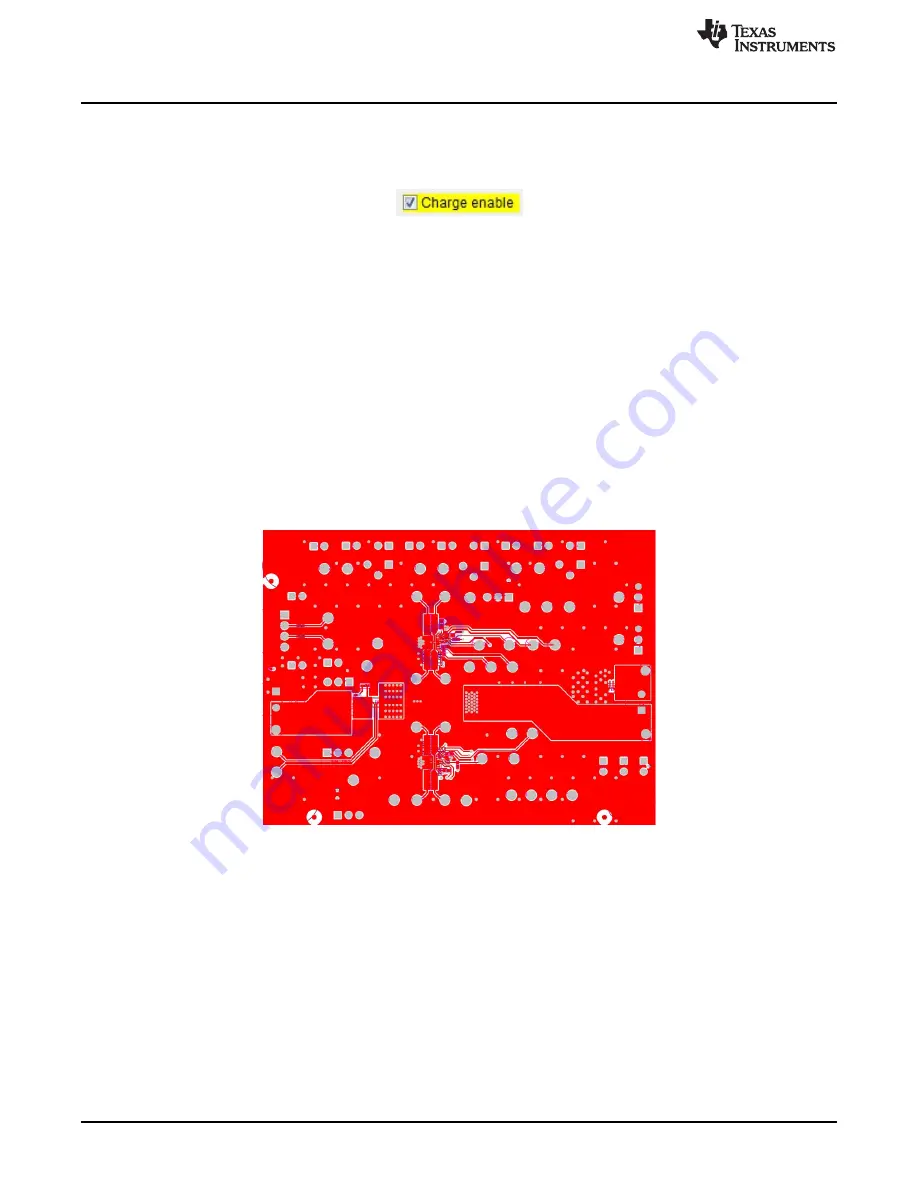
Figure 5

through

Figure 10

illustrate the board layouts for this EVM.

Figure 5. BQ25970EVM-893 top layer

Summary of Contents for bq25970

Page 1: ...bq25970 PWR893 Evaluation Module User s Guide Literature Number SLUUBR4A February 2018 Revised December 2018...

Page 2: ...et EVM Label Variant bq25970 SLUSD72A BQ25970EVM 893 001 The bq2597x evaluation module EVM is a complete charger module for evaluating the highly integrated battery switch in WCSP package for 1 cell L...

Page 3: ...10 ADDRMS pin selection for parallel configuration not installed installed JP11 I2C pull up selection installed installed JP12 SDA and SCL pull up selection installed installed JP13 TSBUS_M connection...

Page 4: ...0 V 0 to 8 A or higher or equivalent NOTE If there is no display of current and voltage in this electronic load a separate current meter and a separate voltage meter are required to measure the output...

Page 5: ...nt limit and then turn off the supply 2 Connect the output of PS to J1 VAC and GND as shown in Figure 1 3 Turn on the battery simulator set to constant voltage mode and output to 3 6 V Turn off disabl...

Page 6: ...udio Select Charger and bq25970 evaluation software The main window of the software is shown in Figure 3 Figure 3 Select Charger in bqStudio Window 2 3 Test Procedure The steps for the test procedure...

Page 7: ...elect Field View specify correct device I2C Address as defined in the datasheet such as CC 66 and so forth 3 Click the Read button Device ACK OK should appear 4 In the EVM software make the following...

Page 8: ...should be two times of the input current 3 Change charge current By increasing the input voltage the input current should increase together with the output current The output current should always be...

Page 9: ...of Materials 9 SLUUBR4A February 2018 Revised December 2018 Submit Documentation Feedback Copyright 2018 Texas Instruments Incorporated bq25970 PWR893 Evaluation Module Figure 6 BQ25970EVM 893 Mid La...

Page 10: ...ls www ti com 10 SLUUBR4A February 2018 Revised December 2018 Submit Documentation Feedback Copyright 2018 Texas Instruments Incorporated bq25970 PWR893 Evaluation Module Figure 8 BQ25970EVM 893 Mid L...

Page 11: ...aterials 11 SLUUBR4A February 2018 Revised December 2018 Submit Documentation Feedback Copyright 2018 Texas Instruments Incorporated bq25970 PWR893 Evaluation Module Figure 10 BQ25970EVM 893 Bottom La...

Page 12: ...ommodate for high current 2 Minimize losses through connectors wherever possible as the losses in these connectors will contribute a significant amount to the total power loss 3 Use vias under the exp...

Page 13: ...4A February 2018 Revised December 2018 Submit Documentation Feedback Copyright 2018 Texas Instruments Incorporated bq25970 PWR893 Evaluation Module 3 2 Schematic Figure 13 and Figure 14 illustrate the...

Page 14: ...Bill of Materials www ti com 14 SLUUBR4A February 2018 Revised December 2018 Submit Documentation Feedback Copyright 2018 Texas Instruments Incorporated bq25970 PWR893 Evaluation Module Figure 14 bq25...

Page 15: ...3 81 mm TH 1727010 Phoenix Contact J3 1 Header 100 mil 4x1 R A TH 22 05 3041 Molex JP1 JP2 JP3 JP4 JP5 5 Header 2 54 mm 3x1 Tin TH TSW 103 07 T S Samtec JP6 JP8 JP9 JP10 JP11 JP12 JP13 JP14 JP15 JP16...

Page 16: ...Multipurpose White TH 5012 Keystone TP50 1 Test Point Compact Orange TH 5008 Keystone U1 U2 2 97 Efficient 8A Switched Cap Battery Charger with Integrated Protection I2C Programmability and ADC YFF00...

Page 17: ...Documentation Feedback Copyright 2018 Texas Instruments Incorporated Revision History Revision History NOTE Page numbers for previous revisions may differ from page numbers in the current version Chan...

Page 18: ...set forth above or credit User s account for such EVM TI s liability under this warranty shall be limited to EVMs that are returned during the warranty period to the address designated by TI and that...

Page 19: ...the antenna types listed in the user guide with the maximum permissible gain and required antenna impedance for each antenna type indicated Antenna types not included in this list having a gain great...

Page 20: ...t the EVM user guide prior to connecting any load to the EVM output If there is uncertainty as to the load specification please contact a TI field representative During normal operation even with the...

Page 21: ...OST OF REMOVAL OR REINSTALLATION ANCILLARY COSTS TO THE PROCUREMENT OF SUBSTITUTE GOODS OR SERVICES RETESTING OUTSIDE COMPUTER TIME LABOR COSTS LOSS OF GOODWILL LOSS OF PROFITS LOSS OF SAVINGS LOSS OF...

Page 22: ...e resources are subject to change without notice TI grants you permission to use these resources only for development of an application that uses the TI products described in the resource Other reprod...

Reviews: