


ADS794xEVM-PDK: Software Installation
15
SBAU194B – August 2011 – Revised September 2017
Copyright © 2011–2017, Texas Instruments Incorporated
ADS794xEVM and ADS794xEVM-PDK
6.5.1
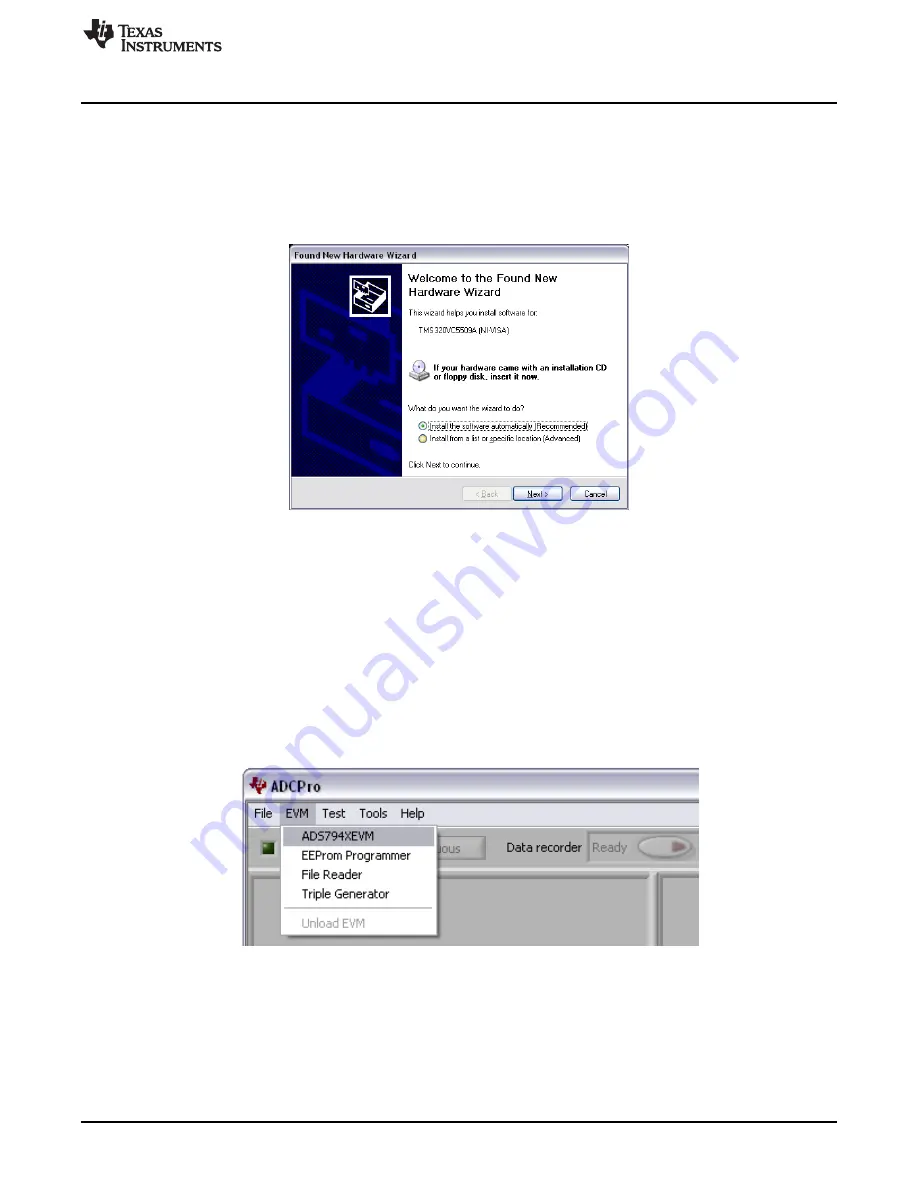
NI-VISA USB Device Driver Installation
Follow these procedures to install the NI-VISA USB device driver, if prompted.
Step 1.
With power applied to the PDK kit, connect the PDK kit to the PC via USB.
Step 2.
The computer should recognize the new hardware and prompt the user for drivers, as shown
in
. This driver should be present in the PC hard drive with the ADCPro files. Direct
the PC to search the driver and install it by clicking
Next -->
at every prompt.
Figure 9. NI-VISA Driver Installation Prompt
6.5.2
USBStyx Driver Installation
The USBStyx driver prompt only appears when the ADCPro software uses the ADS794xEVM plug-in to
communicate with the PDK hardware for the first time. Follow these procedures to install the USBStyx
driver.
Step 1.
Make sure that the PDK kit is configured and powered up as explained in
and
. Then, press the
Reset
button on the MMB0 upper right-hand corner once.
Step 2.
Start ADCPro from the Windows
Start
menu.
Step 3.
Load the ADS794xEVM plug-in from the ADCPro EVM drop-down menu as
illustrates.
Figure 10. Loading ADS794xEVM Plug-in From ADCPro