Using the PC Software
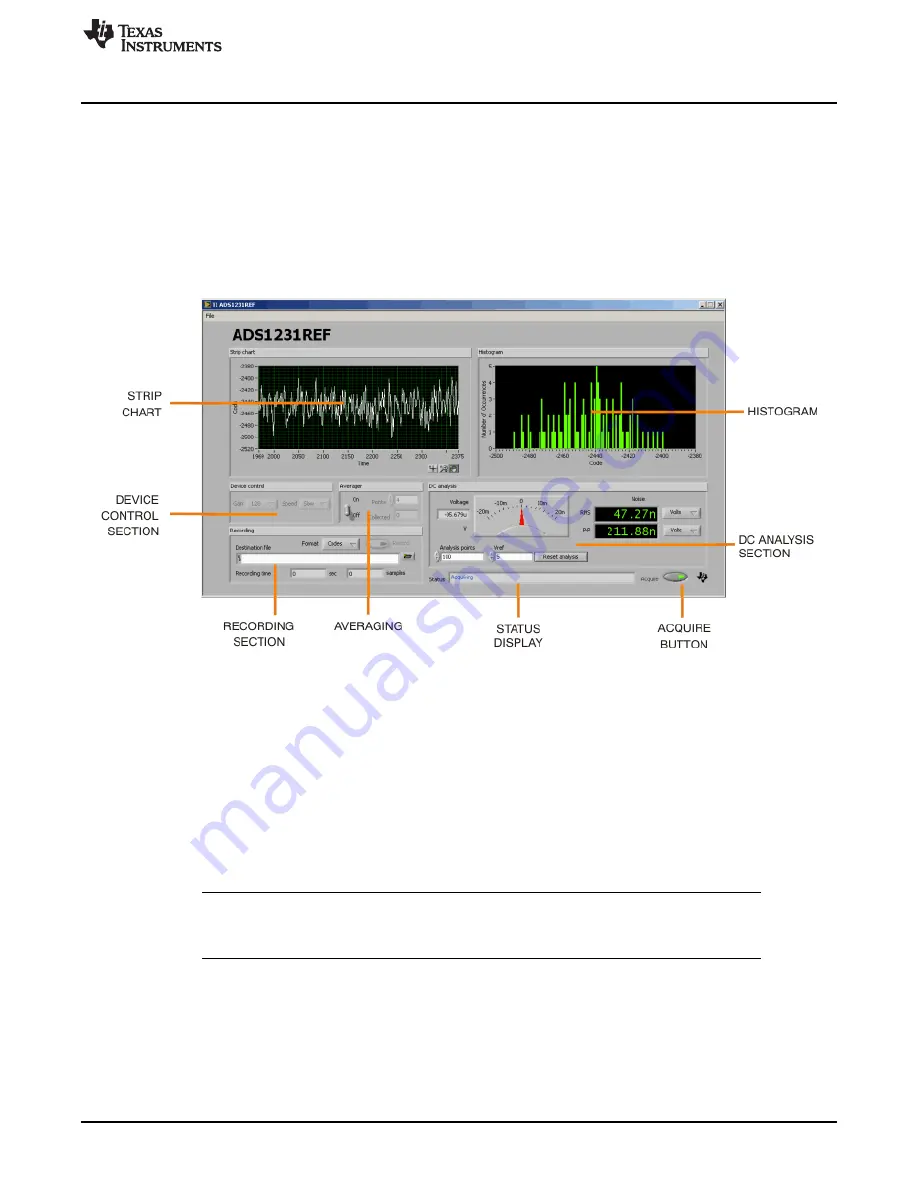
Status display: This display shows messages indicating the current state of the program.
Acquire button: This button starts and stops the running acquisition of data.
4.3
Starting the Program
When the program launches, a screen similar to that shown in
appears. Immediately after launch,
the program searches all available serial ports for the board. To do this step, it opens every available
serial port in turn, testing it to see if there is an ADS1x31REF connected. The program uses the first
ADS1x31REF it finds. Note that the title block displays the name of the board found.
shows the
board found as the ADS1231REF. If the ADS1131REF is connected, the title shows ADS1131REF.
Figure 6. ADS1231REF PC Software Display
Although this procedure is conceptually simple, it may not go as smoothly as expected. The following
process ensures that the board is found correctly. Note that Steps 1
–
3 can be done in any order.
Step 1.
Apply power to the ADS1x31REF.
Step 2.
Plug in the USB connector.
Step 3.
Start the program.
Step 4.
Watch the status display. It reads Scanning followed by the name of the serial port being
tested. When the board is found, the display reads Idle. Until a board is found, the display
cycles through every port, spending approximately one second on each port.
Once the board is detected, the program enters Idle mode and is ready for use.
NOTE:
If the board is never detected, it is still possible (and safe) to exit the program during the
search process. If the board does not respond, pressing the USB Reset switch (SW1) may
help.
15
SBAU175A
–
July 2010
–
Revised August 2011
ADS1131REF and ADS1231REF
Copyright
©
2010
–
2011, Texas Instruments Incorporated


