


Quick-Start Procedure for Digital DDC (Decimation Plus NCO) Mode in ADC32RF4x and ADC32RF8x
27
SLAU620D – April 2016 – Revised August 2017
Copyright © 2016–2017, Texas Instruments Incorporated
ADC32RFxx-EVM
6. After the firmware download has completed, enter “368.64M” into the
ADC Output Data Rate
field at
the bottom left corner of the HSDC Pro GUI (2.94912 GHz sample rate divided by 8). A common
mistake is to type 'm' instead of 'M' in which case the frequency entered is in milli-Hz instead of
mega-Hz. Another common mistake is to omit the 'M' in which case the frequency entered is in Hz.
7. Select “Channel 1/8” in the channel select window located at the top middle of the GUI.
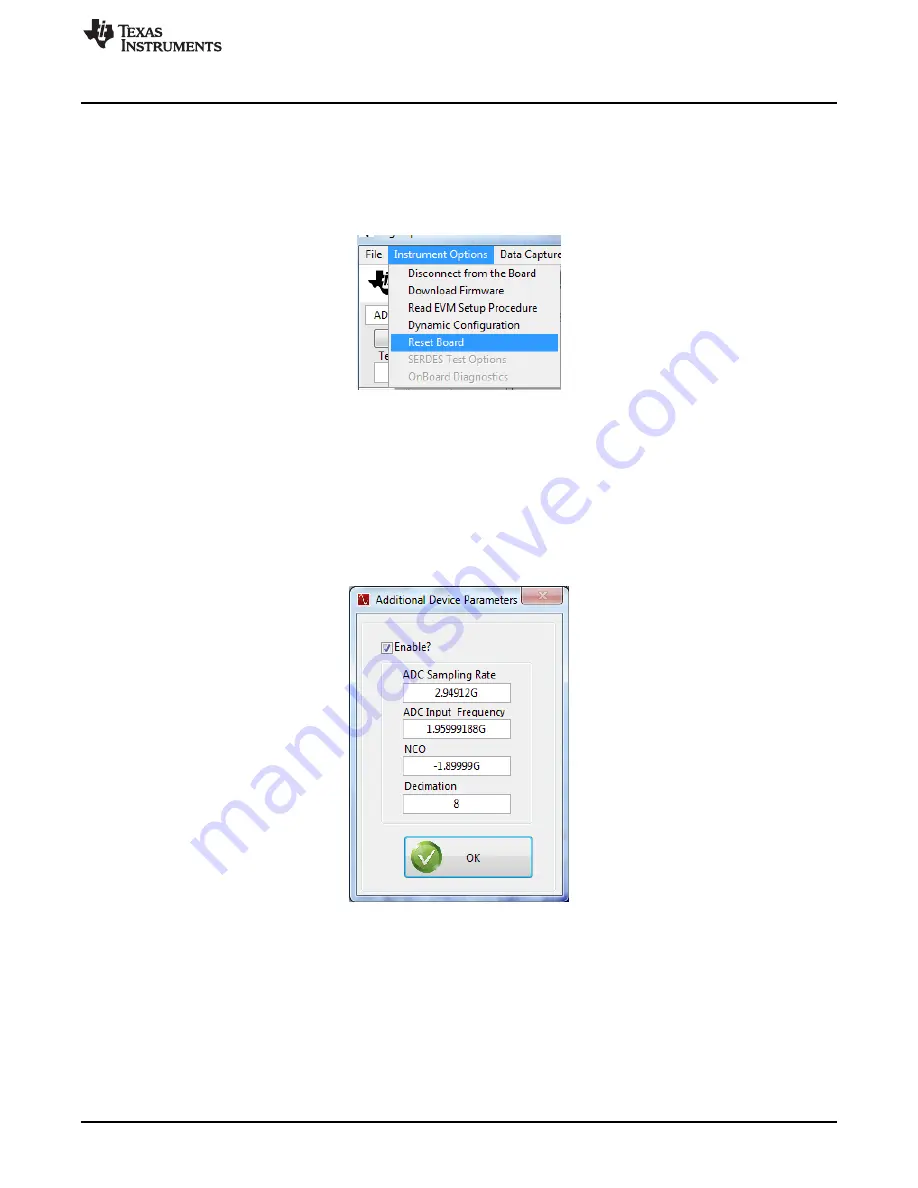
8. Click the
Instrument Options
menu at the top of HSDC Pro and select
Reset Board
.
Figure 25. Resetting the TSW14J56
9. Click
Capture
in HSDC Pro to capture data from the ADC.
10. Select
Complex FFT
11. The result should match the example capture in
The input tone is seen to be near 60 MHz because the signal generator is set to 1.96 GHz while the
NCO in the ADC is set to 1.90 GHz. So, the input tone is mixed down to 60 MHz. If the signal
generators for the analog input tone and the clocking are synchronized, then HSDC Pro is able to
locate the expected tone after the NCO and decimation by way of the popup parameter window of
. If this popup is used, the frequency values entered must be exact.
Figure 26. Popup Window for Setting HSDC Pro Decimation Factor and NCO Frequency