28
Working with Documents on TI-Nspire™ CX II Handhelds
Press
1
.
You can also press
/ N
.
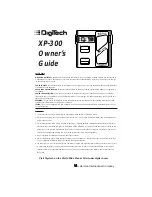
A new document opens with a list of applications.
Note:
The tab at the top left of the screen indicates that this is the first page of the
first problem.
2. Use
¤
and
£
to highlight the application you want to add to the page, then press
·
to open the page.
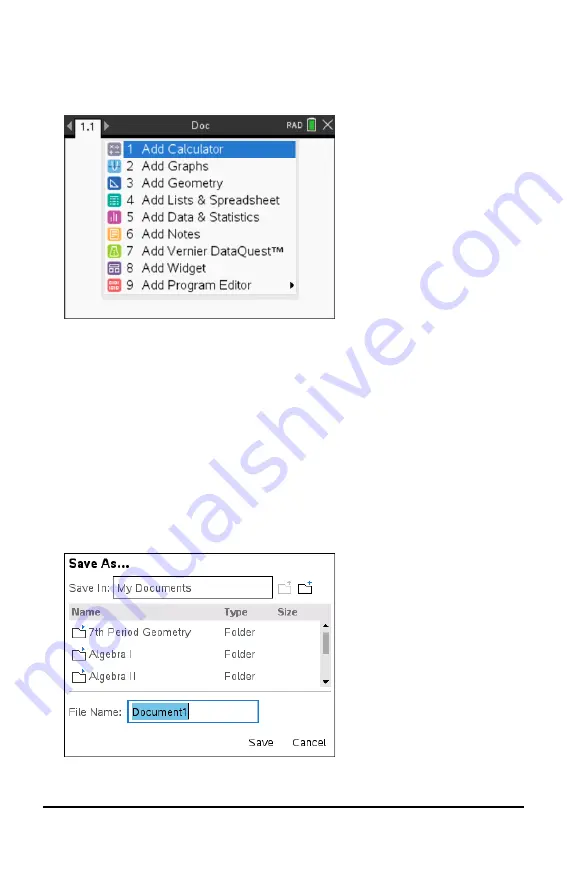
Saving Documents
To save the document in the My Documents folder:
1. Press
~
to open the Documents menu, then select
File > Save
.
Note
: You can also press
~ 1 4
or
/ S
to save a document.
The Save As dialogue box opens.
Summary of Contents for 5808730
Page 6: ...vi ...