17
Accessories
Some accessory options are available for FX 815TG.
Texas recommend buying accessories, as it increases the
usage possibilities of the machine considerably.
Below accessories can be purchased for use with FX 815TG
(the list is subject to local changes/availabilities)
Wheels (included):
used with rear accessories such as
ridger.
Side discs (included):
used for tilling in between crops,
such as carrots/potatoes, to avoid covering the crops in
soil. Side guards can also be used for tilling along a wall
or stone path, or in soft soil.
Iron wheels:
used if the soil is loose or muddy and the
machine is to be operated with a ridge plough or harrow
instead of wheels. Art. no. 90063186
Ridger:
used to plough up ground for potatoes, carrots
and other root crops. Art. no. 90063184
Plough:
used to turn the soil. Art. no. 90063185
Potato plough:
used for harvesting potatoes.
Art. no. 90063183
Cleaning the tiller
The tiller should be cleaned after use. Use a garden hose to
wash off soil and dirt. Remove any grass, etc. from the rotor
shaft.
Avoid using a high-pressure washer during cleaning.
Changing the oil
The oil should initially be changed after the first 5 hours of
use, and thereafter once per year.
1. Let the motor run for 5 minutes to heat up the oil. This
allows the oil to run more freely and makes for a more
complete oil change.
2. After 5 minutes, stop the motor. Remove the spark plug
cap. Drain the oil by unscrewing the sump plug.
Remember to drain the oil into a container of sufficient
capacity. NB: The motor must not be tipped backwards
more than 45 degrees.
3. Screw the sump plug back in and pour new oil into the
motor. Do this by removing the oil cap and pouring in the
recommended quantity of oil.
4. Refit the spark plug cap.
Alternatively, use an oil extractor kit.
1. Suck the oil up through the oil filler hole using the
syringe. Use the hose to reach the sump.
2. Transfer the used oil to the container.
3. Fill the engine with new SAE-30 oil (0.6 l.).
4. Always check that the oil level is visible and to edge of
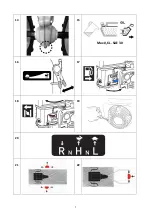
the fill hole. Fig. 21.
Remember to dispose of used oil in a safe way.
Oil and oil extractor kit are not included
Air filter maintenance
Please inspect and clean the air filter on a regular basis. If
the filter has not been cleaned for a longer period, this will
have influence on the engines power take-off and the
exhaustion.
1.
Clean around the air filter before it is removed.
2.
Carefully remove the paper filter and check it. Brush it
with a soft brush. If it is very dirty, it must be changed.
Take care that no dirt gets into the intake of the engine.
3.
Wash the black foam element on the right side in
warm soapy water.
4.
Press the water out of the foam element and let it dry.
Put a few drops of SAE-30 oil on the filter to moisten it
lightly with oil. Carefully squeeze out any surplus oil.
Remount the element.
5.
Check that all parts are fitted correctly, and the cover
closed.
See the engine user manual for further information.
Spark plug maintenance
•
Remove the spark plug cap.
•
Brush away any dirt and deposit of the spark plug.
•
Loosen the spark plug using a spark plug socket.
•
Check the insulation is intact.
•
Clean the spark plug using a wire brush.
•
Measure the electrode gap 0.7–0.8 mm. Avoid
damaging the electrode.
•
If it is damaged, replace it with a new one.
•
Refit the spark plug.
•
Refit the spark plug cap.
Storage
•
If the machine is likely to be stored unused for prolonged
periods, follow the instructions below. This will ensure
longer machine lifetime.
•
Use a garden hose to wash off soil and dirt. Remove
any grass, etc. from the rotor shaft. The chassis number
should only be cleaned with a damp cloth to avoid
unnecessary wear. Avoid using a high-pressure washer
during cleaning.
•
Wipe the tiller with a damp cloth so that all surfaces are
clean. Wipe the surfaces down with an oily cloth to
prevent rust.
•
Always store the machine in a dry, clean location.
Summary of Contents for FX 815TG
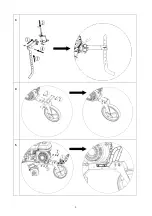
Page 3: ...3 3 4 5 ...
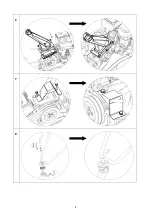
Page 4: ...4 6 7 8 ...
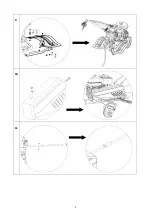
Page 5: ...5 9 10 11 ...
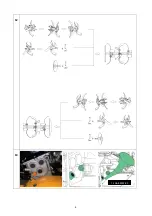
Page 6: ...6 12 13 1 L SAE 80W 90 ...
Page 7: ...7 14 15 Max 0 6 L SAE 30 16 17 18 19 20 21 22 ...
Page 26: ...26 ...
Page 27: ...27 ...
Page 28: ...28 ...

