Adjusting parameters in the device
22
The function keys are also used to operate the Testomat
®
Modul CL.
You will find individual explanations and processes in the following
chapters.
Adjusting parameters in the device
Adjust parameters such as time and date and measurement interval
in the Service Monitor and then transfer the data to the device. To do
this, you must connect the Testomat
®
Modul CL to a computer that
has the Service Monitor software stored on it (see section
on page 27).
You must start the device´s selection mode to establish a USB con-
nection between the Testomat
®
Modul CL and the computer.
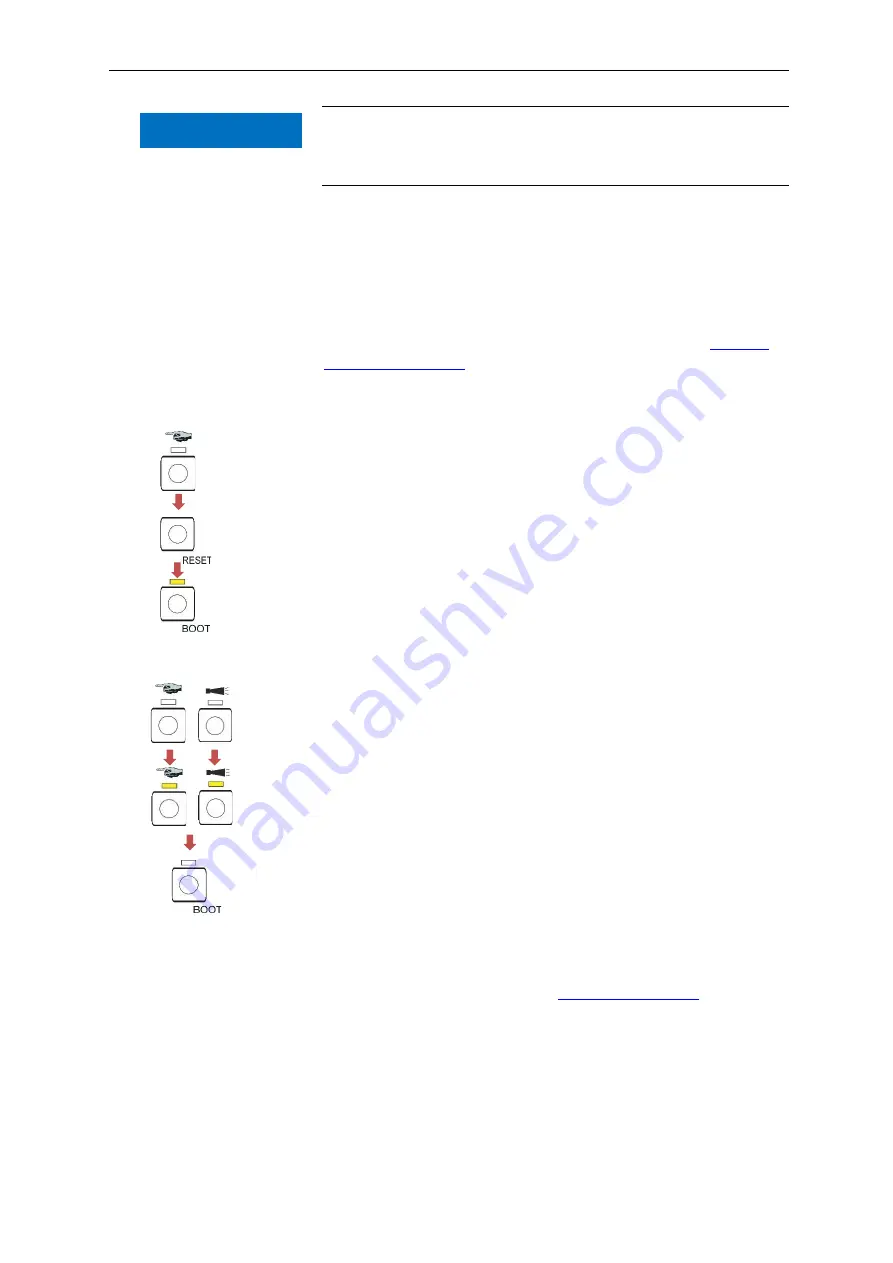
Calling up selection mode on the device
Open the electronics housing lid.
Press and hold one of the three function keys
Manual
,
Alarm
or
100%
down throughout the whole process.
Press the RESET key once.
Keep the function key pressed down until the yellow LED above
the BOOT key lights up.
The device is now is selection mode.
Starting USB communication
Connect the computer and the Testomat
®
Modul CL with a USB
cable.
Start the Service Monitor program on the computer.
Press the
Manual
function key.
Press the
Alarm
function key.
Confirm by pressing the BOOT key.
The LED over the BOOT key goes out.
The LEDs above the two function keys light up to show that commu-
nication is active.
Entering parameters via the Service Monitor pro-
gram
Enter the desired parameter in the Service Monitor (description of all
possible parameters under section
28).
The entered parameters are written straight onto the device with the
“Export Data” button, if “Device” is selected.
Close the program with the
“Close” button.
Disconnect the USB connection between the device and computer.
keep
pressed
down
press
and re-
lease
wait until
LED
lights up
NOTE
NOTE
press
LEDs
light up
press


