Tesla CA65U22U, User Manual
The Tesla CA65U22U is a high-quality product designed for optimal performance. Ensure you get the most out of your device by downloading the free User Manual from manualshive.com. This manual provides detailed instructions for easy setup and operation. Download it now for a seamless experience with your Tesla CA65U22U.
Share
Download


Reviews:
No comments
Related manuals for CA65U22U

TVH24R506STWEB
Brand: Gogen Pages: 150

H25E46DTOM
Brand: Zenith Pages: 60
UA49MU7500
Brand: Samsung Pages: 44

TX-28PS5
Brand: Panasonic Pages: 52

TX-28PS1L
Brand: Panasonic Pages: 44

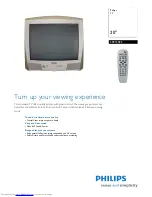
20TP2322
Brand: Philips Pages: 2

20PT6441
Brand: Philips Pages: 2

20PT2321
Brand: Philips Pages: 2

20PT6431
Brand: Philips Pages: 2

20PT3336
Brand: Philips Pages: 2

20PT1342
Brand: Philips Pages: 2

20PT2012
Brand: Philips Pages: 2
20PT2005
Brand: Philips Pages: 2

20PS35S
Brand: Philips Pages: 2

20PS40S
Brand: Philips Pages: 2

20PS47S
Brand: Philips Pages: 2

20PT155A/07
Brand: Philips Pages: 4

19PS57C
Brand: Philips Pages: 2


