background image


16


2.3 On-Screen Display 


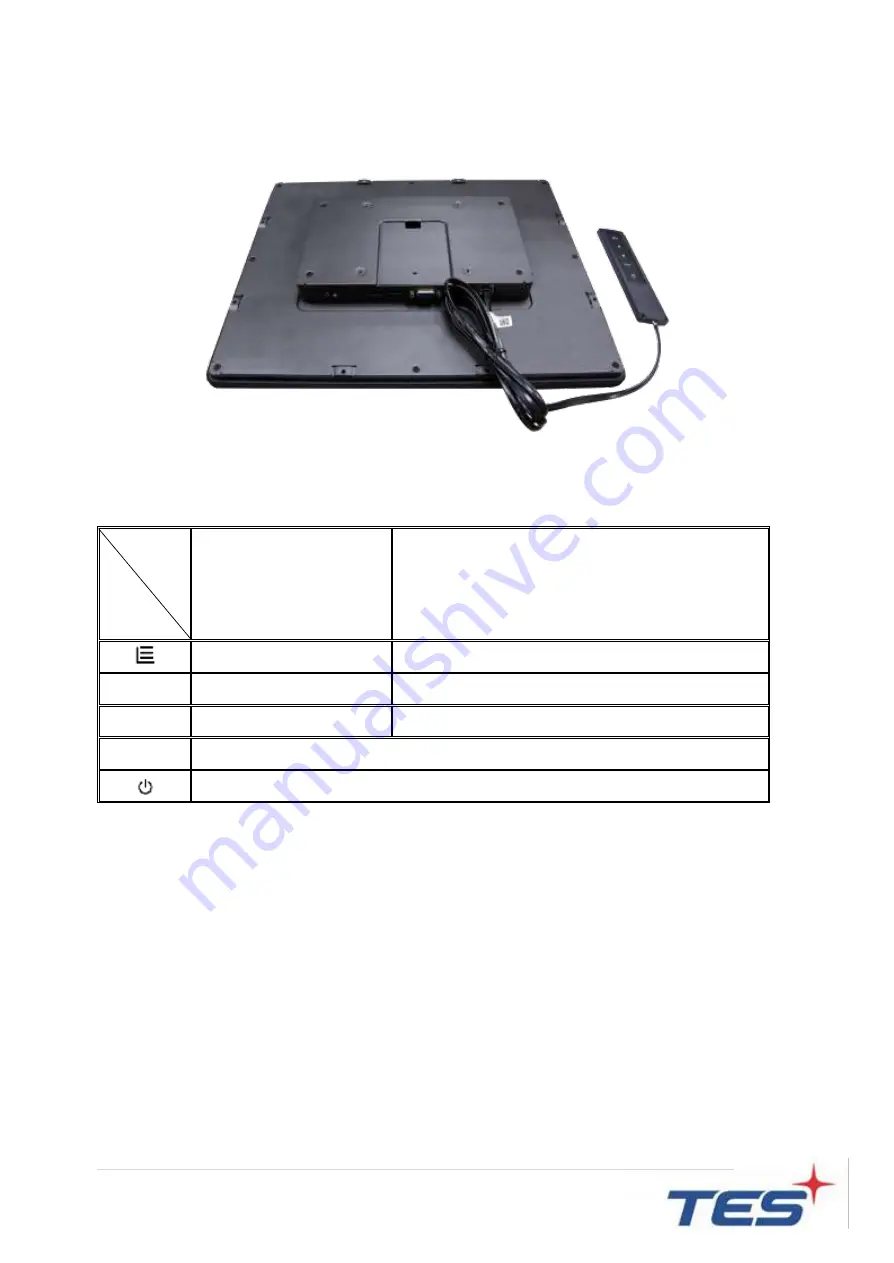
The APM-15 series provide RJ45 port for connecting with OSD remote key. And the 
following is OSD key function table: 


OSD 

Key 

Menu off status 

Menu on status 


Menu appear 

Menu disappear/ return to main item 


Brightness   

Main item select up/ Adjust up 


Contrast 

Main item select down/ Adjust down 


Enter/Select sub-item function 


Power On/Off 


1. 

Press the “MENU”


button to pop up the “on-screen menu” and press “Up” or “Down” button to 


select among the five functions in the main menu. 

2. 

Choose 

the adjustment items by pressing the “Enter” button. 

3. 

Adjust the value of the adjustment items by pressing the “Up” or “Down” button. 

4. 

With the 

OSD menu on screen, press “Menu” button to return main menu or exit OSD. 

5. 

The OSD menu will automatically close, if you have left it idle for a pre-set time. 

6. 

To Lock the OSD / Power menu buttons, please follow the instructions below. 

(Please note: the monitor has to be turned ON with a valid signal pre-set) 

a. 

Press “Menu” key, the OSD menu will pops upon display.   

Summary of Contents for APM-15

Page 1: ...APM 15 Touch LCD Monitor User Manual Version 3 0 2017 11 ...

Page 2: ...he information in this document is subject to change without notice TES makes no representations or warranties with respect to the contents herein and specifically disclaims any implied warranties of merchantability or fitness for a particular purpose TES reserves the right to revise this publication and to make changes from time to time in the content hereof without obligation of TES to notify an...

Page 3: ...e received including interference that may cause undesired operation Warning This device generates uses and can radiate radio frequency energy and if not installed and used in accordance with the manufacturer s instruction manual may cause harmful interference with radio communications Operation of this equipment in a residential area is likely to cause harmful interference in which case you will ...

Page 4: ...he power plug from AC outlet if the product is not going to be used for an extended period of time Don t Do not use abrasive cleaners waxes or solvents for your cleaning Do not operate the product under the following conditions Extremely hot cold or humid environment Areas susceptible to excessive dust and dirt Near any appliance generating a strong magnetic field Warning To prevent the risk of fi...

Page 5: ...r 8 1 5 2 Video Signal Connector 8 1 6 Package Overview 10 Chapter 2 11 2 1 About VESA Mount 12 2 2 About Wall Mount 13 2 2 1 Landscape 13 2 2 1 Portrait 14 2 3 On Screen Display 15 2 3 1 OSD Function Description 18 2 3 2 Timing Table Chart 19 2 3 3 EDID Data 19 2 4 Dimension 20 2 4 1 Front View 20 2 4 2 Side View 20 2 4 3 Rear View 21 Appendix 22 ...

Page 6: ...5 Chapter 1 Product Introduction ...

Page 7: ...ice and interactive signage 1 2 Feature Cable management bracket design for easy organize cable 1 3 Specifications LCD Touch Panel Size 15 TFT LCD Brightness 350 cd m2 Non touch screen 315 cd m2 P CAP Number of Pixels 1024 H 768 V Touch Type P CAP 10 points Environment Certificate CE FCC Compliance IPX0 Operating Temperature 0 C 50 C Storage Temperature 20 C 60 C Operating Humidity 10 95 RH non co...

Page 8: ...7 1 4 Block Diagram ...

Page 9: ... connector Connector Pin Assignment Pin 訊號 1 Red video signal input 2 Green video signal input 3 Blue video signal input 4 NC 5 DDC ground for the VESA DDC2B function 6 Analog signal ground for the red video 7 Analog signal ground for the Green video 8 Analog signal ground for the blue video 9 5V Input from host system for the VESA DDC2B function 10 Signal ground 11 NC 12 SDA signal input for the ...

Page 10: ...nd 7 ML_Lane 2 p Data2 17 AUX_CH n AUX Signal for Auxiliary Channel 8 Signal ground 18 Hot Plug 9 ML_Lane 2 n Data 2 19 DP_PWR Return 10 ML_Lane 3 p Data3 20 DP_PWR Pin Signal Pin Signal 1 TMDS Data2 11 TMDS Clock Shield 2 TMDS Data2 Shield 12 TMDS Clock 3 TMDS Data2 13 CEC 4 TMDS Data1 14 Reserved N C on device 5 TMDS Data1 Shield 15 SCL 6 TMDS Data1 16 SDA 7 TMDS Data0 17 DDC CEC Ground 8 TMDS D...

Page 11: ...Warming This product is intended to be supplied by a Listed Power Adapter or DC power source rated 12Vdc 1 5A minimum Tma 50 degree C minimum and the altitude of operation 3048m minimum If it needs further assistance with purchasing the power source please contact to TES for further information ...

Page 12: ...11 Chapter 2 Product Installation ...

Page 13: ...tandards of touch monitor mounting devices The VESA mount is located on the back of this unit VESA Mount Warming Please select the TES original screws The distance between the back cover surface and the bottom of the screw hole is 8 mm and 18 mm Please use four M4 screws diameter with proper length to mount your monitor Note The mounting stand must be able to support at least 7 67 lbs 3 48 Kg ...

Page 14: ...the opposites 2 2 1 Landscape Depending on your mounting scheme alternately you may use the side brackets to mount your displays onto your wall or device Find a suitable location for attaching side brackets A The left and right sides B The Top and bottom sides Warming This apparatus is intended to be supported by a Listed Wall Mount Bracket or the equivalent ...

Page 15: ...14 2 2 2 Portrait A The left and right sides B The Top and bottom sides ...

Page 16: ...15 2 2 3 Face up Step1 To install bracket on customer s cabinet Back side Step2 Assembly APM 15 into the cabinet and insert screws Back side Front side ...

Page 17: ...on screen menu and press Up or Down button to select among the five functions in the main menu 2 Choose the adjustment items by pressing the Enter button 3 Adjust the value of the adjustment items by pressing the Up or Down button 4 With the OSD menu on screen press Menu button to return main menu or exit OSD 5 The OSD menu will automatically close if you have left it idle for a pre set time 6 To ...

Page 18: ...e instructions below Please note the monitor has to be turned ON with a valid signal pre set Press and hold the Menu key then a Press the Power key simultaneously the Lock Unlock menu will appear for 3 seconds b Use the Enter key to select OSD or Power setting then set at Unlock by pushing the UP or Down button c When the UP or Down button is released the previous setting will be saved and exit th...

Page 19: ...Horizontal size The screen image horizontal dot clock adjustment NA Fine The screen image pixel phase adjustment NA OSD Left Right Moving OSD menu horizontal position to left or right 50 OSD Up Down Moving OSD menu vertical position to up or down 50 OSD Time out OSD auto disappear time selection 15 OSD Language OSD menu language selection English French Japanese Deutsch Spanish Italian Traditional...

Page 20: ... 12 157 1024x768 70 0 Hz 56 476 75 13 141 1024x768 75 0 Hz 60 02 78 75 Note If input H display 1024 pixel or V display 768 lines or V Sync 76Hz then OSD shall display warning out of range 2 3 3 EDID Data DP HDMI The monitor assembly shall provide a display communications channel that conforms to VESA DDC2B hardware requirements This configuration shall contain the 256 byte EDID file as specified b...

Page 21: ...20 2 4 Dimension 2 4 1 Front View 2 4 2 Side View ...

Page 22: ...21 2 4 3 Rear View ...

Page 23: ...22 Appendix ...

Page 24: ...ybrominated diphenyl ethers PBDE 塑膠零件 Plastic Parts 金屬零件 Metal Parts 線纜和電纜組件 Cable component LCD 面板 LCD Panel 觸控式螢幕面板 Touch Panel PCBA 軟體 CD 等 Software Note 1 Exceeding 0 1 wt and exceeding 0 01 wt indicate that the percentage content of the restricted substance exceeds the reference percentage value of presence condition Note 2 indicates that the percentage content of the restricted substance doe...

Reviews: