


English
Basic
setup
a
)
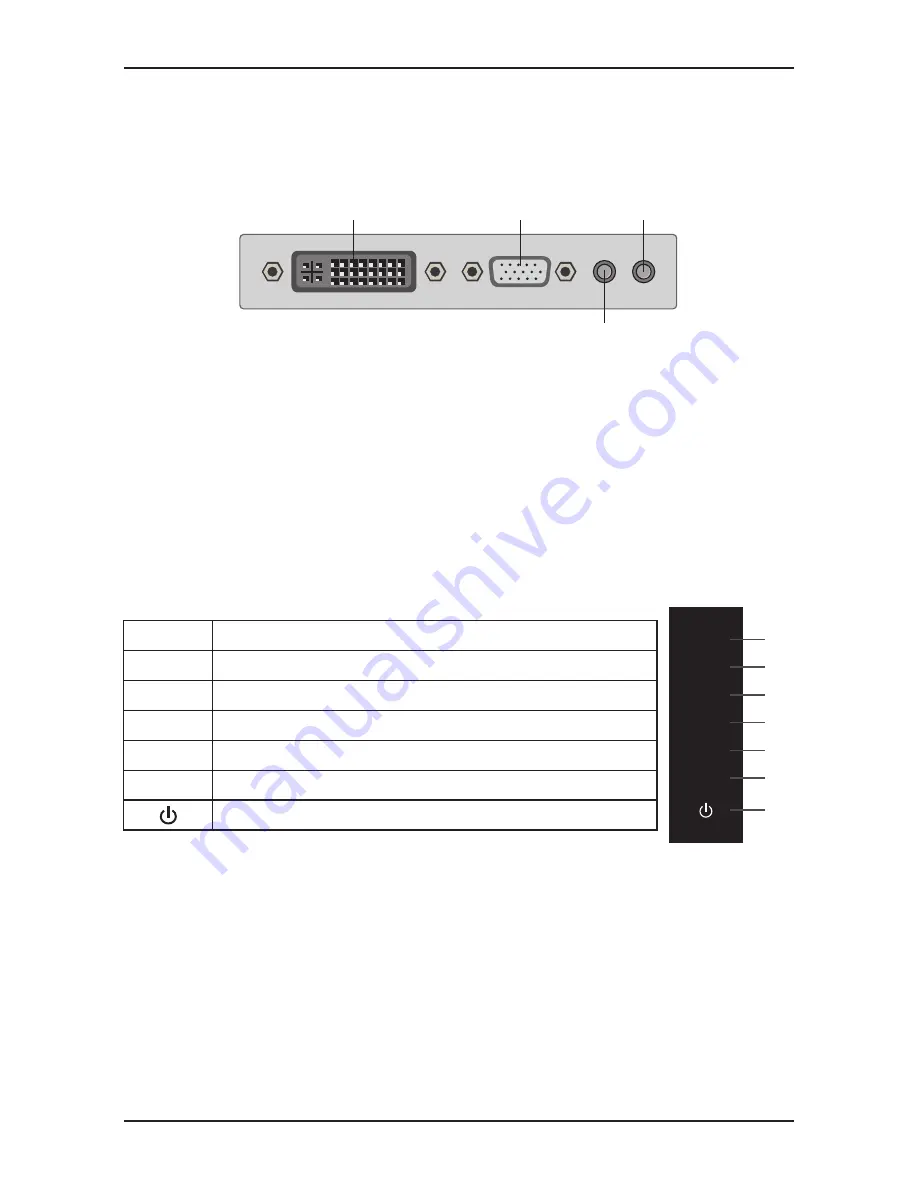
Insert
the
DVI
or
VGA
cable
signal
cord
to
the
PC
graphic
card
signal
input
cable
(
)
(
).
We
recommend
using
the
digital
interface
(DVI).
b
)
The
monitor
has
a
wide
power
voltage
range
;
it
can
be
used
on
AC100 240V
50
/
60Hz
supply
.
-
~
power
c
)
Connect
the
power
cable
to
the
Monitor
power
socket
and
to
the
power
source
in
the
room
.
d
)
Turn
on
the
power
source
supply
.
e
)
To
switch
on
the
monitor
,
press
the
power
control
key
.
Screen
image
setups
The
right
side
of
the
monitor
Display
.
have
Seven
keys
to
adjust
the
monitor
settings
with
the
aid
of
the
OnScreen
AUTO
MENU
VOL-
VOL+
1
2
3
4
5
UP
DOWN
6
7
Adjustment
settings
1
.
Press
MENU
key
into
main
Setup
menu
on
the
screen
.
2
.
Press
UP
/
DOWN
key
to
switch
selections
on
the
Setup
screen
.
3
.
Press
MENU
key
again
to
access
setup
selection
.
a
.
Press
to
jump
between
menu
options
.
UP
/
DOWN
Press
MENU
key
to
access
the
function
.
b
.
Press
to
adjust
the
setting
.
VOL+
/
VOL-
c
.
Press
AUTO
to
return
to
main
menu
.
Exit
main
menu
,
or
when
no
menus
-
auto
adjust
image
.
Shows
main
choice
menus
Adjust
the
options
-
move
up
or
higher
/
When
no
menus
VGA
/
DVI
source
selection
Adjust
the
options
-
move
down
or
lower
Power ON OFF
/
AUTO
MENU
VOL-
VOL+
UP
DOWN
Increase
the
sound
level
/
Adjust
the
options
-
move
up
or
higher
Decrease
the
sound
level
/
Adjust
the
options
-
move
down
or
lower
2
DVI
connector
VGA
connector
Audio
connector
DC
connector


