background image

www.element14.com
www.farnell.com
www.newark.com
www.cpc.co.uk

TM

TM

Page <3>

V1.0

03/01/19

User Manual

1. Quick Start

This chapter describes the basic check points on 72-2660 for proper operation, as well as the functions of 72-2660. 

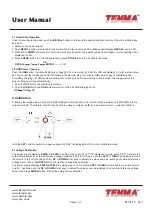
1.1 Front Panel Description

Current Setting Indicator 
Voltage Setting Indicator
Measured Value Display 
Keypad 
USB Charging Ports 
DC Output Terminals 

Current Setting Indicator

1.2 Pre-Check

Before the operation, please check the included accessories; if any are missing, please contact the local distributor. 
Power Cord – 1PC
User Guide – 1PC
Connect the power cord to the unit and to a properly grounded outlet, and switch on 72-2660. The unit starts the self-system 

checking, the LCD displays 0.5s, date of manufacturing, production lot, model number version number in turn. 

1.3 Quick Start


OUT Button

Press the 

OUT

 button to begin outputting the selected voltage and current. The unit will display the voltage or current on the 

screen. Press again OUT button to exit output function. 

UP Arrow Key

 + 

DOWN Arrow Key

Press 

UP

 arrow key to activate the LCD backlight

Press 

DOWN

 arrow key to exit the LCD backlight 

LEFT Arrow Key

 + 

RIGHT Arrow Key

Press 

LEFT

 arrow key to decrease the contrast of LCD

Press 

RIGHT

 arrow key to increase the contrast of LCD

Summary of Contents for 72-2660

Page 1: ...nell com www newark com www cpc co uk TM TM Page 1 V1 0 03 01 19 User Manual Switch Mode DC Power Supply Introduction Thank you for selecting the Tenma Switching DC Power Supply please read this user guide before the operation ...

Page 2: ...pliance 72 2660 Switch Mode DC Power Supply is compliance with the specification described in this manual The content or specification of this manual is subject to change without prior notice Product Features The 72 2660 is the single output switch mode DC power supply with a maximum 30V output voltage 3 75A output current and maximum output power of 50W 72 2660 integrates the AC DC and DC DC 2nd ...

Page 3: ...utor Power Cord 1PC User Guide 1PC Connect the power cord to the unit and to a properly grounded outlet and switch on 72 2660 The unit starts the self system checking the LCD displays 0 5s date of manufacturing production lot model number version number in turn 1 3 Quick Start OUT Button Press the OUT button to begin outputting the selected voltage and current The unit will display the voltage or ...

Page 4: ... voltage can be adjusted from 0 3V to max 30V 1 4 2 The output constant current mode check This is for checking the functions of power supply under constant current mode 1 Switch on the product the power is off and the indicators of CC CV are off 2 Adjust voltage value to 30V 3 Connect the resistance 3Ω 50W between output terminals 4 Push the OUT button the indicator of CC also displays on the LCD...

Page 5: ...f output offset Voltage 0 05 5mV Current 0 05 5mV Ripple and Noise 20HZ 20MHz Voltage 10mVrms 100mVp p Current 10mVrms 100mVp p Temperature Coefficient 0 40 C of output offset Voltage 0 05 Current 0 1 Dimensions 185mm 88mm 38mm Weight Net 370g 2 2 Supplementary Specifications Build in EEPROM Recommended Calibration Time Annually AC Input Power 90 265V AC 43 to 65Hz Operating Temperature 0 to 40 C ...

Page 6: ...3 Push and SET ENTER button the max value position flashes of voltage setting area 4 Push the V A button the max value position of current setting flashes and current setting is activated 5 Push the LEFT or RIGHT arrow keys to move the cursors 6 Push the UP or DOWN arrow keys to change the settings 7 Push SET ENTER button and light off this button to exit current setting mode UP ENTER OUT SET V A ...

Page 7: ...ly 1 Push the OUT button to activate output mode 2 Push the USB button and USB indicator will turn off to exit USB charging mode USB OUT OK 4 Calibration Following the image below connect a 5 digit displayed volt meter and current meter please resistance 10Ω 100W into the output terminals To calibrate start from point of zero voltage voltage coefficient and zero current current coefficient Hold th...

Page 8: ...lting from negligence or where the Group was aware of the possibility of such loss or damage arising is excluded This will not operate to limit or restrict the Group s liability for death or personal injury resulting from its negligence Tenma is the registered trademark of the Group Premier Farnell Limited 2016 Part Number 72 2660 4 2 Current Calibration Push the V A button and power supply displa...

Reviews: