


3.
If your SX7 is not active, click
Carrier Provisioning – IOTA
(3)
to initiate
“over-the-air” provisioning by your wireless service provider. Check the
Activation Status
display
(2)
to check your status.
4.
If your service provider does not offer IOTA provisioning, manually enter your
MSL/SPC Code
(4a)
, your
MDN
(10-digit wireless phone number)
(4b)
, and
your
MIN/MSID
(usually also your 10-digit wireless phone number)
(4c)
.
Contact your wireless service provider for your account settings.
5.
Click
Save
(5)
. If you have no additional changes, click
Restart
(6)
to complete
Activation. The SX7 will power down and restart.
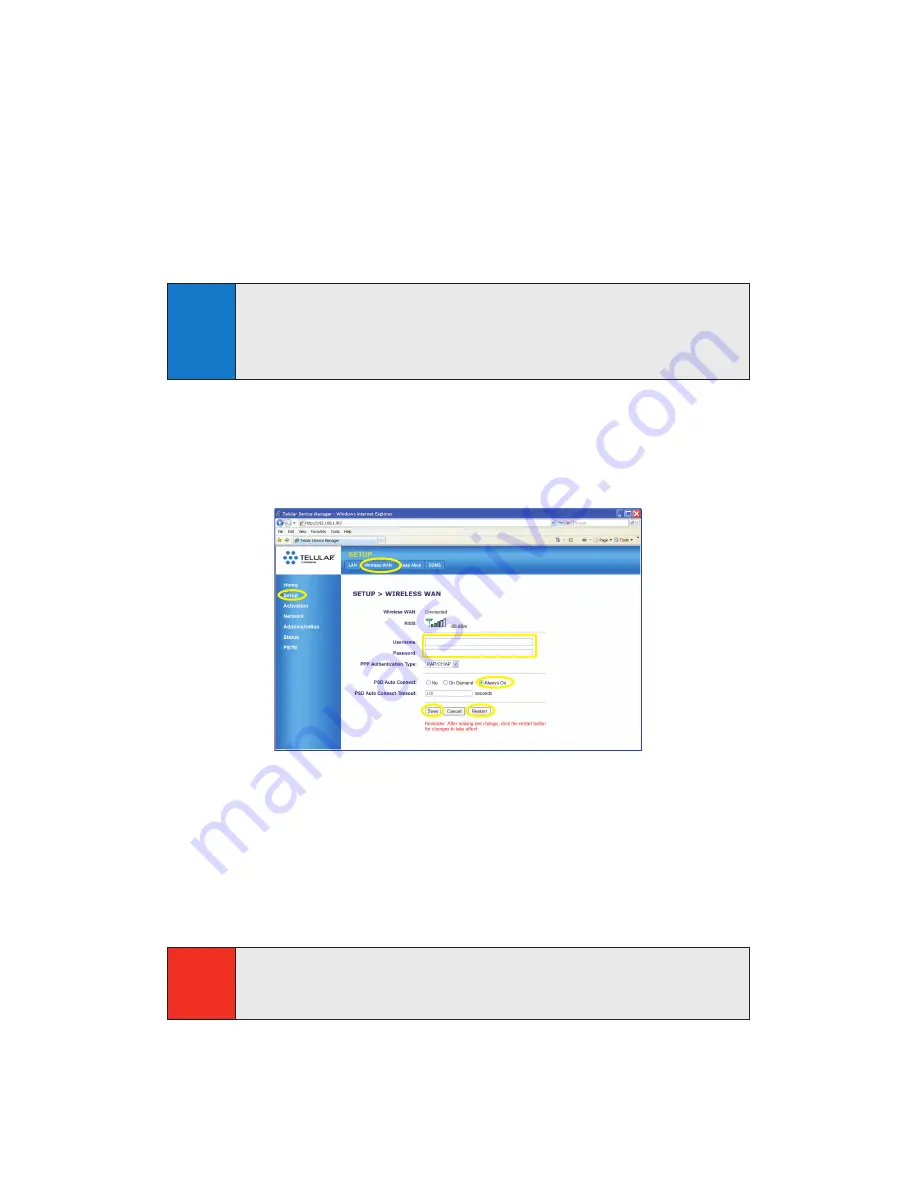
Set Up a Wireless WAN Data Connection
1.
From any page in the
Telular Device Manager
(see previous step 1), click
Setup
(1)
> Wireless WAN
(2)
.
2.
If required by your wireless service provider, enter your
Username
(3a)
and
Password
(3b).
3.
Click
Always On
(4)
next to
PSD Auto Connect
.
4.
Click
Save
(5)
and
Restart
(6)
to complete Setup. The SX7 will power down
and restart, and you will be ready to connect to the Internet.
Mounting your SX7 to the wall
For additional details on the SX7 and advanced settings, please
see the User Guide on the CD that is packaged with your device.
Caution
When mounting the SX7 to the wall using screws, be carful
NOT
to allow
the screw heads to push the plastic tabs inward towards the SX7. A
potential to short circuit the unit may occur should the plastic tabs make
contact with the internal printed circuit boards.
1
1
2
4
5
6
3a
3b
Tip
When adding or changing settings in the
Telular Device Manager
, click
Save
whenever you change a setting, and then move on to the next item
you want to change. When you have finished making all your changes, click
Save
again and then click
Restart
. The SX7 will power down and restart,
and all your new settings will be in effect.