


Trademarks and Servicemarks
Teledyne LeCroy, PCIe Protocol Suite, PCIe Protocol Analysis and Summit
T416 are trademarks of Teledyne LeCroy. Microsoft and Windows are
registered trademarks of Microsoft Inc. All other trademarks are property of
their respective companies.
Changes
Product specifications are subject to change without notice.
Teledyne LeCroy reserves the right to revise the information in this
document without notice or penalty.
Teledyne LeCroy Customer Support
Online Download
Periodically check the Teledyne LeCroy Protocol Solutions Group
web site for software updates and other support related to this
product. Software updates are available to users with a current
Maintenance Agreement.
Web:
teledynelecroy.com/tm/software/PCIe
E-mail:
Support:
teledynelecroy.com/support/contact
© 2016 Teledyne LeCroy, Inc. All rights reserved.
Part Number: 927310-00 Rev C
This document may be printed and reproduced without additional permission, but all copies should contain this copyright notice.
Making Your First Recording
Connect Summit T416 to the system under test using an interposer or probe, and then configure the Recording Options. You can then test the Analyzer by
creating a short snapshot recording.
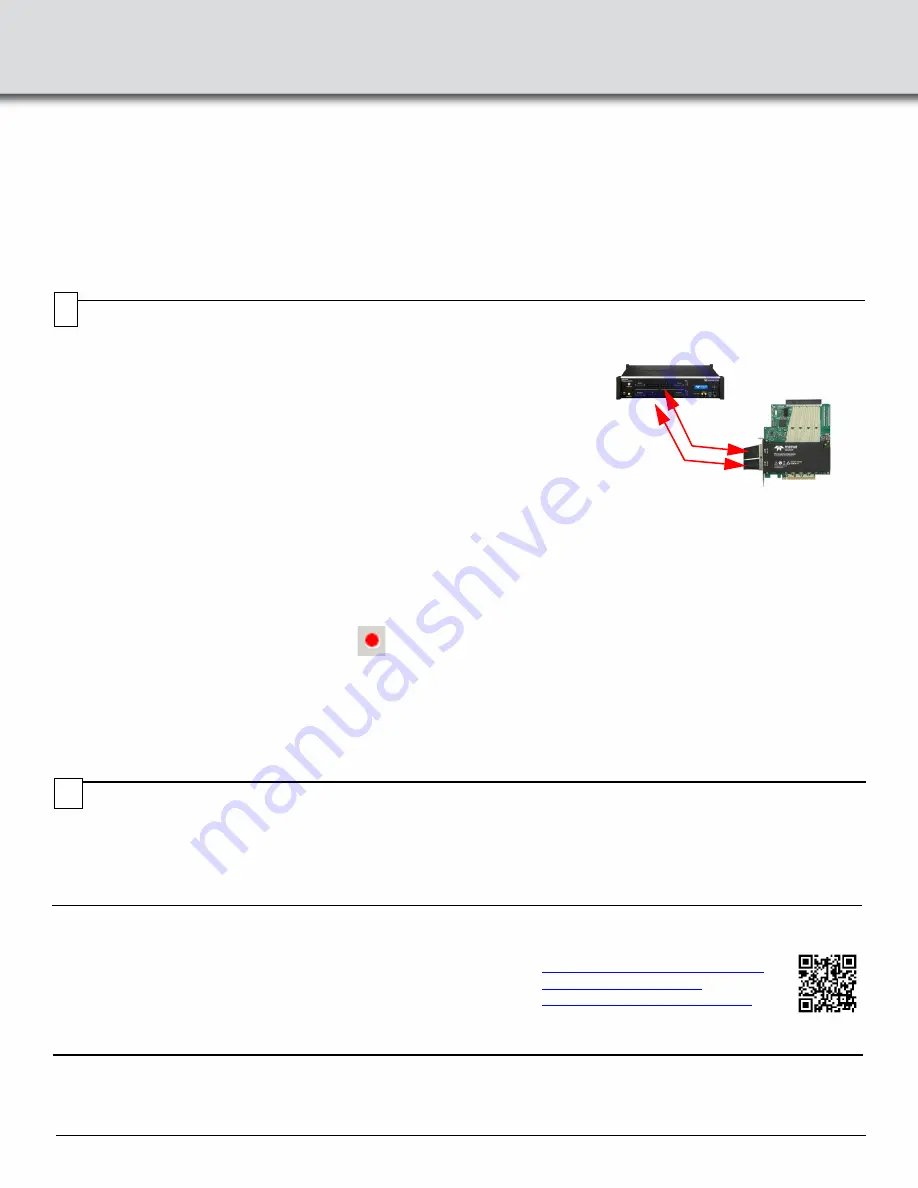
Connect Summit T416 to System under Test using an Interposer or Probe
For a slot interposer, do the following:
1.
Insert a Gen4 interposer into a PCI Express slot that you want to monitor.
2.
Insert the PCI Express device into the PCIe connector on top of the interposer.
3.
Connect the interposer cables to the Analyzer System according following the labeling.
4.
Connect power to the interposer using the provided 12V power adapter.
For other probes or interposers, please see the
Summit T416 User Manual
.
Configure Recording Options
1.
From the
Setup
menu, select
Recording Options
.
2.
Select the
General
tab and then choose
Summit T416
as the Analyzer type.
3.
In the
Link
section, specify the link width of the PCI Express link to be analyzed. The rest of the settings in this section can be left at the factory
defaults for most PCI Express systems.
4.
For multi-lane PCI Express links, the Analyzer needs to observe link training to record link traffic correctly.
5.
Click
OK
at the bottom of the Recording Options dialog box to apply the Analyzer recording settings specified.
Start Recording
1.
Start a recording session by clicking the
Record
button in the toolbar. Recording is tracked and reported on an activity meter in the status bar.
2.
After the recording buffer fills, uploading starts automatically. PCI Express traffic is saved to the hard drive as the file specified in the recording
options, and this file is opened in the application for you to view the traffic.
Note
: You can interrupt a session by pressing the
Stop
button. If Recording is finished and Upload has started but has not finished, a message box
appears. You can:
•
Continue uploading.
•
Abort the upload and flush the data.
•
Abort the upload and preserve all the previously saved data.
Upstream
Downstream
Using a USB Connection
To set up the Analyzer using a USB connection:
1.
Install PCIe Protocol Analysis on the host machine.
2.
Connect the Analyzer to a 100-volt to 240-volt, 50 Hz to 60 Hz,
230 W power outlet using the provided power cord.
3.
Connect the USB port to a USB port on the host machine using a USB
cable.
4.
Turn on the power switch on the front of the analyzer.
Note:
At power-on, the Analyzer initializes and performs a self-diagnostic. The
results are reflected by messages on the Summit T416 LCD display. If the
LCD display indicates failure, call Teledyne LeCroy Customer Support for
assistance.
5.
Summit T416 will be recognized by the host machine as a USB device.
Follow the Microsoft
®
Windows
®
on-screen Plug-and-Play instructions for
the automatic installation of the Analyzer as a USB device on your
analyzing host machine. (The required USB drivers are included on the
Installation DVD and were installed on your system when you installed the
software.)
Click
Finish
when you see the message that says “Windows has finished
installing the software that your new hardware requires” and the file has
been installed in your host machine.
8.
Start the PCIe Protocol Analysis, so you can start working with
Summit T416.
8
Environmental Conditions
•
Temperature: Operating 32° F to 122° F (0° C to 50° C)
•
Temperature: Non-Operating 14° F to 176° F (-10° C to 80° C)
•
Humidity: Operating 10% to 90% RH (non-condensing)
9


