background image

Operation 

Model 3110XL 


Teledyne Analytical Instruments 

24


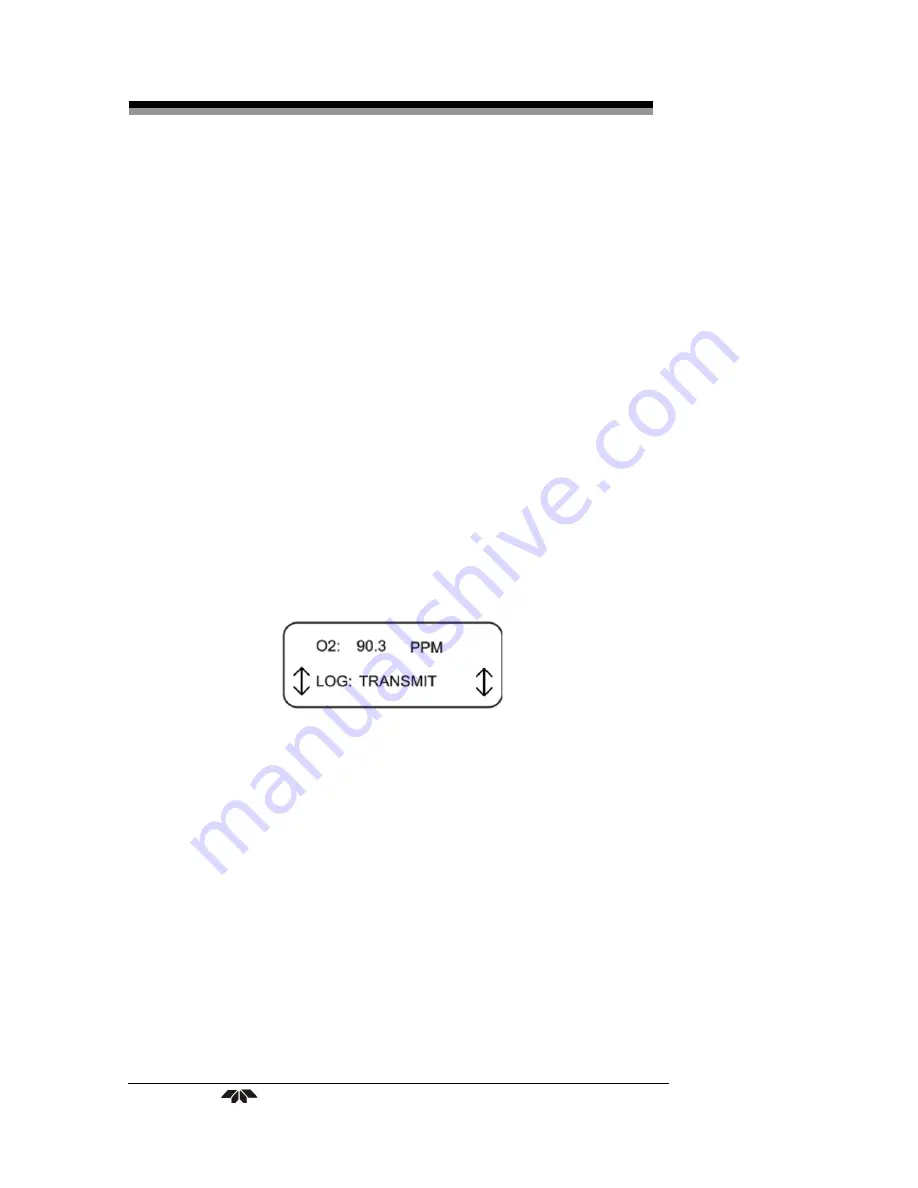
3.2.11 LOG TRANSMIT Screen 

Data can be downloaded to a computer using the 9-pin D-

subminiature port and cable attached to a PC. The D-sub port accepts a 
standard data cable with a DB-9 connector. The computer must be able 
to accept data from a source with the following characteristics: 


9600 baud 

8 bit data 

no parity 

1 stop bit 

no flow control 


Refer to your computer manual for details on how to setup the RS-

232 communications port on your computer. 


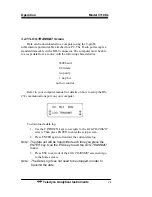
To download a data log: 

1.


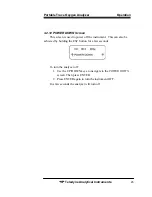
Use the UP/DOWN keys to navigate to the 

LOG TRANSMIT 

screen. Then press ENTER to enter the setup screen. 

2.


Press ENTER again to transmit the current data log. 

Note:  The data set will be transmitted each time you press the 

ENTER key. Use the ESC key to exit the LOG TRANSMIT 
menu. 

3.


Press ESC to exit out of the 

LOG TRANSMIT

 screen and go 

to the home screen. 

Note:  The Date Log does not need to be stopped in order to 

transmit the date. 

Summary of Contents for 3110XL

Page 1: ...st on certain components internally which may persist for a time even after the power is turned off and disconnected Only authorized personnel should conduct maintenance and or servicing Before conduc...

Page 2: ...eight of any parts in so far as such alterations do not adversely affect our warranty Important Notice This instrument provides measurement readings to its user and serves as a tool by which valuable...

Page 3: ...nstrument for which this manual is supplied are indicated by a check mark in the box Instrument Serial Number _______________________ Sensor Options Available for the Instrument with the Above Serial...

Page 4: ...ING This warning is specific to heated components within the instrument Failure to heed the warning could result in serious burns to skin and underlying tissue WARNING ELECTRICAL SHOCK HAZARD Dangerou...

Page 5: ...ts are customized for a particular application or features and or options added per customer requests Please check the front of this manual for any additional information in the form of an Addendum wh...

Page 6: ...5 1 7 Range 5 1 8 Compact Packaging 5 Installation 7 2 1 Charging the Batteries 7 2 2 Gas Connections 8 2 3 Sensor Installation 9 2 3 1 Installing the Trace Sensor 10 2 4 Calibration 10 2 4 1 Calibrat...

Page 7: ...3 2 8 Filter Screen 22 3 2 9 LOG INTV Screen Optional 22 3 2 10 LOG RESET START Screen Optional 23 3 2 11 LOG TRANSMIT Screen 24 3 2 12 POWER DOWN Screen 25 Maintenance Troubleshooting 27 4 1 Routine...

Page 8: ...igure 1 1 Model 3110 Portable Trace Oxygen Analyzer 2 Figure 2 1 Model 3110 Rear Panel 8 Figure 3 1 Front Panel Keys 16 Figure 3 2 Available Menus and Their Sequence 17 Figure 4 1 Battery Charger Port...

Page 9: ...ce with the information contained within this manual It is the customer s responsibility to ensure safety especially when combustible gases are being analyzed since the potential of gas leaks always e...

Page 10: ......

Page 11: ...ign the instrument can be employed even in hazardous environments without compromise once calibrated The Model 3110XL incorporates a large standard feature list designed for versatile accurate oxygen...

Page 12: ...ic LCD on the front panel displays data and operational information through various screens The contrast is adjustable for various lighting conditions Four Button User Interface Operation is performed...

Page 13: ...n be downloaded using the instrument s 9 pin serial interface Real time Clock This feature allows the Model 3110XL to date and time stamp the data set recorded on the data logger It uses a 24 hour clo...

Page 14: ...cell is removed from its shipping package You should stock only one spare cell per instrument at a time If a cell was working satisfactorily but ceases to function before the warranty period expires y...

Page 15: ...Output This analyzer includes a 0 1 VDC output as standard This signal is suitable for driving external devices that have an input impedance of 10 000 or more The signal output is available from a po...

Page 16: ...Introduction Model 3110XL Teledyne Analytical Instruments 6 BLANK PAGE...

Page 17: ...adapter supplied with the instrument to the AC power outlet Plug the other end of the charger into the port on the rear panel as shown in Figure 2 1 The green charge indicator LED should be illuminat...

Page 18: ...he customer must provide a means of controlling the pressure and flowrate of the applied gas For positive pressure applications TAI suggests a simple throttle valve installed in the sample line betwee...

Page 19: ...in Figure 2 1 each fitting has a button which when depressed allows the rapid detachment of the gas line from the instrument It is not necessary to press the button when inserting the line just push...

Page 20: ...lug through the bag and remove it from the sensor 4 Remove the packaging and rapidly place the sensor on the top of the cell holder cap with the concentric gold rings facing up 5 Screw the cell holder...

Page 21: ...ect SPAN START then press ENTER 9 When the screen changes to SPAN FINISH select SPAN FINISH 10 Expose the cell holder to air again by removing the cell holder cap for a few seconds Verify that the oxy...

Page 22: ...and Purging the Gas Line When using bottled gas gas cylinder as a calibration gas for trace analysis applications the regulator and sample lines should be purged to remove traces of trapped air Otherw...

Page 23: ...has been calibrated the instrument can be brought to the analysis site and the sample gas line can be connected to the unit Using the quick disconnect fittings supplied connect the vent line followed...

Page 24: ...Installation Model 3110XL Teledyne Analytical Instruments 14...

Page 25: ...the next analysis the instrument should always be purged with an oxygen free inert gas prior to being taken out of service for standby or storage 3 1 Front Panel Interface The Model 3110XL is controll...

Page 26: ...3 1 2 ESCAPE Key The Escape ESC key is used to exit a setup menu without saving any changes made to that screen The values will revert to the last value saved for that entry 3 1 3 UP DOWN Keys The UP...

Page 27: ...he sequence of screens when scrolling Figure 3 2 Available Menus and Their Sequence 3 2 1 POWER ON Screen The POWER ON screen automatically appears on the display when the unit is first powered up The...

Page 28: ...n displays the current date and is used by the data logger for date stamping data records The currently set date is displayed on the second line of the display To change the currently set date 1 Press...

Page 29: ...ion arrows that appear on the left and right sides of the display change from UP DOWN to pointing LEFT RIGHT 2 Use the UP DOWN keys to alter the hour field Then press ENTER The cursor will move over t...

Page 30: ...desired value is shown The value will be accepted and the cursor will move to the next editable field units 2 Use the UP DOWN keys to cycle between ppm and percent for units Press ENTER to accept the...

Page 31: ...must have already been input to the instrument See Section 3 2 6 for entering a span value into the analyzer CAUTION THE CORRECT SPAN VALUE MUST BE ENTERED INTO THE INSTRUMENT THAT CORRESPONDS TO THE...

Page 32: ...filtering will slow down analyzers response to changing O2 levels The lowest effective level of filtering should always be selected The filter level should be lowered to 1 or 2 when setting the span...

Page 33: ...RT screen is used to start the data logger The data logger has a 3200 record capacity and each record uses 10 bits of data The data set is retained until it is reset by using the START RESET menu agai...

Page 34: ...bit no flow control Refer to your computer manual for details on how to setup the RS 232 communications port on your computer To download a data log 1 Use the UP DOWN keys to navigate to the LOG TRAN...

Page 35: ...screen is used to power off the instrument This can also be achieved by holding the ESC button for a few seconds To turn the analyzer off 1 Use the UP DOWN keys to navigate to the POWER DOWN screen Th...

Page 36: ...Operation Model 3110XL Teledyne Analytical Instruments 26...

Page 37: ...ll attack the LCD lens material as well as eventually wear off the silk screened legends 4 2 Opening the Instrument Case CAUTION DEPENDING ON THE APPLICATION IT MAY BE NECESSARY TO PURGE THE INSTRUMEN...

Page 38: ...2 Remove the instrument to a safe non hazardous location Note Depending on the application purging may be required before disconnecting the analyzer and moving it to a safe location Plug the AC charge...

Page 39: ...ge variations in ambient temperature 75 F nominal and in such a way as to obviate any possibility of incurring damage Under no circumstances should you disturb the integrity of the cell package until...

Page 40: ...CO2 free gas streams where highly mobile gases such as H2 He and ethylene may be present Typically it is installed in a nylon cell block See page iii in this manual for the sensor and sensor block use...

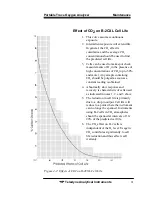
Page 41: ...le containing CO2 should be purged as soon as a constant reading is obtained 4 Abnormally slow response and recovery is characteristic of cells used as indicated in notes 1 2 and 3 above 5 The reducti...

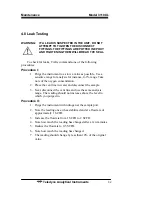
Page 42: ...e Take note of the oxygen concentration 2 Place the vent line in water and disconnect the sample 3 Next disconnect the vent line and use the same analysis range The reading should not increase above t...

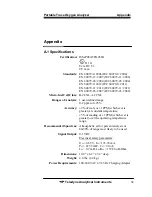
Page 43: ...cro fuel Cell Class B 2CXL A 2CXL Ranges of Analysis 1 user defined range 0 2 ppm to 0 25 Accuracy 2 of scale or 1 PPM whichever is greater at constant temperature 5 of reading or 1 PPM whichever is g...

Page 44: ...8 Fuse 200 mA T 1 C78853 Cell Cap with O Ring standard Micro Fuel Cell Options 1 C6689 B2CXL Micro Fuel Cell Class B 2CXL 1 C6689 A2CXL Micro Fuel Cell Class A 2CXL IMPORTANT Orders for replacement pa...

Reviews: