


TELE System Hybrid BLOBbox
10
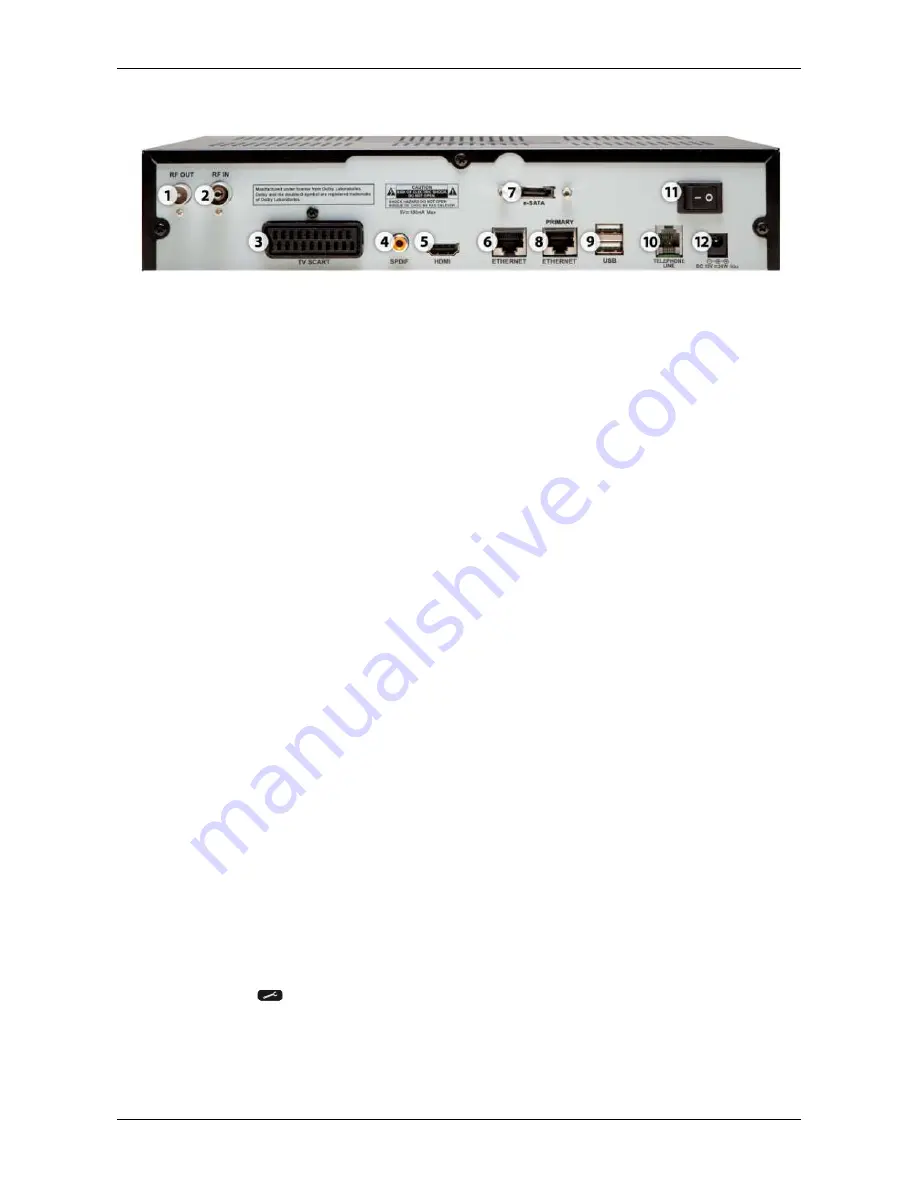
7.4 Back panel
1. RF OUT: pass-through antenna signal output to connect a TV or other decoder
2. RF IN: TV signal input from antenna
3. TV SCART: analog audio-video output to connect an old generation TV
4. SPDIF: digital coaxial S/PDIF audio output to connect home-theatre system
5. HDMI: high definition digital output to connect HD-Ready or FullHD TV
6. ETHERNET: auxiliary Ethernet port to connect other network devices (ex. PC, games console,...)
7. e-SATA: port to connect external hard-disk with e-SATA interface
8. PRIMARY ETHERNET: main Ethernet port used to connect the BLOBbox to Internet
9. USB: double USB 2.0 port to connect USB Key, external hard-disk, USB Keyboards,..
10. TELEPHONE LINE: not used
11. POWER ON/OFF: switch to completely activate/disactivate the power supply
12. DC 12V: 12V DC power supply input to connect the supplied adaptor
7.5 How to connect and turn on the BLOBbox
1. Insert the batteries into the remote control.
2. Connect the BLOBbox to the TV using the HDMI or SCART cable. If your TV has both inputs, we
recommend to use HDMI.
3. Connect the BLOBbox to Internet in one of these three ways:
a. If your router has a Ethernet port, use the RJ45 Ethernet cable to connect the BLOBbox from
its PRIMARY ETHERNET port to the router.
b. If you have a Wi-Fi Internet access and the TP-LINK model TL-WN821N USB Wi-Fi key,
plug it in one of the USB 2.0 ports on the back of the BLOBbox.
c. If you have the HUAWEI model EchoLife WS311 Wi-Fi bridge, connect it to the electrical
socket using the supplied adaptor, then connect RJ-45 Ethernet cable to the PRIMARY
ETHERNET port on BLOBbox’s back panel.
4. Plug the antenna cable from the BLOBbox to the aerial socket (make sure that your antenna is
compatible with the digital terrestrial signal).
5. Connect an external hard-disk to the USB or e-SATA connector on the back of the BLOBbox
6. Plug the AC power cord into the AC adapter, then connect the AC adapter connector to the
BLOBbox and the AC power cord to the electrical socket.
7. Turn on the BLOBbox using the power switch on the back of the BLOBbox. The BLOBbox will take
about 1 minute to become operative. Do not unplug the power supply and do not use the remote
control during start up.
8. If the BLOBbox interface is displayed correctly go directly to step 9, if you display a black screen on
your TV follow these steps:
a. Make sure that the HDMI or SCART cable is correctly connected from the BLOBbox to the
TV.
b. Make sure that you selected the HDMI or AV input in which the BLOBbox is connected.
c.
Press
on the remote control and then press the green button, a second LED will light up
on the BLOBbox’s front panel. Press the green button repeatedly with an interval of about 10
seconds each time until you see the interface on the screen. Press SAVE (red button) to
apply the new resolution video output.
9. Follow the first setup wizard on the TV screen to get the BLOBbox up and running in a few minutes.


