background image


TIG 3000 G


Vers. 001


40 


GB 


Pos. 

Code 

Q.tà 

Descrizione 

Dèsignation 

Beschrijving 

Description 

Bezeichnung 

Descripcion 

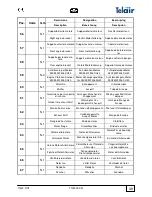
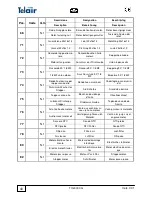
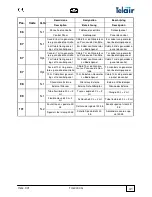
68 


N. 1 

Dado fissaggio rotore 

Écrou de fixation du rotor. 

Rotor bevestigingsmoer 

Rotor fastening nut 

Rotor befestigungsmutter  

Tuerca de fijación del 

rotor 

71 


N. 1 

Guarnizione 22x18x1,2  

Joint 22x18x1.2 

Afdichting 22x18x1.2  

Gasket 22x18x1.2  

Dichtung 22x18x1.2 

Junta 22x18x1.2  

72 


N. 1 

Raccordo tappo olio mo-

tore  

Raccord bouchon huile 

moteur  

Koppeling oliedop  

Motor oil cap union 

Anschluss der Ölschraube  

Unión tapón aceite  

73 


N. 1 

Raccordo 90° 1/8 MF 

Raccord 90° 1/8 MF 

Koppeling 90° 1/8 MF 

1/8 MF union elbow 

Anschlussstuck 90° 1/8 

MF 

Empalme 90° 1/8 MF 

74 


N. 1 

Rondella alluminio per 

tappo scarico olio 

Rondelle en aluminium 

Onderlegring van alumin-

ium 

Aluminium Washer for 

Stopper 

Alu-Scheibe 

Arandela aluminio 

75 


N. 1 

Tappo scarico olio 

Bouchon de vidange 

d'huile 

Olieaftapschroef 

Lubricant Discharge 

Stopper  

Ölablassschraube  

Tapón de vaciado de 

Aceite 

76 


N. 1 

Asta livello olio motore  

Vente aux enchères ni-

veau je huile moteur  

Veiling niveau ik motorolie  

Auction level motor oil  

Versteigerung Niveau ich 

Motoröl  

Venta a las pujas nivel 

engraso motor  

77 


N. 1 

Sensore NTC 

Sonde NTC 

NTC probe 

NTC probe 

NTC Fühler 

Sonda NTC 

78 


N. 1 

Filtro aria 

Filtre à air 

Luchtfilter 

Air cleaner 

Luftfilter 

Filtro aire 

80 


N. 1 

Motore Elettrico Avvia-

mento 

Moteur de démarrage 

électrique 

Elektrische startmotor 

Electric motor Starter  

Elektrischer Anlassermo-

tor 

Motor eléctrico de arran-

que 

82 


N. 1 

Motore passo-passo 

Moteur Pas à Pas 

Stappenmotor 

Stepper motor 

Schrittmotor 

Motor paso a paso 


Summary of Contents for TIG 3000G

Page 1: ...Vers 001 TIG 3000 D I 1 USE AND MAINTENANCE MANUAL AND INSTALLATION INSTRUCTIONS TIG 3000G V 001 June 2017 GENERATORS GB ...

Page 2: ...c safety symbols have been employed in this booklet to identify different levels of dan ger or important information Information to avoid potentially danger ous situations that could result in serious injury or possible harm to one s health Information to avoid situations that could potentially result in damage to property Important information for correctly carry ing out the operations described ...

Page 3: ... ating set casing and use only approved type fire extinguishers Never use water to put out flames in the generating set This equipment is not intended for use by people including children with physical sensory or mental limitations or lacking experience or knowledge unless they have been instructed in the use of the equipment by a person responsible for their safety The information contained in th...

Page 4: ...ility 13 5 5 Cut off Relay connection 14 5 6 Electronic control panel connection 14 5 7 Auxiliary connections 15 5 8 Connection to dedicated LPG tank 16 5 9 Connecting two TIG3000G units in parallel 16 5 10 Isolating the internal battery charger 17 6 OPERATING INSTRUCTIONS 17 6 1 Machine safety 17 6 2 Fuel LPG 17 6 3 Useful tips 17 7 CONTROL PANEL 17 8 GENERATING SET USE 19 8 1 First starting 19 8...

Page 5: ... 2 Checks not requiring skilled personnel 23 9 2 1 Checking the engine oil level 23 9 3 Maintenance operations to be carried out by skilled personnel 24 9 3 1 Engine oil replacement 24 9 3 2 Extraction generator from its hood 24 9 3 3 Air filter maintenance 25 10 DECOMMISSIONING AND DISMANTLING INSTRUCTIONS 26 11 GENERAL WARRANTY TERMS 27 12 TIG 3000 G WIRING DIAGRAM 28 13 TIG 3000 G SPARE PARTS L...

Page 6: ...TIG 3000 G Vers 001 6 GB THIS PAGE HAS BEEN LEFT BLANK INTENTIONALLY ...

Page 7: ...ontrol panel supplied which can be installed inside the vehicle or via a domotics con trol unit Teleco HUB optional As part of its product development and upgrade policy the manufacturer reserves the right to in troduce modifications without prior notice 2 CHARACTERISTICS 2 1 Technical Specifications Output voltage V ac 230 2 Output frequency Hz 50 1 Maximum continuous power kW 2 5 cosΦ 1 Maximum ...

Page 8: ...ating set model 2 Serial number 3 Frequency 4 Power factor 5 Maximum electric power 6 Maximum output current 7 Rated voltage 230V AC 8 Battery charger specifications 9 Weight 3 SHIPPING HANDLING STORAGE 3 1 Storage During transport and storage the generator is protected by suitable cardboard packaging and placed on a wooden support base It must be stored horizontally in a covered dry and well vent...

Page 9: ...tive 2006 42 CE Moreover the manufacturer will not be liable for any resulting injury or damage 4 2 Instructions for generating set fixing The generator is equipped with 2 support brack ets fig 4 ref 2 fixed on the sides that allow for both wall mounting and floor mounting 4 cylindri cal vibration damping mounts fig 4 ref 1 and 2 omega shaped mounting brackets fig 4 ref 3 are supplied particularly...

Page 10: ... configuration as shown in fig 8 is strictly not permitted Ensure that the ride height of the gen erator is not such as to risk contact with the ground during travel A good rule is to ensure that the ride height of the lowest point of the generator is not less than that of the other components of the vehicle on which it is in stalled 4 2 3 Floor mounting The TIG3000G can be installed on a table sh...

Page 11: ...ition to a system shutdown occurring when the safety temperature threshold is reached irreparable damage may occur to the internal combustion engine and the electronic boards 4 3 Connecting the external exhaust silencer The generator is supplied with an external ex haust silencer kit consisting of the silencer a flexible steel pipe and accessories for generating set connection and fixing As a firs...

Page 12: ...the way onto the connector If the vehicle LPG system consists of copper pip ing a D6xd5 steel reinforcement bushing must be inserted inside the hose near the ogive Do not crush the rubber hose or bend it too sharply If the LPG tank has a fuel reserve indicator the service terminal strip will have a wire connector to connect the electrical wire coming from the fuel sensor switch 5 ELECTRIC WIRING C...

Page 13: ...y or to the service battery The connected battery is charged by the genera tor itself with a maximum current of about 10 A For connection purposes insulated cables of dif ferent colours should be used usually red and black connected to the positive pole and nega tive pole respectively with sections 10 mm for lengths up to 6 metres 16 mm for longer lengths On the generator side each wire should be ...

Page 14: ...nt may suffer serious damage On the distribution system of the 230 V power line immediately downstream from the generator as indicated in fig 19 a cut off relay for example code 05423 optional or another automatic switch should be installed to isolate the generator when the system is supplied 230 V mains voltage Connect the relay fig 19 ref 1 as follows Connect the two wires of the 230 V output li...

Page 15: ...G fuelled generators FUEL LEVEL Terminal 0 Volt active input to which the pilot terminal of a fuel level reserve gauge of the on off type can be connected The other gauge terminal must be connected to the ground either on the vehicle or to the negative pole of the battery connected to the generator D terminal 12 Volt active input max 15 volts with respect to the electrical ground to which the D wi...

Page 16: ...out the parallel connection the connections must be made with the genera tors switched off the maximum distance between the two genera tors must not exceed 10 metres the length of cables 5 and 6 from the outputs of the generators to the junction point must be less than 15 metres each the lengths must be identi cal a maximum difference of 1 metre is tolerat ed and the wires must be of the same size...

Page 17: ... Both Butane or Propane or a mix of these two LPG gas fuels can be used Choosing the right one will depend on the ambi ent temperature in the tank area Where ambient temperature is higher than 15 C Butane can be used Where ambient temperature is below 5 C only Propane must be used 6 3 Useful tips To ensure a long efficiency of the genera tor and avoid malfunctioning of any utilities pow ered it is...

Page 18: ...reaching the start threshold and the stop threshold set 5 Start Stop button dual function button within the MENUS it scrolls forward through the available options with an active panel it en ables the generating set start and stop Press it to cancel the AUTO function 6 LED Booster it illuminates when the BOOST function is on fig 30 ref 3 7 MAINTENANCE red LED the display shows the type of required ...

Page 19: ... total running hours by pressing boost and then START STOP or AUTO the last 10 recorded alarm events can be viewed indicates the generator model and hardware and software versions indicates the language setting by pressing BOOST followed by START STOP or AUTO it is possible to scroll through the available languages end of the available list by pressing BOOST the panel is returned to its standard d...

Page 20: ... threshold default is 13 8 Volt In any case the generator will remain in opera tion for at least 15 minutes Note that the required battery charging time changes according to the battery capacity maximum current delivered by the battery charger used and the ambient temperature in the battery environment In the event that in addition to the battery charger a minimal default load is connected around ...

Page 21: ...the maximum permitted load has been exceeded the generator stops and the red alarm LED lights up Fig 30 ref 8 8 9 2 Short circuit there is a short circuit on 230 V output the generator stops the red alarm LED lights up Fig 30 ref 8 8 9 3 Low output voltage the output voltage has dropped too far below the minimum limit probably due to poor performance of the in ternal combustion engine or to a sing...

Page 22: ...ge disappears from the display 8 10 2 Engine oil replacement this message appears alter nately with the normal messages on the display and is highlighted by the illumination of the red LED Fig 30 ref 7 it calls for the engine oil to be changed After completing the operation reset the corre sponding hour counter press the MENU button and the following mes sage will appear Press the MENU button agai...

Page 23: ...r supplied together with the generator 9 2 Checks not requiring skilled personnel To perform this kind of inspections it will be nec essary to open the door of the generating set The following precautions must therefore be taken 1 The generator must not be running 2 All its parts must be cold 9 2 1 Checking the engine oil level Engine oil level checking must be car ried out with the engine stopped...

Page 24: ...p is lo cated on the generator underside fig 37 ref 1 Remove the oil filler cap fig 35 ref 1 Remove the rubber guard fig 37 ref 4 on the generator bottom Then remove the drain plug and relative gasket fig 37 ref 3 and ref 2 and drain all the oil into a container suitable for collec tion of the spent lubricant After emptying screw the drain plug back in and restore the lubricant level through the s...

Page 25: ...e The filter cartridge is enclosed in the sheet metal housing fig 41 ref 1 Open the lid fig 41 ref 4 by releasing the clips fig 41 ref 2 Remove the filtration element fig 41 ref 3 remove the thin layer of spongy filtration material if very dirty wash with water and neutral detergent Lightly tap the cartridge on a hard surface to remove traces of dust or blow the filter clean inside out with compre...

Page 26: ...MMISSIONING AND DISMANTLING INSTRUCTIONS The materials used for the construction of this appliance are recyclable In the event of disposal it is advisable to take the unit to a specialist workshop or designated waste collection centre ...

Page 27: ...no later than 14 months 16 months if delivered outside of Europe after ex fac tory delivery In any case the costs of lubricants and consumables will be charged Any transport expenses will have to be covered by the purchaser the same ap plies to any expenses connected with inspections requested by the customer and accepted by TELAIR The manufacturer s warranty shall only be valid if the customer ha...

Page 28: ...TIG 3000 G Vers 001 28 GB 12 TIG 3000 G WIRING DIAGRAM ...

Page 29: ...Vers 001 TIG 3000 G 29 GB ...

Page 30: ...t relays 3 Electric start motor 4 Electronic ignition 5 Oil level sensor 6 Engine temperature sensor 7 LPG solenoid valve 8 Choke solenoid 9 Generator temperature sensor 10 Stepping motor 11 Alternator stator 12 Battery charger 13 Inverter 14 Engine control board 15 Safety breaker 16 230 V mains output terminal strip 17 Auxiliary terminal strip 18 Control panel lead connector 19 REMOTE On Off conn...

Page 31: ...Vers 001 TIG 3000 G 31 GB 13 TIG 3000 G SPARE PARTS LIST ...

Page 32: ...TIG 3000 G Vers 001 32 GB ...

Page 33: ...Vers 001 TIG 3000 G 33 GB ...

Page 34: ...TIG 3000 G Vers 001 34 GB ...

Page 35: ...radura 8 N 1 Isolante Destra Cofano Isolation Droite Capot Isolatie rechts voor kap Right hood insulation Isolierung rechts für Haube Aislante Derecho Capó 9 N 1 Isolante Sinistra Cofano Isolation Gauche Capot Isolatie links voor kap Left hood insulation Isolierung links für Haube Aislante Izquierdo Capó 10 N 1 Isolante 1 Superiore Co fano Isolation 1 Supérieur Ca pot Isolatie 1 Bovenste Kap Upper...

Page 36: ...insulation of the fan housing Frame für die Isolierung des Lüftergehäuse Chasis para el aislamiento del cárter del ventilador 23 N 1 Convogliatore marmitta Convoyeur pot d échap pement Geleider knaldemper Muffler conveyor closure Auspufftopf Leitblech Transportador silenciador escape 24 N 1 Chiusura per convoglia tore marmitta Convoyeur pot d échap pement Geleider knaldemper Muffler conveyor Auspu...

Page 37: ...e head cover insula tion Isolierung für Abdeckung des Zylinderkopfe Aislamiento de la protección de la cabeza 34 N 1 Isolante per parete inter media Isolation pour séparateur intermédiaire Isolatie voor intermediaire scheidingswand element Intermediate sheet metal insulation Zwischenplatte Isolierung Aislamiento para separa dor intermedio 35 N 1 Supporto per connessioni elettriche Support pour con...

Page 38: ...Inverter Inverter Inverter Inverter 48 N 1 Caricabatteria Chargeur de Batterie Batterij Oplader Battery Charger Ladegerät Cargador de Batería 49 N 1 Cablaggio elettrico com pleto Câblage électrique com plet Volledige elektrische be drading complete electrical wiring Komplette elektrische Verdrahtung Cableado eléctrico com pleto 50 N 1 Morsettiera ausiliaria 4 poli 2 5 mm Bornes auxiliaire 4 pôles ...

Page 39: ...60 N 1 Marmitta Echappement Uitlaatdemper Muffler Auspuff Tubo de Escape 61 N 1 Guarnizione per manicotto di scarico Joint pour Manchon d é chappement Pakking voor Mof Uitlaat demper Gasket for exhaust Muff Dichtung für Ver bindungsmuffe Auspuff Junta para Manga de Escape 62 N 1 Manicotto di scarico Manchon d échappement Mof voor Uitlaatdemper Exhaust Muff Verbindungsmuffe Auspuff Motor Manga de E...

Page 40: ...tappo scarico olio Rondelle en aluminium Onderlegring van alumin ium Aluminium Washer for Stopper Alu Scheibe Arandela aluminio 75 N 1 Tappo scarico olio Bouchon de vidange d huile Olieaftapschroef Lubricant Discharge Stopper Ölablassschraube Tapón de vaciado de Aceite 76 N 1 Asta livello olio motore Vente aux enchères ni veau je huile moteur Veiling niveau ik motorolie Auction level motor oil Ver...

Page 41: ...e from generat ing set to control panel 7 m Kabel von Generator zu Bedienpanel Cable 7 m de generador a panel de control 97 Opt Cavo di 10 m tra genera tore e pannello di controllo Câble 10 m du Généra teur au Panneau de Con trôle 10 m kabel van generator naar bedieningspaneel 10 m Cable from generat ing set to control panel 10 m Kabel von Generator zu Bedienpanel Cable 10 m de generador a panel d...

Page 42: ...TIG 3000 G Vers 001 42 GB Notes ...

Page 43: ...Vers 001 TIG 3000 G 43 GB ...

Page 44: ......

Reviews: