background image


Users safety summary


Terms in manual:


CAUTION

Conditions that can result in damage to the product.  

WARNING

Conditions that can result in personal injury or loss of life.


Power source:


 Do not apply more than 250 volts RMS between the supply conductors or between either supply 

conductor and ground.  Use only the speciÞed power cord and connector.  Refer to a qualiÞed service technician 
for changes to the cord or connector.


Operation of product:


  Avoid electric shock by contacting a qualiÞed service technician to replace fuses inside the 

product.  Do not operate without the covers and panels properly installed.  Do not operate in an atmosphere of 
explosive gases.

WARNING

Turning the power off using the On/Off switch does not de-energize the 

printer.  You must remove the power cord to disconnect the printer from the 
mains.  Keep the power cord accessible for removal in case of an emergency.


Safety instructions:


  Read all installation instructions carefully before you plug the product into a power source.


Terms on product:


CAUTION

A personal injury hazard exists that may not be apparent.  For example, a
panel may cover the hazardous area.  Also applies to a hazard to property
including the product itself.

DANGER

A personal injury hazard exists in the area where you see the sign.


Care of product:


  Disconnect the power plug by pulling the plug, not the cord.  Disconnect the power plug if the 

power cord or plug is frayed or otherwise damaged, if you spill anything into the case, if product is exposed to 
any excess moisture, if product is dropped or damaged, if you suspect that the product needs servicing or repair, 
and whenever you clean the product.


Ground the product:


  Plug the three-wire power cord (with grounding prong) into grounded AC outlets only.  If 

necessary, contact a licensed electrician to install a properly grounded outlet.

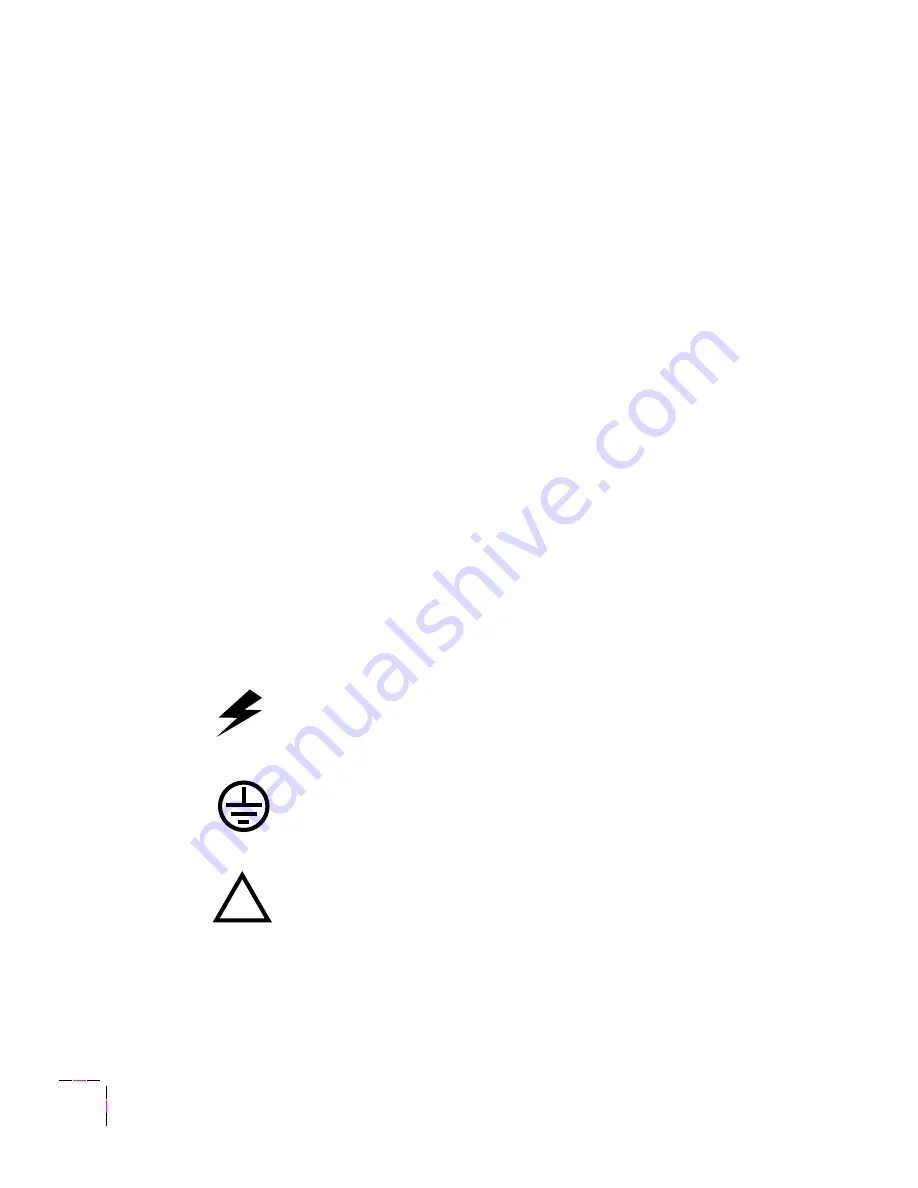
Symbols as marked on product:

DANGER high voltage:

Protective ground (earth) terminal:

Use caution.  Refer to the manual(s) for information:


WARNING:


  If the product loses the ground connection, usage of knobs and controls (and other conductive parts) 

can cause an electrical shock.  Electrical product may be hazardous if misused.  

!

Summary of Contents for Phaser 200 Series

Page 1: ...Cleaning Instructions Phaser 200 Series Color Printers First Printing February 1995 063 1450 02...

Page 2: ...d rights reserved under the copyright laws of the United States Restricted Rights Legend Use duplication or disclosures by the U S government is subject to restrictions as set forth in subparagraph c...

Page 3: ...product into a power source Terms on product CAUTION A personal injury hazard exists that may not be apparent For example a panel may cover the hazardous area Also applies to a hazard to property inc...

Page 4: ...Cleaning Instructions iii Contents Introduction 1 Thermal Head 3 Paper feed Rollers 5 Paper pick Rollers 6 Transfer Roll Sensor Pad 10 Drum 11 Exit Rollers 12...

Page 5: ...me you replace the transfer roll and whenever printing appears streaked or media feeds improperly clean these parts 1 Thermal head 2 Paper feed rollers 3 Paper pick rollers Clean these printer parts e...

Page 6: ...e paper feed paper pick and exit rollers to dry Before cleaning any part except the paper pick rollers Dampen a lint free wipe with isopropyl alcohol Cleaning kit A cleaning kit is shipped with the pr...

Page 7: ...roll change 1 2 3 Isoprop OR Pre saturated isopropyl alcohol cleaning wipe Turn off the printer using the switch on the side Open the top cover Open a pre saturated cleaning wipe packet and remove th...

Page 8: ...ossible injury let it cool before cleaning it Use the wipe to gently clean the entire surface of the thermal head Cleaning in one direction only prevents dirt from being re introduced to the thermal h...

Page 9: ...change 1 Remove the front cover by pulling forward using the ngergrips at each side Clean the three paper feed rollers rotate them as you wipe so that all surfaces are cleaned Replace the front cover...

Page 10: ...paper or transparencies do not push the paper tray s metal plate down If the metal plate is down put the paper tray in the printer and pull it out again this returns the metal plate to the up position...

Page 11: ...t do not saturate it Slide the cleaning tray into the paper tray Position the cleaning tray gently so that the paper tray s metal plate presses up against the cleaning tray Be sure that the corners or...

Page 12: ...eaning this set of paper pick rollers If your printer has only one paper tray remove the paper tray from the printer and the cleaning tray from the paper tray Reload the paper tray with paper or trans...

Page 13: ...ff and on resets the printer default to the upper tray and lets you clean this set of paper pick rollers Press and hold theTEST switch for 3 seconds the switch is at the back of the printer When the J...

Page 14: ...n every 5 000 prints 1 2 3 Open the top cover Remove the transfer roll from the printer Open a pre saturated cleaning wipe packet and remove the wipe or dampen a lint free wipe with isopropyl alcohol...

Page 15: ...leaning Instructions 11 3 Drum Clean every 5 000 prints 1 2 Clean the drum Rotate the drum as you wipe so that the entire surface is cleaned Replace the transfer roll in the printer Close the top cove...

Page 16: ...Clean every 5 000 prints 1 2 3 Remove the front cover Clean the exit rollers rotate them as you wipe so that all surfaces are cleaned Replace the front cover tilting it slightly toward you as you ali...

Page 17: ...February 1995 063 1450 02...

Reviews: